• About

All Sparkled Up

~ Like dew hanging from the tip of a leaf, a single bead or word adds sparkle where there was none. BE the bright!

All Sparkled Up

Tag Archives: salad

Sourdough Breadstick Cobras

19 Thursday Jun 2014

Posted by Julia Monroe in baking, food, recipe, tutorial

≈ 2 Comments

Tags

bread, bread dough, breadsticks, food, meal, recipe, salad, sourdough bread dough, Sourdough Breadstick Cobras, sourdough starter, summer supper, supper, tutorial

We were scraping the bottom of the barrel for supper tonight. Things went from bad to worse when he forgot to put the yeast in the bread dough. He forgot to add the honey too and I forgot to check the dough, so much later we found the forlorn little lump in the bottom of the bread machine bowl. I was going to throw it out but decided to try breadsticks and called him out to help.

“What are we doing?” he called from the other room.

“Making bread sticks,” I called back. “Help me roll all these snakes.”

And so he did. I watched as he coiled up his snake like a … snake.

So then I figured we might as well make a bunch of snakes, cobras, actually, with little flat heads and perky tails. They were delicious and adorable!

The recipe is my Sourdough Grain Bread recipe, found here, but WITHOUT adding yeast or honey and using the starter cold, straight from the refrigerator unfed.
These chewy breadsticks need a tiny little rise so it’s essential to use a good sourdough starter in the recipe.

SOURDOUGH BREADSTICK COBRAS

Prepare a shallow muffin tin by greasing the muffin cups. Place a tart tin upside down as shown next to each muffin cup. Roll a small piece of tin foil into a ball and place in each muffin cup.
Roll a piece of sourdough bread dough, about the size of a small egg, 16″ long, with a little taper at one end for the tail.
Sourdough Breadstick Cobras-2

Lift the long piece of dough and place the tail over the muffin cup edge. Slowly lower the long piece of dough into the muffin cup, around the foil ball twice and then back up out of the muffin cup, draping the end over the tart tin. Pinch the end flat to form the cobra head. Ours puffed up more than I thought in the oven so next time I will flatten them even more.

The sourdough "snakes" are formed into snakes and positioned over a foil ball and tart tin.

The sourdough “snakes” are formed into snakes and positioned over a foil ball and tart tin.

Beat one egg white and use a small brush to brush the cobras. Sprinkle with sea salt.
Bake at 375 degrees for about 15 minutes. (NOTE: Ours seemed barely underdone so next time I will quickly remove the foil balls and pop them back in the oven for another minute.)

Bake at 375 for 15 or so minutes.

Bake at 375 for 15 or so minutes.

Remove from oven and remove from the muffin cups. Pull out the foil balls. Ours didn’t stick, even though they weren’t greased.
Sourdough Breadstick Cobras-4
Sourdough Breadstick Cobras-5
Aren’t they adorable?
Sourdough Breadstick Cobras-6
Sourdough Breadstick Cobras-7
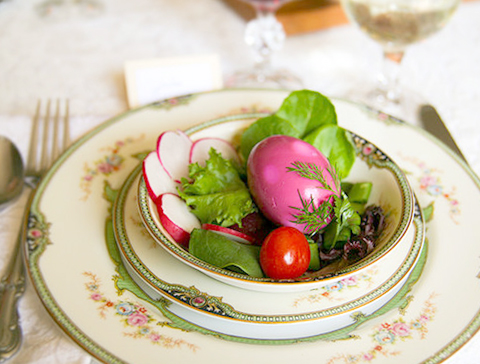
Who could complain about a sorry-lettuce salad, canned beans and fried egg yolk supper when there were Sourdough Breadstick Cobras?

Salad with beans and Fried Egg Yolk and a Sourdough Breadstick Cobra

Salad with beans and Fried Egg Yolk and a Sourdough Breadstick Cobra

Perfect for a warm summer evening. So what started as a recipe fail ended up as an Oh my goodness “play with your food” meal!

Share this:

  • Click to share on Twitter (Opens in new window)
  • Click to share on LinkedIn (Opens in new window)
  • Click to share on Facebook (Opens in new window)
  • Click to share on Pinterest (Opens in new window)
  • Click to share on Reddit (Opens in new window)
  • Click to email a link to a friend (Opens in new window)
  • Click to print (Opens in new window)
  • Click to share on Tumblr (Opens in new window)

Like this:

Like Loading...

A pink lunch – Pickled Egg salad

23 Wednesday Apr 2014

Posted by Julia Monroe in food, recipe, Uncategorized

≈ 1 Comment

Tags

Easter, food, pickled beets, pickled eggs, recipe, salad

Today’s lunch salad features Easter leftovers, especially the pickled eggs.

Salad Ingredients: romaine lettuce, spinach, yellow and orange bell peppers, edamame, sliced pickled eggs and pickled beets. The dressing is a tahini based Goddess Dressing from Trader Joe's. In the glass: Pink Lemonade.

Salad Ingredients: romaine lettuce, spinach, yellow and orange bell peppers, edamame, sliced pickled eggs and pickled beets. The dressing is a tahini based Goddess Dressing from Trader Joe’s. In the glass: Pink Lemonade.

Here’s another way I enjoy pickled eggs after Easter…

Two pickled eggs with beets, a sweet pickle and matzoh.

Two pickled eggs with beets, a sweet pickle and matzoh.

I like using pickled eggs to add color to the Easter dinner table. Here they are with the salad course.

Pickled eggs add color to the salad dish.

Pickled eggs add color to the salad dish.

This year we had a separate salad so the pickled eggs were served simply with a garnish of parsley.

The original recipe in the old cookbook is for Pickled Beets. When I was young, my mom added hard boiled eggs to the beet solution a couple days before Easter so they would be ready to serve on Easter.

Here is the original recipe from the Relishes and Garnishes section of The New Goodhousekeeping Cookbook, published in the 60’s.

Pickled Beets (Pickled Eggs)

1/2 teaspoon dry mustard
1 Tbsp sugar
1/2 teaspoon salt
1/2 teaspoon ground cloves
1/2 clove garlic
6 Tbsp vinegar
1/4 cup water
2 cups drained cooked or canned beets, sliced

Combine mustard, sugar, salt, cloves, and garlic.
Slowly stir in vinegar and water. When smooth, pour over beets. [..layered with 6 to 10 peeled, hardboiled eggs at this point.]
Refrigerate until well chilled. Remove garlic. [I never remove the garlic. I slice or mince it and leave it in.]
Makes six servings

The eggs are best after four days in the solution. Once some eggs have been removed, you can add another batch of hard boiled eggs but the pickling won’t be as intense because the vinegar loses some of its tang.

Share this:

  • Click to share on Twitter (Opens in new window)
  • Click to share on LinkedIn (Opens in new window)
  • Click to share on Facebook (Opens in new window)
  • Click to share on Pinterest (Opens in new window)
  • Click to share on Reddit (Opens in new window)
  • Click to email a link to a friend (Opens in new window)
  • Click to print (Opens in new window)
  • Click to share on Tumblr (Opens in new window)

Like this:

Like Loading...

Pizza Salad

23 Sunday Jun 2013

Posted by Julia Monroe in food, recipe

≈ 3 Comments

Tags

food, leftover pizza, pizza, recipe, salad, veggies

I made Pizza Salad for my lunch today with leftover spinach mushroom pizza, leftover veggie tray items and fresh Thai and Lime Basils.

Pizza Salad Ingredients: leftover Spinach Mushroom Pizza, grape tomatoes, celery sticks, carrots, spinach, Thai basil and Lime basil leaves.

Pizza Salad Ingredients: leftover Spinach Mushroom Pizza, grape tomatoes, celery sticks, carrots, spinach, Thai basil and Lime basil leaves.


The pizza slice was toasted till bubbly and then set aside to cool a little while chopping the grape tomatoes with the basil.
The basil was chopped a bit first and then the tomatoes were sliced right on top of the basil.

The basil was chopped a bit first and then the tomatoes were sliced right on top of the basil.


Celery is often very strong tasting but this was mild so I used a little more than usual. I didn’t want to bother with a grater so just chopped the carrots.
Pizza Salad 3
The pizza slice had cooled enough that the cheese was no longer dripping.
Warm piece of homemade Spinach Mushroom Onion pizza, cut into 3/4" squares.

Warm piece of homemade Spinach Mushroom Onion pizza, cut into 3/4″ squares.


The vegetables and basil were tossed with the spinach and placed in the bowl. Then I added the still-warm pizza. Last was a drizzle of good olive oil and Balsamic Vinegar over the top.
Pizza Salad

Pizza Salad


It was delicious! Pizza is definitely an up-scale crouton.

Share this:

  • Click to share on Twitter (Opens in new window)
  • Click to share on LinkedIn (Opens in new window)
  • Click to share on Facebook (Opens in new window)
  • Click to share on Pinterest (Opens in new window)
  • Click to share on Reddit (Opens in new window)
  • Click to email a link to a friend (Opens in new window)
  • Click to print (Opens in new window)
  • Click to share on Tumblr (Opens in new window)

Like this:

Like Loading...

Pasta Rose Salad

11 Saturday Aug 2012

Posted by Julia Monroe in food, recipe, tutorial

≈ 4 Comments

Tags

food, homemade pasta, pasta, pasta rose, Pasta Rose Salad, pasta salad, rose, salad

Last week I made a Pasta Rose Salad.

Pasta Rose Salad – fresh pasta, homemade tomato sauce with garlic and Greek Basil, Spinach Leaves, Thai Basil leaves, toasted walnuts, Parmigiano Reggiano, and drizzled with Olive Oil.

I made a Pasta Rose a couple months ago but didn’t have any tutorial photos so last week I decided to make the tutorial. This post has 40 photographs to show the detailed process. Sorry for the blurred photos. My son Ethan prepared the pasta dough for me.

We used this recipe: http://www.food.com/recipeprint.do?rid=288125 for the pasta dough and mixed the ingredients in the mixer bowl.

The pasta dough was placed on a floured surface and kneaded.


Kneading the pasta dough


The dough was pressed flat, wrapped in plastic wrap and chilled for about 1 hour.

I have a hand crank pasta machine but prefer the efficiency of the KitchenAid pasta attachment. A floured ball of dough, about the size of a small fist, is placed in the top of the pasta machine, with the plain rollers and thickness setting 1.

The flattened dough that comes out of the machine is folded in half and then run through the rollers on setting 1 again.


Each time the dough is passed through the rollers, the texture becomes finer, stretchier and less lumpy.


Once the dough is fine enough, usually after 5 or 6 passes, the setting is changed to 2 and the dough is passed through without folding it in half.


The settings are changed with each pass of the dough. The dough is kept brushed with flour so it won’t stick to the rollers. When the dough becomes too long or too wide to fit the roller, it is cut into smaller pieces.


The final width of the pasta is 2 1/2″ or 3″ wide with a thickness setting of 7 on the machine, which is quite thin. about 1.5 mm.


The floured strips of pasta were laid on a floured surface as we completed each one. They were then hung from a rack for an hour or two until cooked. I did not want them drying out lest they crack so we covered them with a towel.


One long piece of pasta makes one rose and a bud or two. I forgot to measure the length but it was about 2 or 3 feet long.

One long piece of pasta is dropped into boiling water.


Pasta cooking.


The pasta is cooked about six minutes or so, till el dente.


Steaming pasta in the colander.


One long piece of pasta is used to make the rose. The pasta rose is formed while the pasta is still hot but will be cool by the time the plate is finished. If you want a warm dish, the plate will need warming, with the greens added right before serving.

Begin the rose at the center. Starting at one end of the long pasta ribbon, the pasta is folded and rolled to form the center bud.


With the bud in the left hand, the long ribbon of pasta is wrapped around the bud clockwise. Occasionally the long ribbon of pasta is folded over to form a folded edge of a petal.


Once enough of the rose is established, it is placed on the serving plate and the folding and wrapping of the pasta ribbon continues around the rose.


When the rose is the size desired, any excess pasta is cut off and the rose is positioned as desired.


To make a rose bud, start with a 5″ piece of pasta ribbon and fold the right side forward diagonally.


Make another fold on the opposite side toward the center, forming a pointed triangle.


Slightly scrunch up the base of the piece to form a bud.


Place the bud partially under the edge of the rose.


A second rose bud is formed and placed under the other side of the rose.
We made a tomato sauce by simmering diced tomatoes with garlic, sea salt and chopped Greek Basil.
Spinach leaves are tucked around the rose.

A paint brush is used to brush tomato sauce between the rose petals.


A small spoonful of sauce is placed in the center of the rose.


Extra Virgin Olive Oil is drizzled over the top of the pasta and spinach leaves.


Thai basil is spicier than broad leaf basil and has a delicious anise flavor. I placed one Thai basil leaf on top of several of the spinach leaves for color and flavor.


Toasted walnuts are placed on the plate with the spinach leaves and Parmigiano Reggiano is grated over the top. The final garnish is a small cluster of Thai Basil.


The completed Pasta Rose Salad. Please click photo to see a larger image.


I ended up chilling the first Pasta Rose so I threw together one to eat. Here is my Thrown Together Pasta Rose.

Thrown-together Pasta Rose, served warm. It was ugly and absolutely delicious!

The Thai Basil and toasted walnuts are key to making this dish delicious. It’s also critical to make the pasta thin for forming the rose and making the serving size not too big.
This is the Pasta Rose I made several months ago.

Pasta Rose Salad


I love both versions and look forward to making this for lunch guests. This dish takes a while to make so make it early in the day for dinner guests. Better yet, make it the day before, covering each complete plate with plastic wrap and refrigerate. It keeps well till the next day for a luncheon. Remover from refrigerator about an hour before serving.

Share this:

  • Click to share on Twitter (Opens in new window)
  • Click to share on LinkedIn (Opens in new window)
  • Click to share on Facebook (Opens in new window)
  • Click to share on Pinterest (Opens in new window)
  • Click to share on Reddit (Opens in new window)
  • Click to email a link to a friend (Opens in new window)
  • Click to print (Opens in new window)
  • Click to share on Tumblr (Opens in new window)

Like this:

Like Loading...

Thanksgiving Salad with Stuffing Croutons and Cranberry Dressing

27 Sunday Nov 2011

Posted by Julia Monroe in food, recipe, Thanksgiving

≈ Leave a comment

Tags

food, leftovers, recipe, salad, Thanksgiving, Thanksgiving leftovers

Today’s lunch was Thanksgiving Salad. What a refreshing way to have Thanksgiving leftovers! Salad ingredients were cold Thanksgiving dinner leftovers: Turkey, Bell Pepper Rings, Stuffing, Cranberries, Parmesan Crusted Pumpkin Wedge and Green Bean Casserole.

To make Stuffing Croutons, I baked leftover stuffing on a cookie sheet at 300 degrees for about 15 minutes.
For the dressing, I combined equal amounts of leftover Cranberry Orange Relish and Pomegranate Salad Dressing. Thinly sliced cranberries were used for the garnish.

Thanksgiving Salad dressing ingredients


The Thanksgiving Salad was delicious!

Share this:

  • Click to share on Twitter (Opens in new window)
  • Click to share on LinkedIn (Opens in new window)
  • Click to share on Facebook (Opens in new window)
  • Click to share on Pinterest (Opens in new window)
  • Click to share on Reddit (Opens in new window)
  • Click to email a link to a friend (Opens in new window)
  • Click to print (Opens in new window)
  • Click to share on Tumblr (Opens in new window)

Like this:

Like Loading...

If you are a non-WordPress follower, enter your email address to follow this blog and receive notifications of new posts by email.

Tags

allsparkledup All Sparkled Up altered book art baking beach beads bird bread breakfast cake candy carving cat cats chocolate Christmas Christmas tree cookies craft crafts dessert DIY Easter Easter eggs eggs egg tree encouragement fabric family figs flowers food funny gardening Gilded Girls God granddaughter grandkids heart home decor hope inspiration inspirational jewelry jewelry making joconde light Little Plastic Bears miniature miniatures mixed media mousse nature painting PB & J pets photo photography projects recipe roses salad Scoliosis scripture sewing snow sparkling Spoonflower sunlight sunset Sunset Beach surgery tablescape tea tree tutorial Valentine's Day vintage book words

Archived Posts

Top Posts & Pages

Sourdough Breadstick Cobras
Marble window sills
Sfogliatelle
The Day the Baby Hawks Learned to Fly
Woven Tortillas
We made up a new recipe - PB & Jam Joconde Cake - Part 3
Sugar Bonnets
A Welded Valentine!
Angel Curtain Treatment

Recent Posts

  • Sfogliatelle
  • Blue Willow Toile
  • The Kitchen tea towel
  • The little cake she decorated
  • Icing flowers
  • Matthew 11:28
  • Christmas at Sea Tablescape
  • Gratitude
  • The Hot Air Balloon mobile has lights
  • Journaling in Coloring Books
  • The Light is still here.
  • A Hot Air Balloon decoration for my granddaughter’s room
  • Coco’s new favorite hangout
  • My kitten is growing
  • English roses fabric

Post Categories

All Sparkled Up allsparkledup altered books American Girl Dolls art baking Baking for Neighbors ballet beach beading BFN birthday books cake decorating calligraphy candy cats Christmas color community cooking Craft Fail crafts DIY dolls drawing Easter encouragement Etsy fabric family fashion design Favorite Childhood Books flowers food Free Idea funny gardening Gilded Girls Gilded Life God granddaughter grandkids handmade books holiday home home decor Inspirational jewelry making journals lighting Little Plastic Bears Mexican miniature mixed media music nature New Years On my Worktable painting party pets photography Princess doll projects recipe Scoliosis Scripture sewing sketchbook sparkling Spoonflower sunlight sunset tea time Thanksgiving The cats time tools travel tutorial Uncategorized Valentine's Day water wedding woodwork words wreath
Follow All Sparkled Up on WordPress.com

Blog at WordPress.com.

Privacy & Cookies: This site uses cookies. By continuing to use this website, you agree to their use.
To find out more, including how to control cookies, see here: Cookie Policy
  • Follow Following
    • All Sparkled Up
    • Join 289 other followers
    • Already have a WordPress.com account? Log in now.
    • All Sparkled Up
    • Customize
    • Follow Following
    • Sign up
    • Log in
    • Report this content
    • View site in Reader
    • Manage subscriptions
    • Collapse this bar
 

Loading Comments...
 

    %d bloggers like this: