The Crown Journal.
For years I made my own blank journals using a standard codex construction with fabric bound spine and hardcovers. The signatures were sewn onto cords or tapes and then glued into the hard cover. This site,
Humblebee & Me, has an excellent tutorial for sewing signatures on tapes.
It’s been a few years since I made a handmade journal so I finally had time to make one a couple months ago. I followed Jeanne Oliver’s video for stitching the signatures together from her wonderful The Journey of Letting Go class online . (I highly recommend the class, not just for the terrific art instruction, but also for the heart-felt inspirational videos. Jeanne, you’re the best!) Jeanne’s stitching process for sewing the pages together was easy and fun.
I didn’t photograph the steps to stitch the text block together but here is how I made the Crown Journal cover if you want to make one. This is an abbreviated tutorial but there’s enough here to give you basic instruction to make the lace crown, which would look great glued to an altered book cover. If you want actual measurements, let me know in the comments and I’ll measure some of the components for you.
It was fun going through my stash of supplies to pull out some pretty options.
The dyed seam binding tape, blue sequin fabric, lace and rhinestone chain were from A Gilded Life.
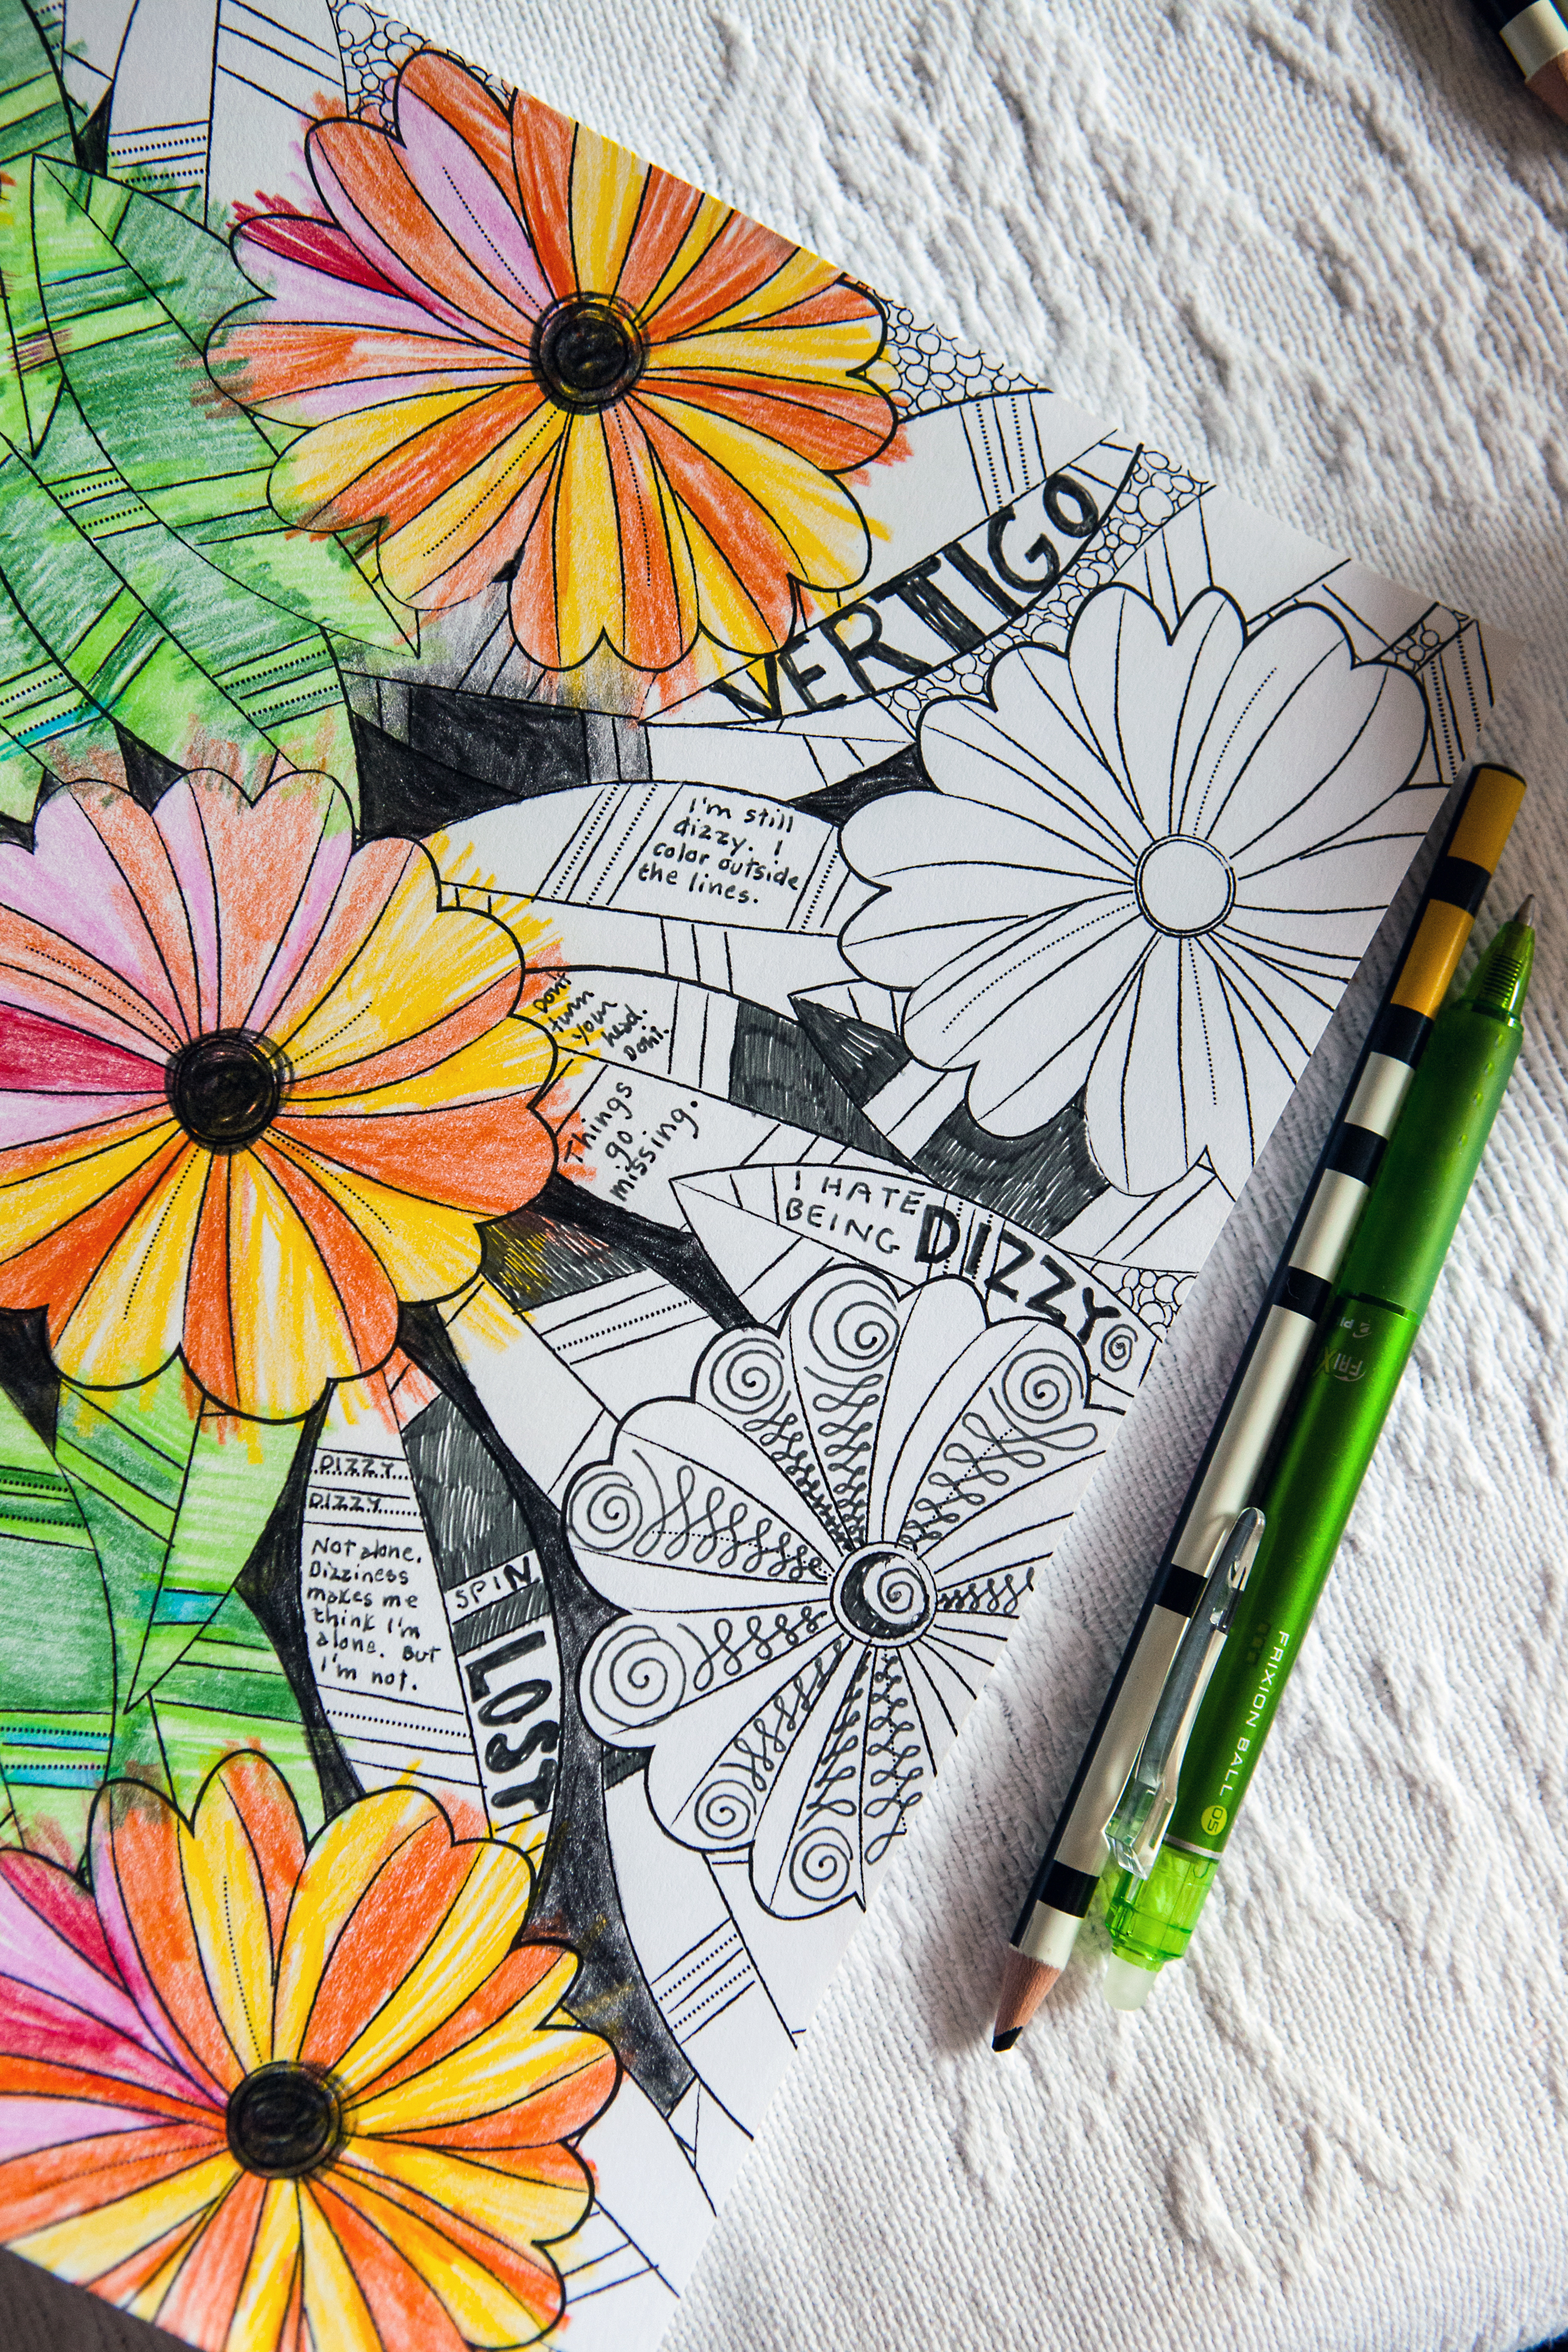
To make the text block, I cut up a sketch pad.
The linen was purchased from sources online.

Glittery trims, lace and rhinestones to make a handmade journal.
Both front and back covers were assembled the same way. Each cover has a piece of ivory linen and natural color linen, one small and one larger piece of chip board (cut from the back of a water color tablet) and a piece of thin cotton batting for padding under the ivory linen.

The materials used to make the book cover: Ivory linen over batting over chip board, which is then glued to a larger piece of chip board covered with natural linen.
The batting is lightly glued to the small chip board square and then the ivory linen is placed over top of the batting. This piece is turned over and the ivory linen is glued to the back of the board, mitering the corners on the back.
The natural color linen is glued to the larger board without any batting.
Once the cover pieces are covered with linen, then you get to do the fun stuff!
I lay loose pieces of lace and rhinestone chain on the top of the book cover to see what I liked before gluing anything down.
I also tried several different lace pieces before making up my mind about the crown.

Trying out pieces of lace for the crown.
To glue such fine netting, I spread tacky glue on the flat lid of a plastic bin and then laid the blue lace in the glue… then quickly picked up the lace while still wet and smoothed it in position on the padded ivory linen.

Gluing the sequined lace on the journal cover.
There was just enough glue on the thin lace netting to glue all the tiny pieces down securely, with no edges pulling up and no glue squishing up. I want the lace to be durable because this journal will last me at least a year.

The back of this board shows how the edges of the linen and lace are glued down on the back of the padded ivory board.

The back of the top cover piece.
To make a lace crown, choose lace pieces that will look like the points of a crown when placed together. I used three different pieces of lace. To curve the lace, cut small slits between the motifs of the lace as shown.

Here you can see where I snip the lace so it will curve better.

Snipping the lace so the edge can be overlapped so it curves better.
Once the lace is ready, glue the pieces together to form the crown.

The lace crown pieces all glued together.
Tacky glue is thinly spread on a smooth surface and the lace crown is carefully pressed into the glue.

The assembled crown is laid on wet tacky glue.
While the glue is still wet, lift the lace crown piece up and carefully position it on the cover and press it down on the ivory linen. It dried fairly fast when I positioned it but I still pressed down in places to make sure it stuck well on all edges.

The crown is carefully positioned on the book cover and pressed down around all edges.
Cut rhinestone chain to size using jewelry cutters and glue it down with 527 Multi-Use glue or other strong jewelry glue.

Jewelry cutters are used to cut the rhinestone chain to size.
I pressed my needle nose pliers into the book cover to make small indentations so rhinestones would set in deeper and more securely. These were glued with the 527 glue also.

If the gems are large, make small indentations so they can be set more securely into the book cover.
The crown is complete.

The front of the book cover is ready for the next step.

While the glue was drying, I made the ribbon rose buds for the journal spine. A length of ribbon was tied to make a loose knotted ribbon rose bud. I made three of these.
To make a knotted rose bud, the ribbon is tied as if about to make a knot, but the ribbon is looped over and over 4 times, not just once like a standard knot. Then when the ribbon is slowly pulled tighter, the layers of wrapped ribbon overlap and form a pretty bud shape. If the ribbon is pulled too tightly, the flower shape disappears and turns into a big knot. So you have to stop pulling while the ribbon is still loose. The ribbon “tails” are folded to the back and then stitched together so the ribbon bud doesn’t come apart. I cut off the excess ribbon and gently fringed the short ribbon tail under the bud.

Making the ribbon rose buds.
Three lengths of ribbon were stitched and gathered together.

These longer ribbons were stitched behind the flower buds.

The ribbon loops are sewn to the back of the ribbon rose buds.
I ruffled a long length of seam binding tape to use on the front cover. Here it is pinned down on the larger natural linen-covered board as I adjust the ruffles to fit. But before gluing down the ruffle, I glued on the decorative top of the cover.

Seam binding tape is gathered down the middle and then pinned to the cover to check for size and adjust ruffles.
I spread tacky glue generously over the back of the ivory cover piece and pressed it down on the larger board.

Tacky glue is squirted on the inside of the top cover piece. After taking this photo, I spread the glue around using an old credit card and made sure the glue extended all the way to the edges and corners. Tacky glue is great because it sets up fast but you have to work quickly.
Some of the glue squished out around the edge but that was good. I used my fingers and a pallet knife to press the folded ruffle into the glue. I used the ruffle folded in half all the way down the length for extra fullness. It was easy to press the center of the ruffled seam binding tape into the glue and it held well. I squeezed more tacky glue into any spaces that didn’t have enough to hold the ruffle well.

The top of the cover is glued on the larger linen-covered board. Then while the glue is still wet, the ruffled seam binding tape is pushed into wet glue between the two boards.
The back cover was different. Instead of a ruffle all the way around, I just pleated the four corners and let the seam binding tape stay flat on the sides. I glued this down before gluing on the back piece.

I cut a small motif from the blue lace and laid it in glue as for the front cover.

The glued motif was positioned and pressed down carefully, especially around the lace edges. Here is the finished back cover.

I glued a piece of decorative paper inside the front and back covers to cover the edges of the linen and lace. The same kind of paper was used to wrap the front and back signatures so they would match.

Each signature was folded inside a piece of vintage wallpaper or decorative paper. Here you can see the gap between two signatures in the journal.

I accidentally placed this piece of wallpaper upside down during construction of the journal. I don’t mind because mistakes like this make me smile and remind me life isn’t perfect.

Once the book was sewn together, I stitched and glued the bundle of ribbon rose buds into the spine.


Here you can see the stitching along the spine.

The bundle of rose buds in the spine doesn’t interfere with the book opening fully.

I used a decorative paper punch to punch the edges of pages in random places.

One of the ribbons is threaded in between two signatures to be used as a ribbon bookmark.

One of the ribbons at the spine is used as a bookmark.
The finished Crown Journal.

The binding of this book allows it to open fully, even with a ribbon bundle glued and sewn into the spine.
This journal will last me about a year because I tend to write very small. I’ve been using it for two months so far and it has shown no signs of loosening and all the lace and gems are glued down tight, even when I slide the journal between books on a bookshelf.
I have to confess that this is the prettiest journal I’ve had in a long time. It’s quite heavy and the covers are soft and silky to hold. All the prettiness has had an unexpected impact on me. Each night, when I pick it up to write, I noticed that my writings have become more optimistic. I’m really glad about that because I have a couple old journals that are genuine but much too sad to reread. This is the perfect journal for this time in my life, a time of transition and full of good things, all sparkled up.