• About

All Sparkled Up

~ Like dew hanging from the tip of a leaf, a single bead or word adds sparkle where there was none. BE the bright!

All Sparkled Up

Category Archives: party

A Warm Winter Game Weekend

16 Monday Jan 2017

Posted by Julia Monroe in family, home, home decor, lighting, party, Uncategorized, woodwork

≈ 4 Comments

Tags

family, family game night, game night, home decor, party

I’ve wanted to host a game night for a while but everyone’s schedules were really busy. So we freed up the whole weekend and let the gatherings happen when they could. What fun!

First of all, I wanted warmth and light. Right after Christmas is always so dreary. All the prettiness of Christmas is packed away and all that’s left is cold. So I did a little searching and gathered a bit of warmth from around the world.

First and most important, there had to be fur from Russia.
1-winter-game-weekend-fur-throws
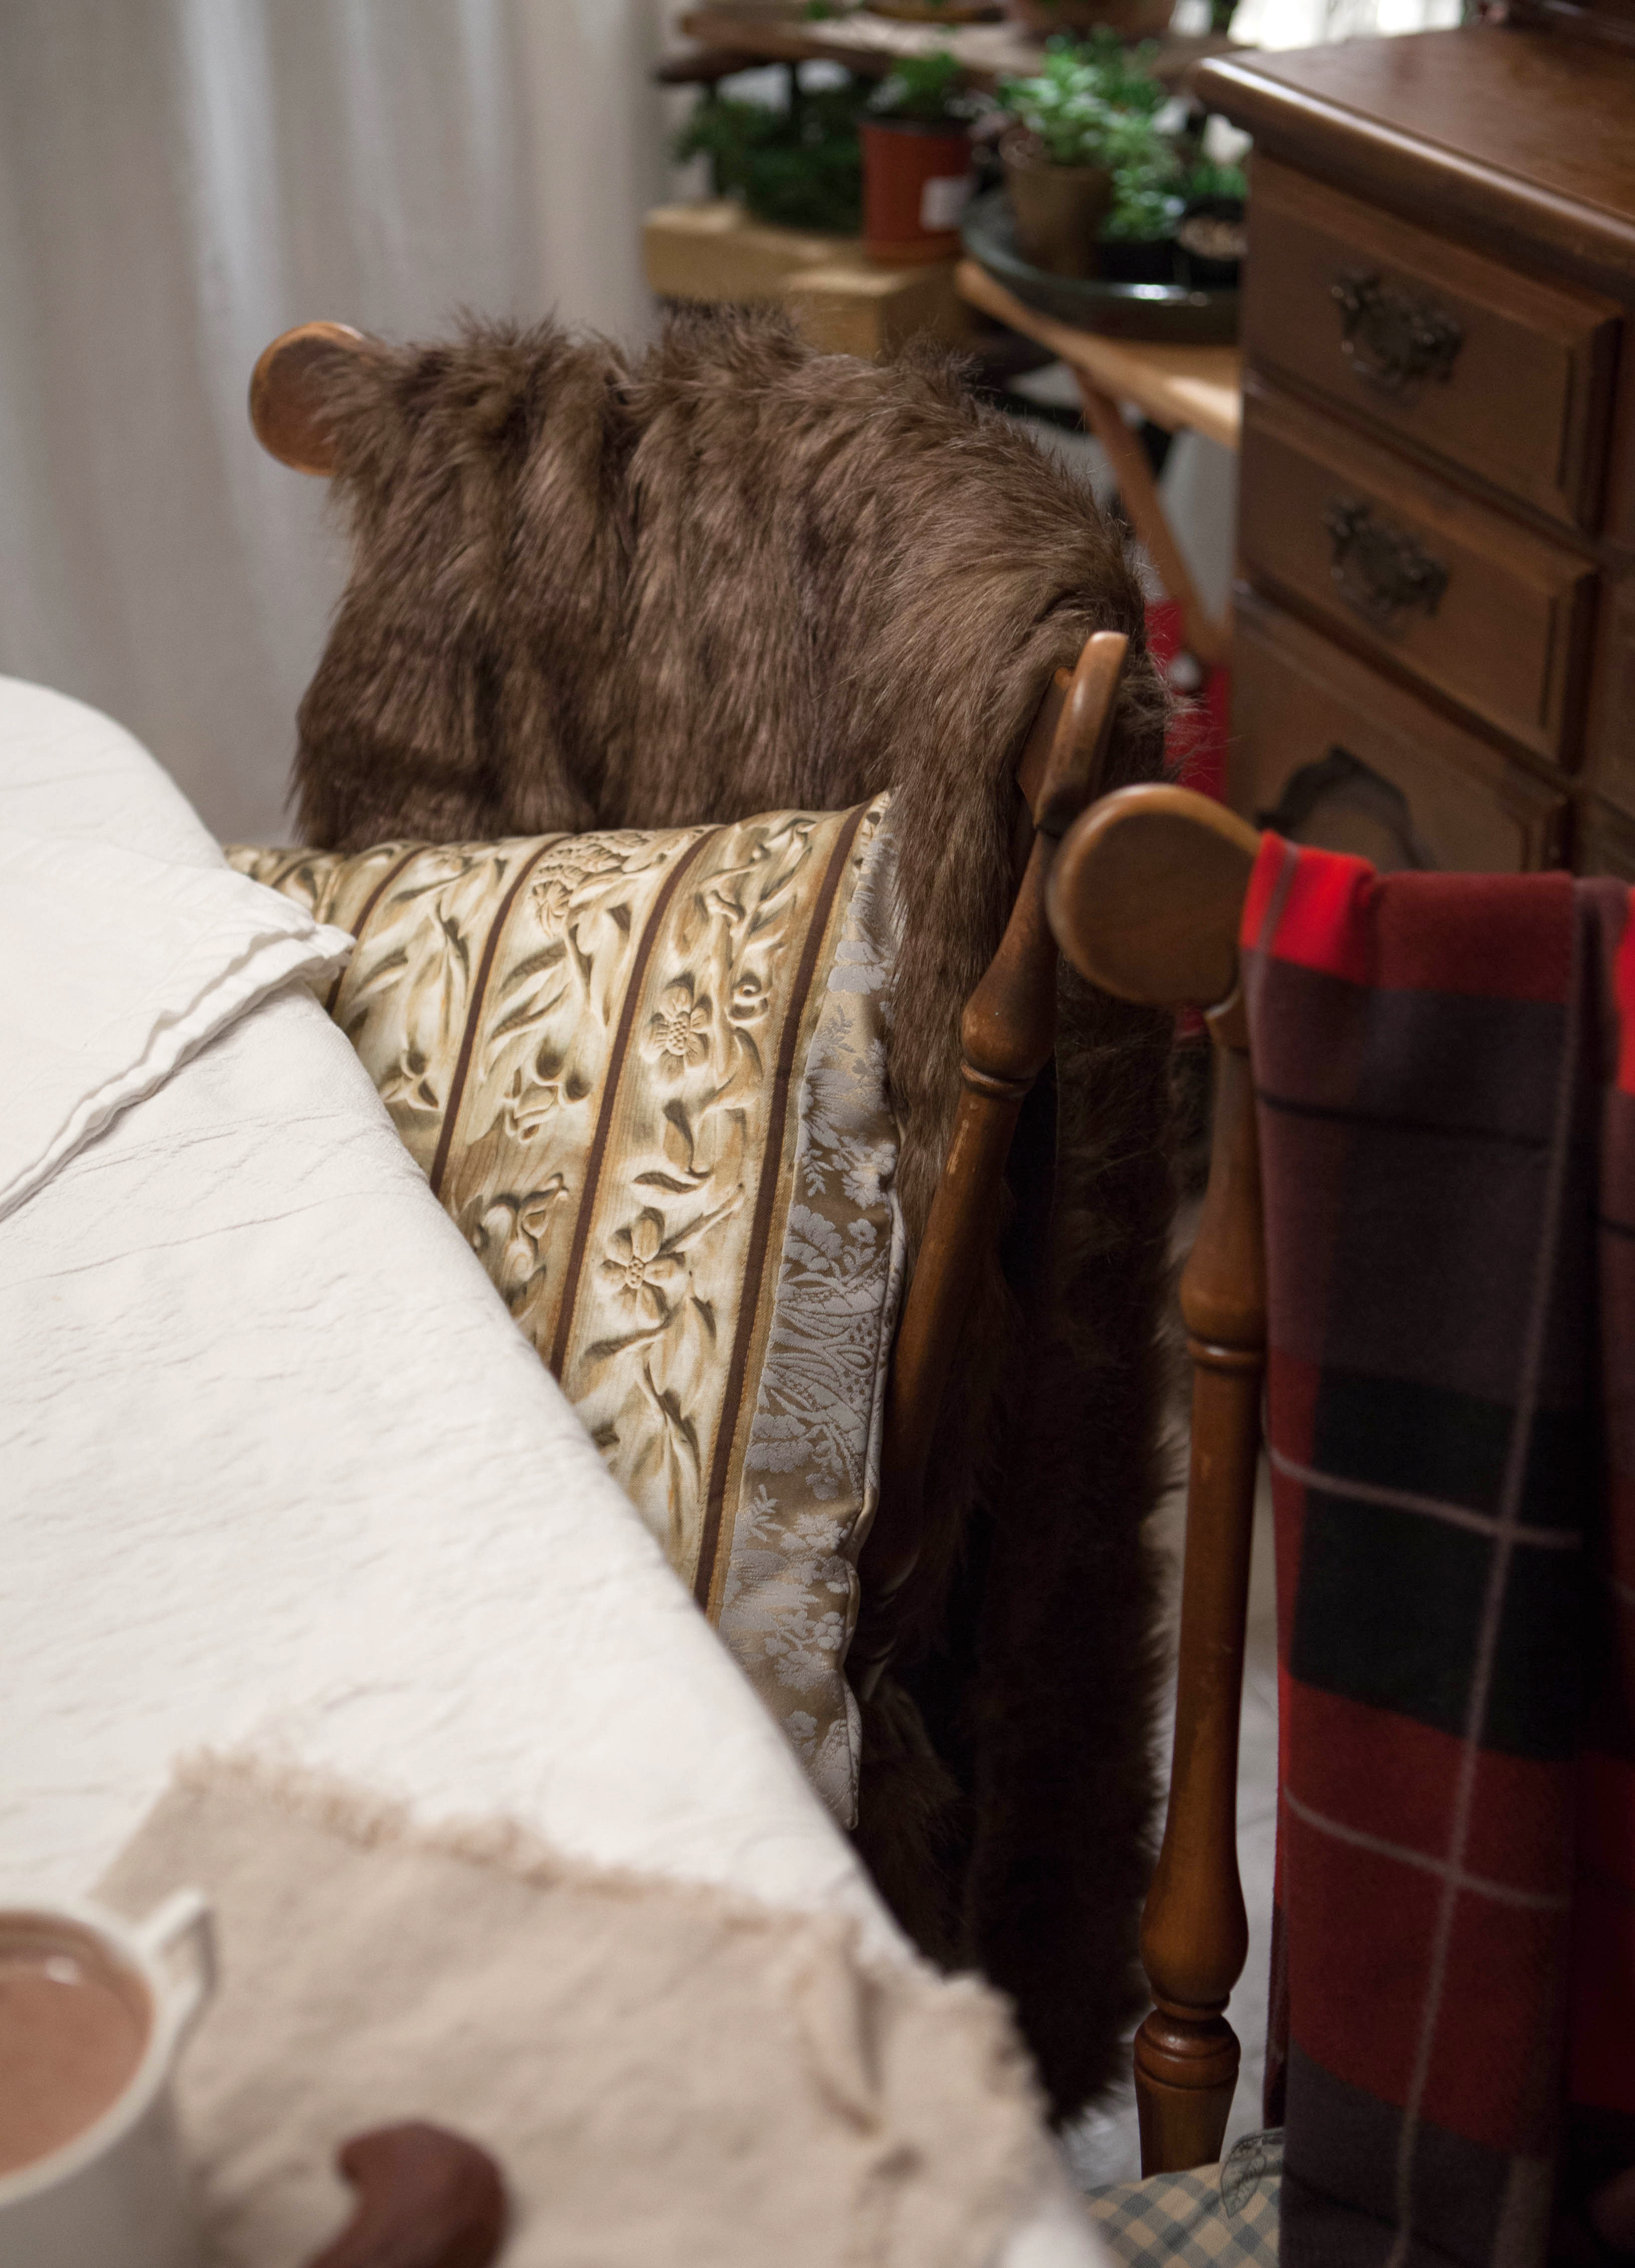
I have a large fur throw in the living room but needed something smaller for the dining room chairs. I found the perfect fur at JoAnn fabrics and made two throws from 1.5 yards of fur to drape over the backs of the chairs.

I adore knits from Scandinavia and found a beautiful heavy knit, also at JoAnn Fabrics. 1.5 yards made two more comfy throws for the chairs. I also used another yard of fur and a lovely wool throw that a friend had given me.

On one chair is a pillow I made using Floral Wood Carving Stripe fabric from Spoonflower.  2 carved wood flower stripe fabric pillow.jpg 
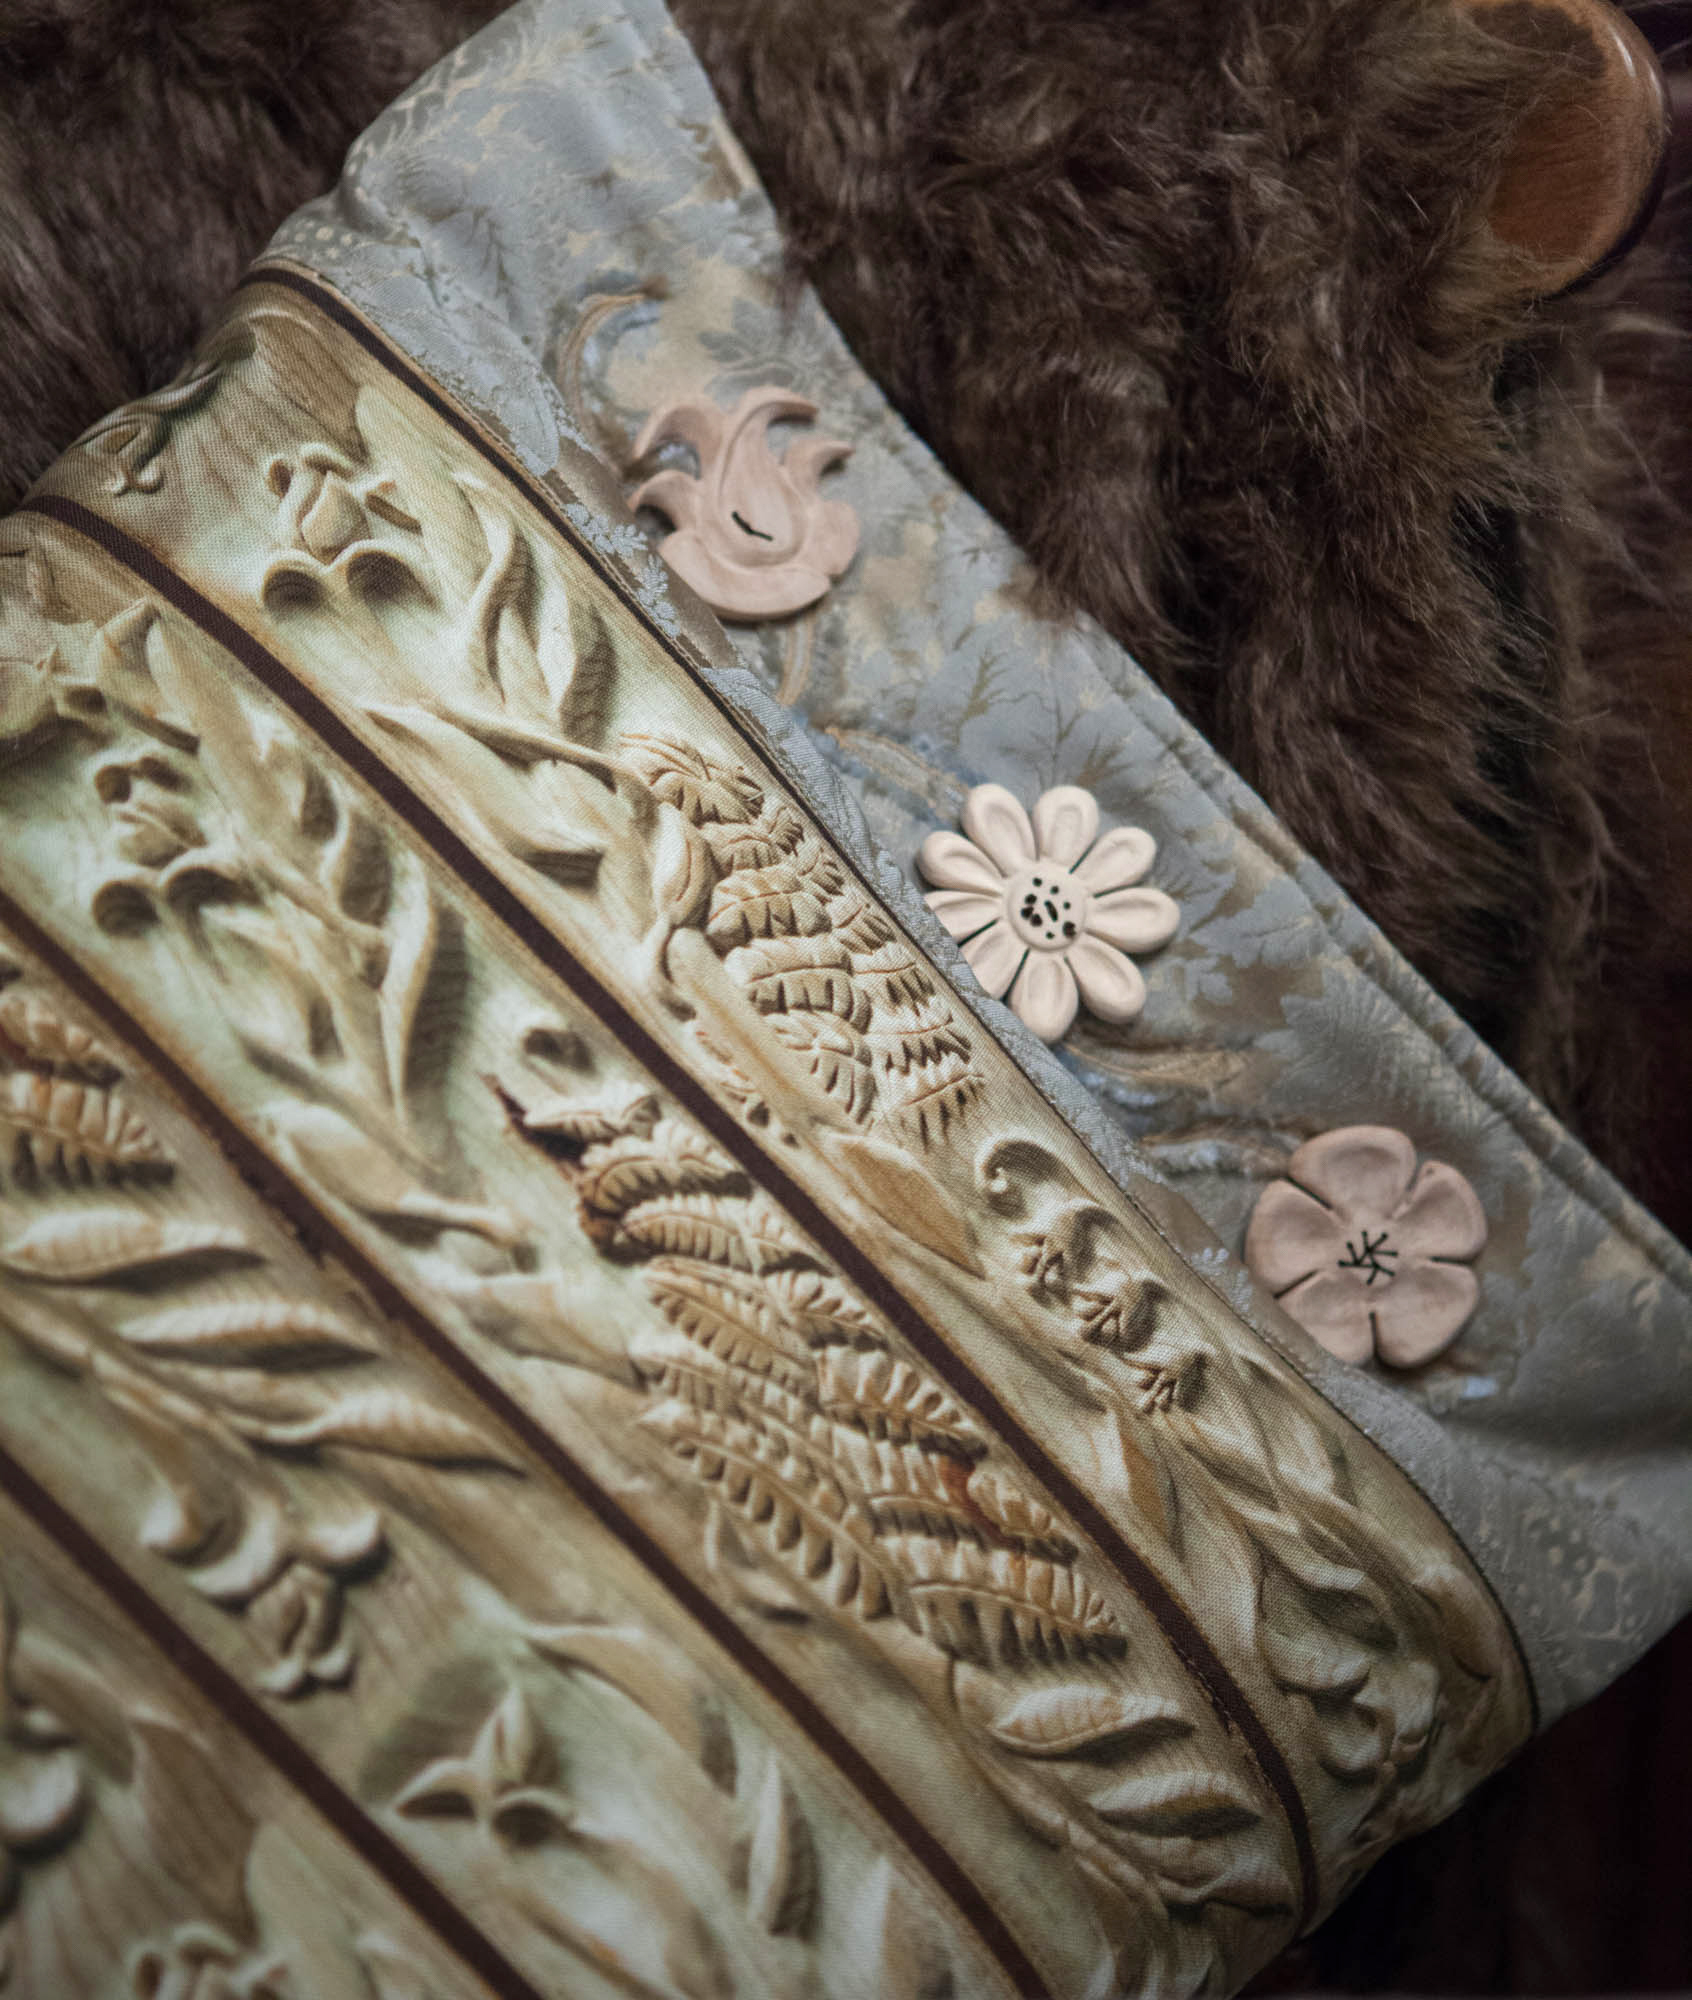
Roostery sells premade pillows using the wood carving fabric too. The wood buttons were fun to carve while watching Gilmore Girls. :) 3-hand-carved-wood-buttons

On the table, more softness. “Go ahead and put your elbows on this table!” Oh the softness! 4 Winter Game Weekend soft table.jpg

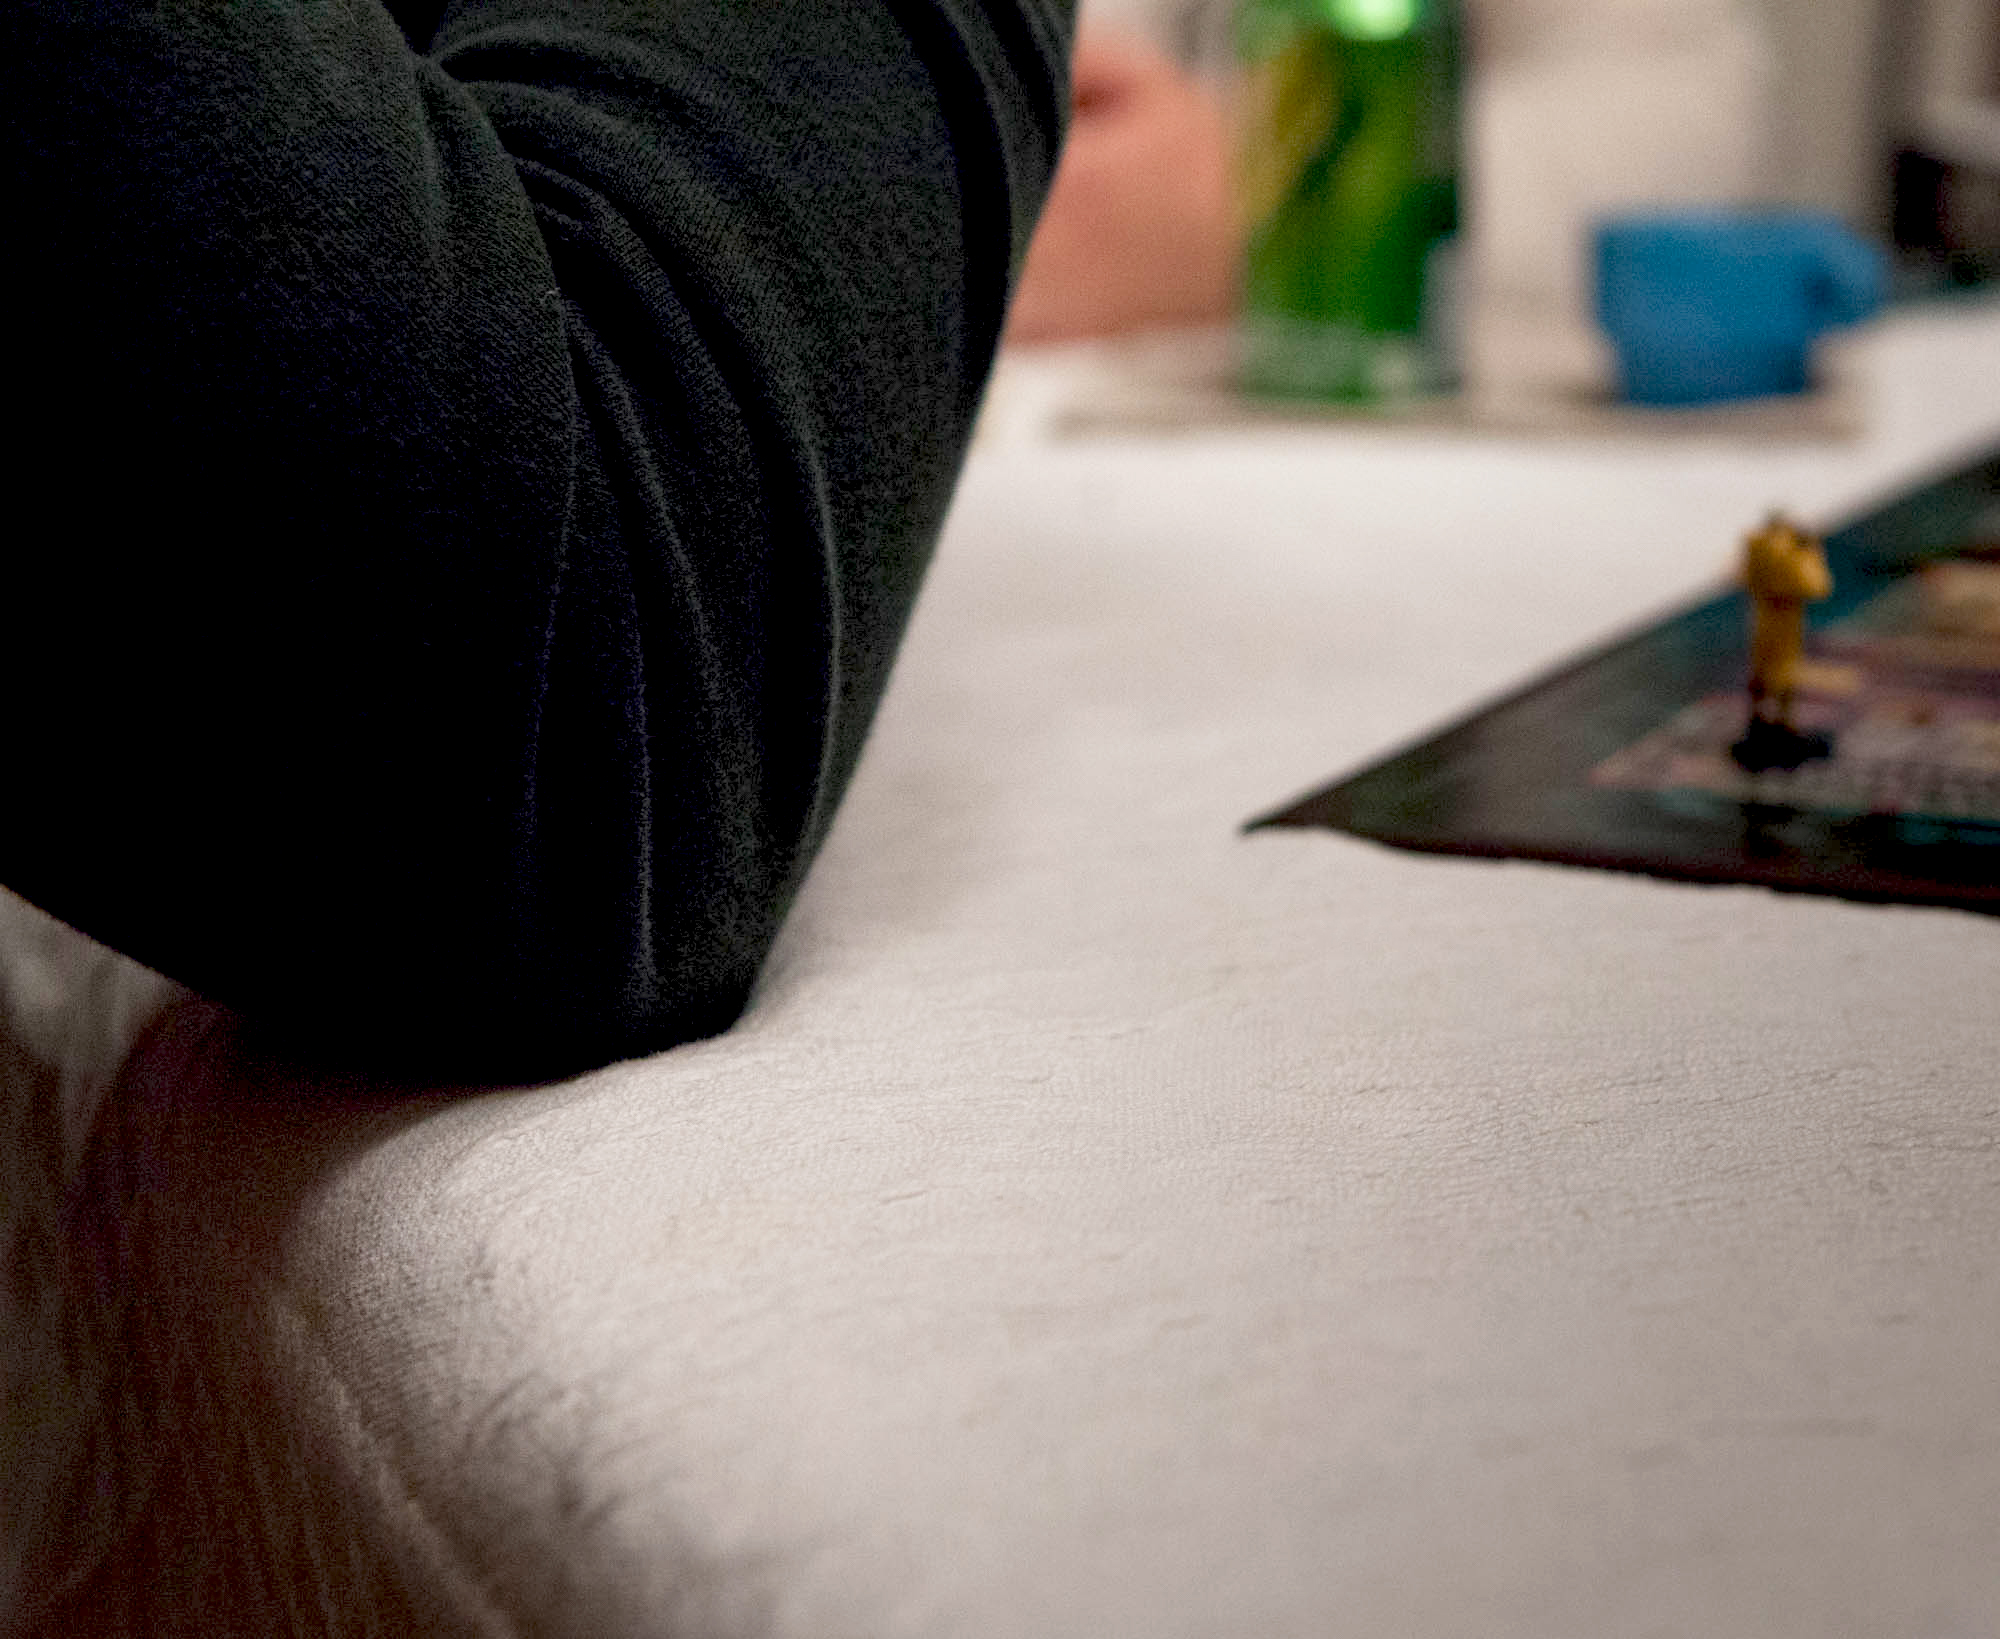
I’ve never leaned on a table so soft that your elbows sink in, and there are no words to describe how comforting this is!!! If you want your guests to linger, you’ve GOT to try it!

To get it soft enough, I used these layers: Felt-backed plastic tablecloth, cotton table cloth, fluffy old blanket, chenille bedspread-turned into a tablecloth and a thick cotton throw. 5 Winter Game Weekend table throws and blankets.jpg

Our table belonged to my grandparents. Decades of love and laughter have taken place around this table. The only thing I’d change is if it were a trestle table with rounded corners and center pedestal so we could fit more people around it without bumping the table legs. My father made the family trestle table and I’ve always wanted one. This trestle table is beautiful! But really, all these tables are gorgeous here.

The first two nights I used the white bedspread/tablecloth as the top layer. The last night I put the maroon spread on top. You simply must try this! Make sure you use washable throws though, in case there are crumbs and spills. From now on, I’m going to be watching for thick, washable throws that can be layered on tables. I might even make one for my desk. Yes! … um… zzzz…. maybe too much comfort for a desk… ;)

For lighting, I wired old chandelier crystals and glass icicle ornaments to the light fixture. The crystals were salvaged from a family heirloom and I cherish them so much. 6 Winter Game Weekend icy chandelier.jpg They add a delightful sparkle and look quite wintery.

7 Winter Game Weekend chandelier with crystals.jpg 
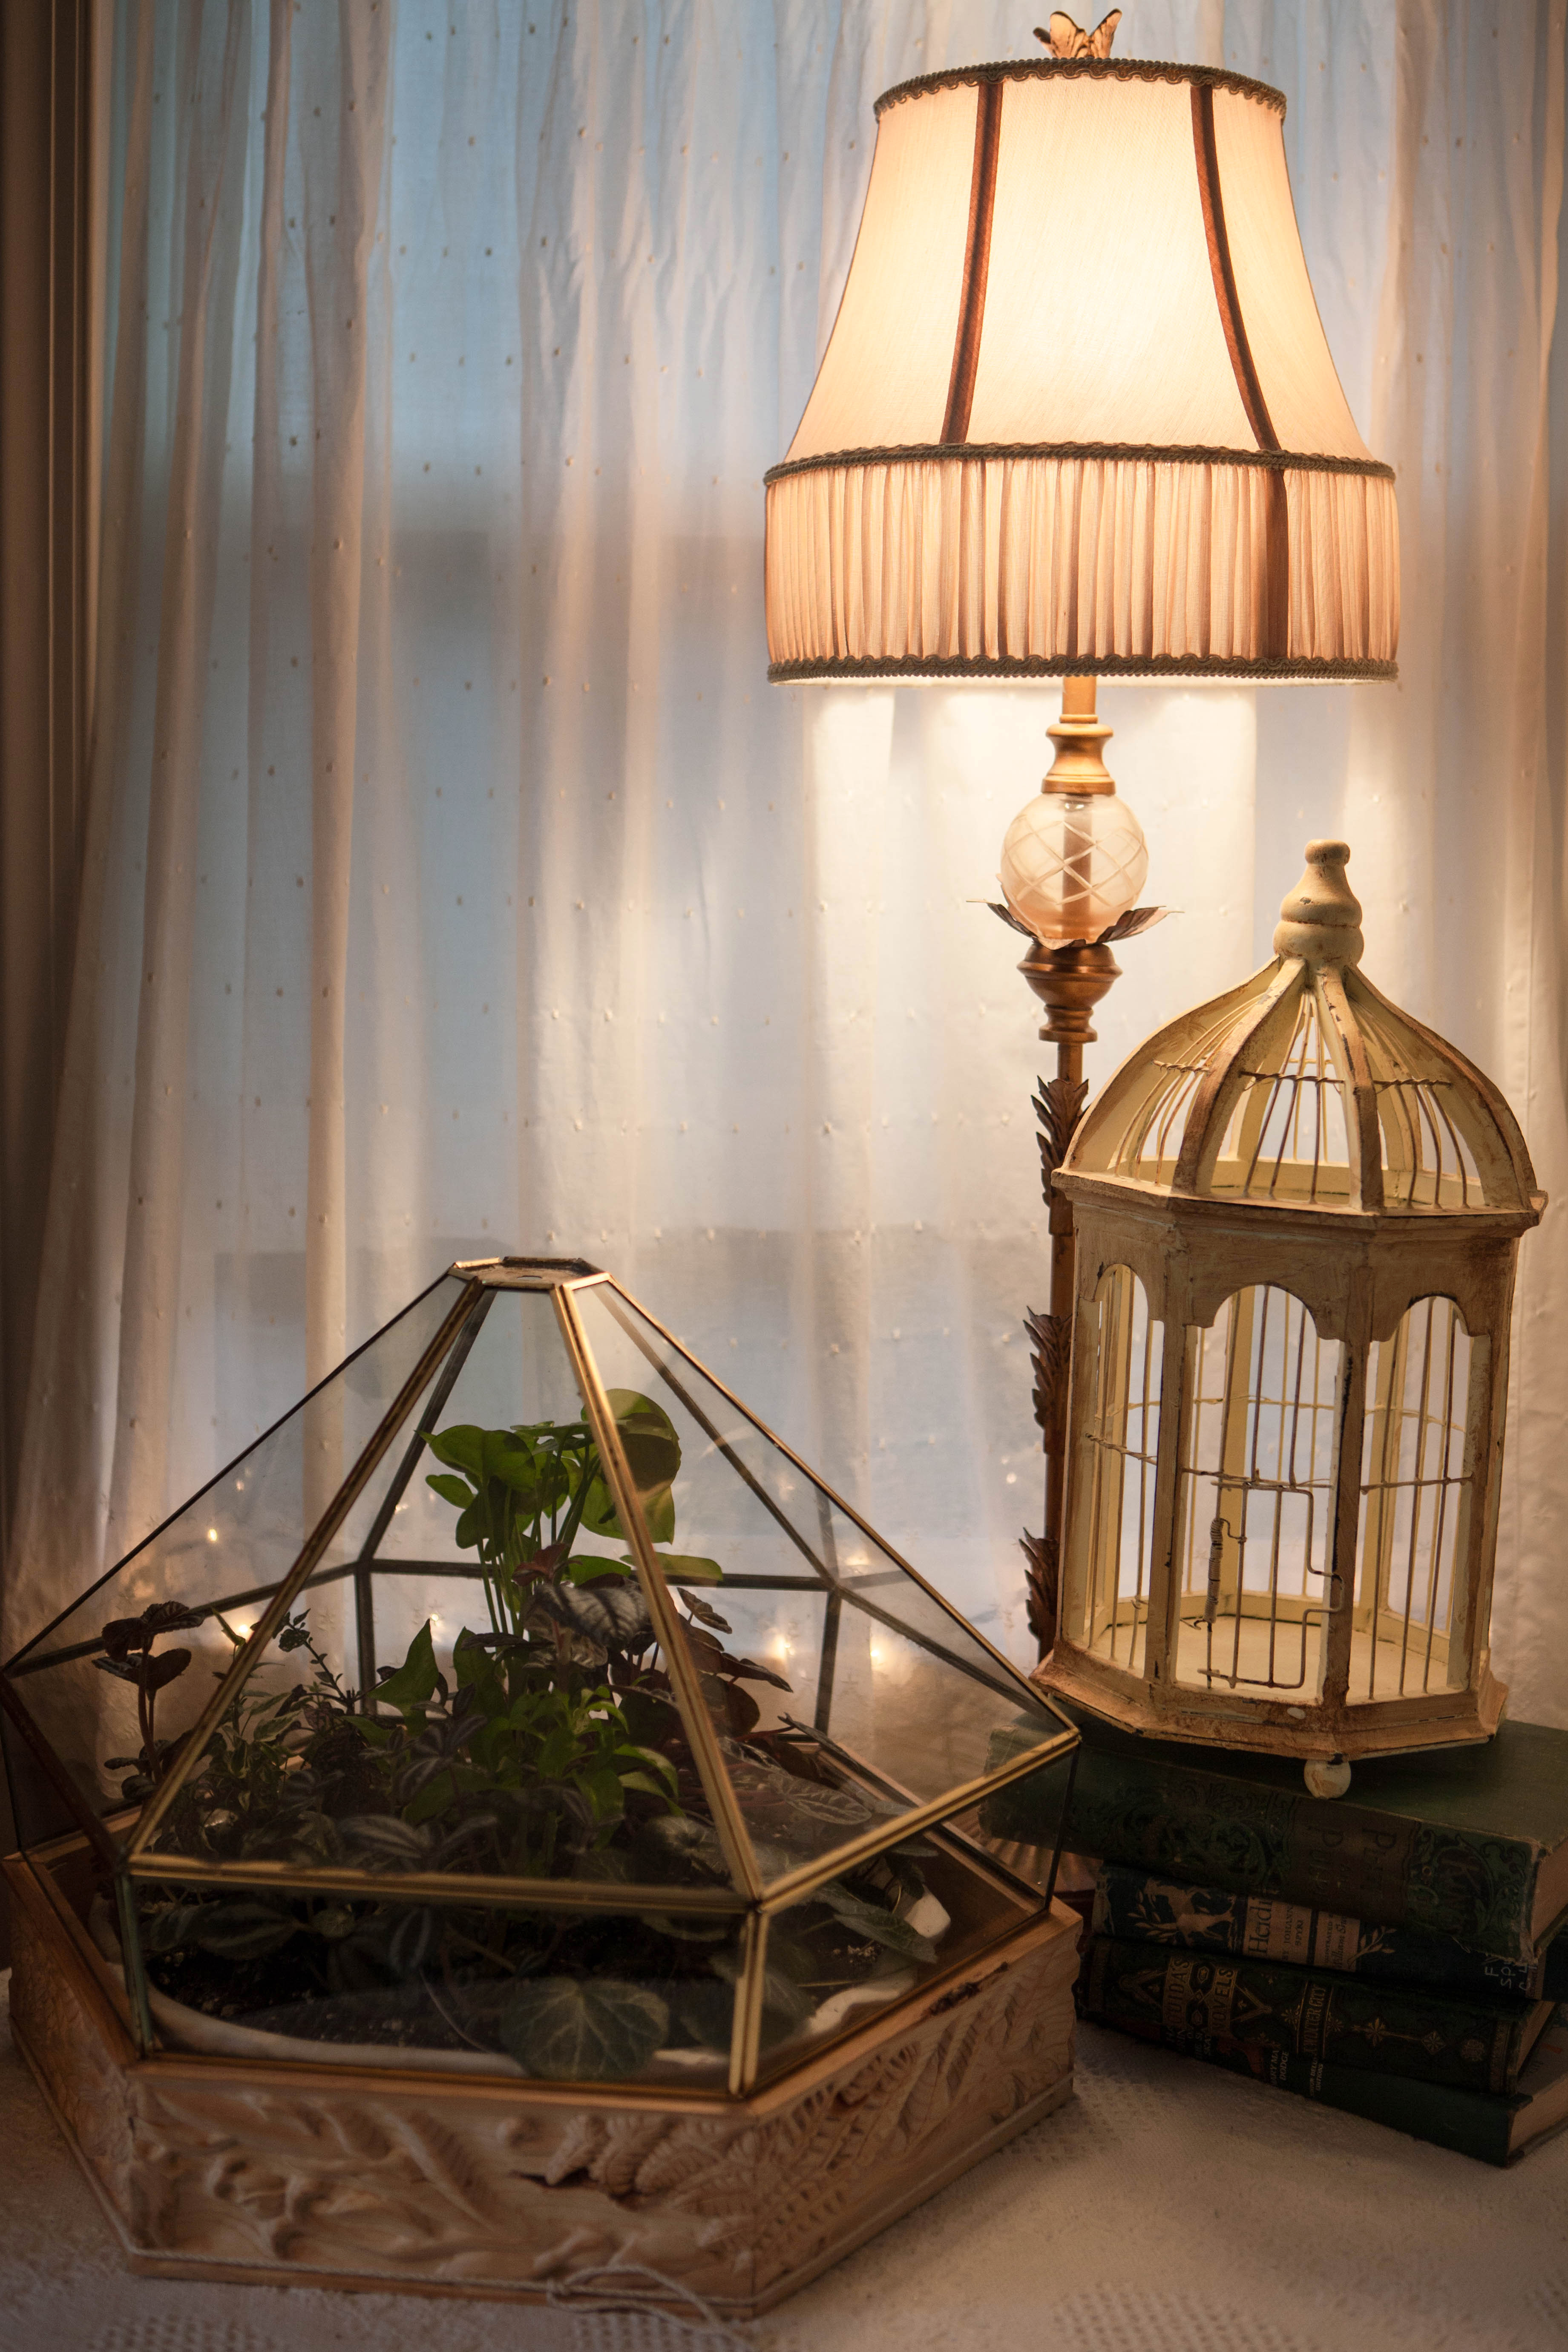
Two corners of the dining room have lamps. The terrarium is still unfinished, tied together with cord but the plants are growing fine. They’re over a year old now. I finished all the carving but have yet to cut the wood base, glue it all together and line it with copper. The glass top of the terrarium is the old dining room light fixture that we removed when we bought this house.

8 light fixture and wood carved terrarium.jpg I also keep white mini lights on top of the china cabinet and dining room bookcase until winter is past. To me, mini lights don’t remind me of Christmas, they mean health and well-being. The more light in winter, the better!

While visiting my daughter in Tokyo, I learned about Japanese tables that were warmed underneath. What a great concept! To mimic the comfort of a kotatsu, I put an electric blanket under the table to tuck our stocking feet into. 9 Winter Game Weekend electric blanket floor.jpg

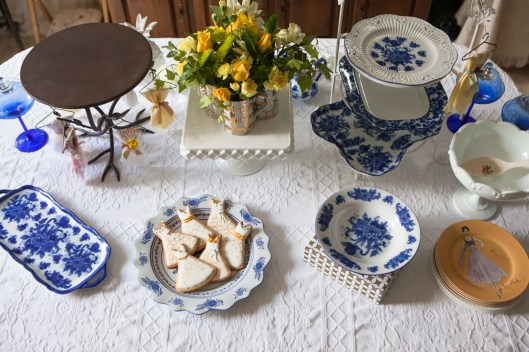
On the table I put a beautiful leaf plate from Arhaus. It was perfect for holding cookies – German Springerli and Viennese Chocolate Hazelnut Crescents.10 Winter Game Weekend Springerli Chocolate Hazelnut Crescents.jpg

One of my sons made me a gorgeous chalkboard tray for Christmas. He did a beautiful job on it! It was jolly fun writing on the tray, playing tic tac to and keeping score. 11 Winter Game Weekend Arhaus leaf bowl.jpg

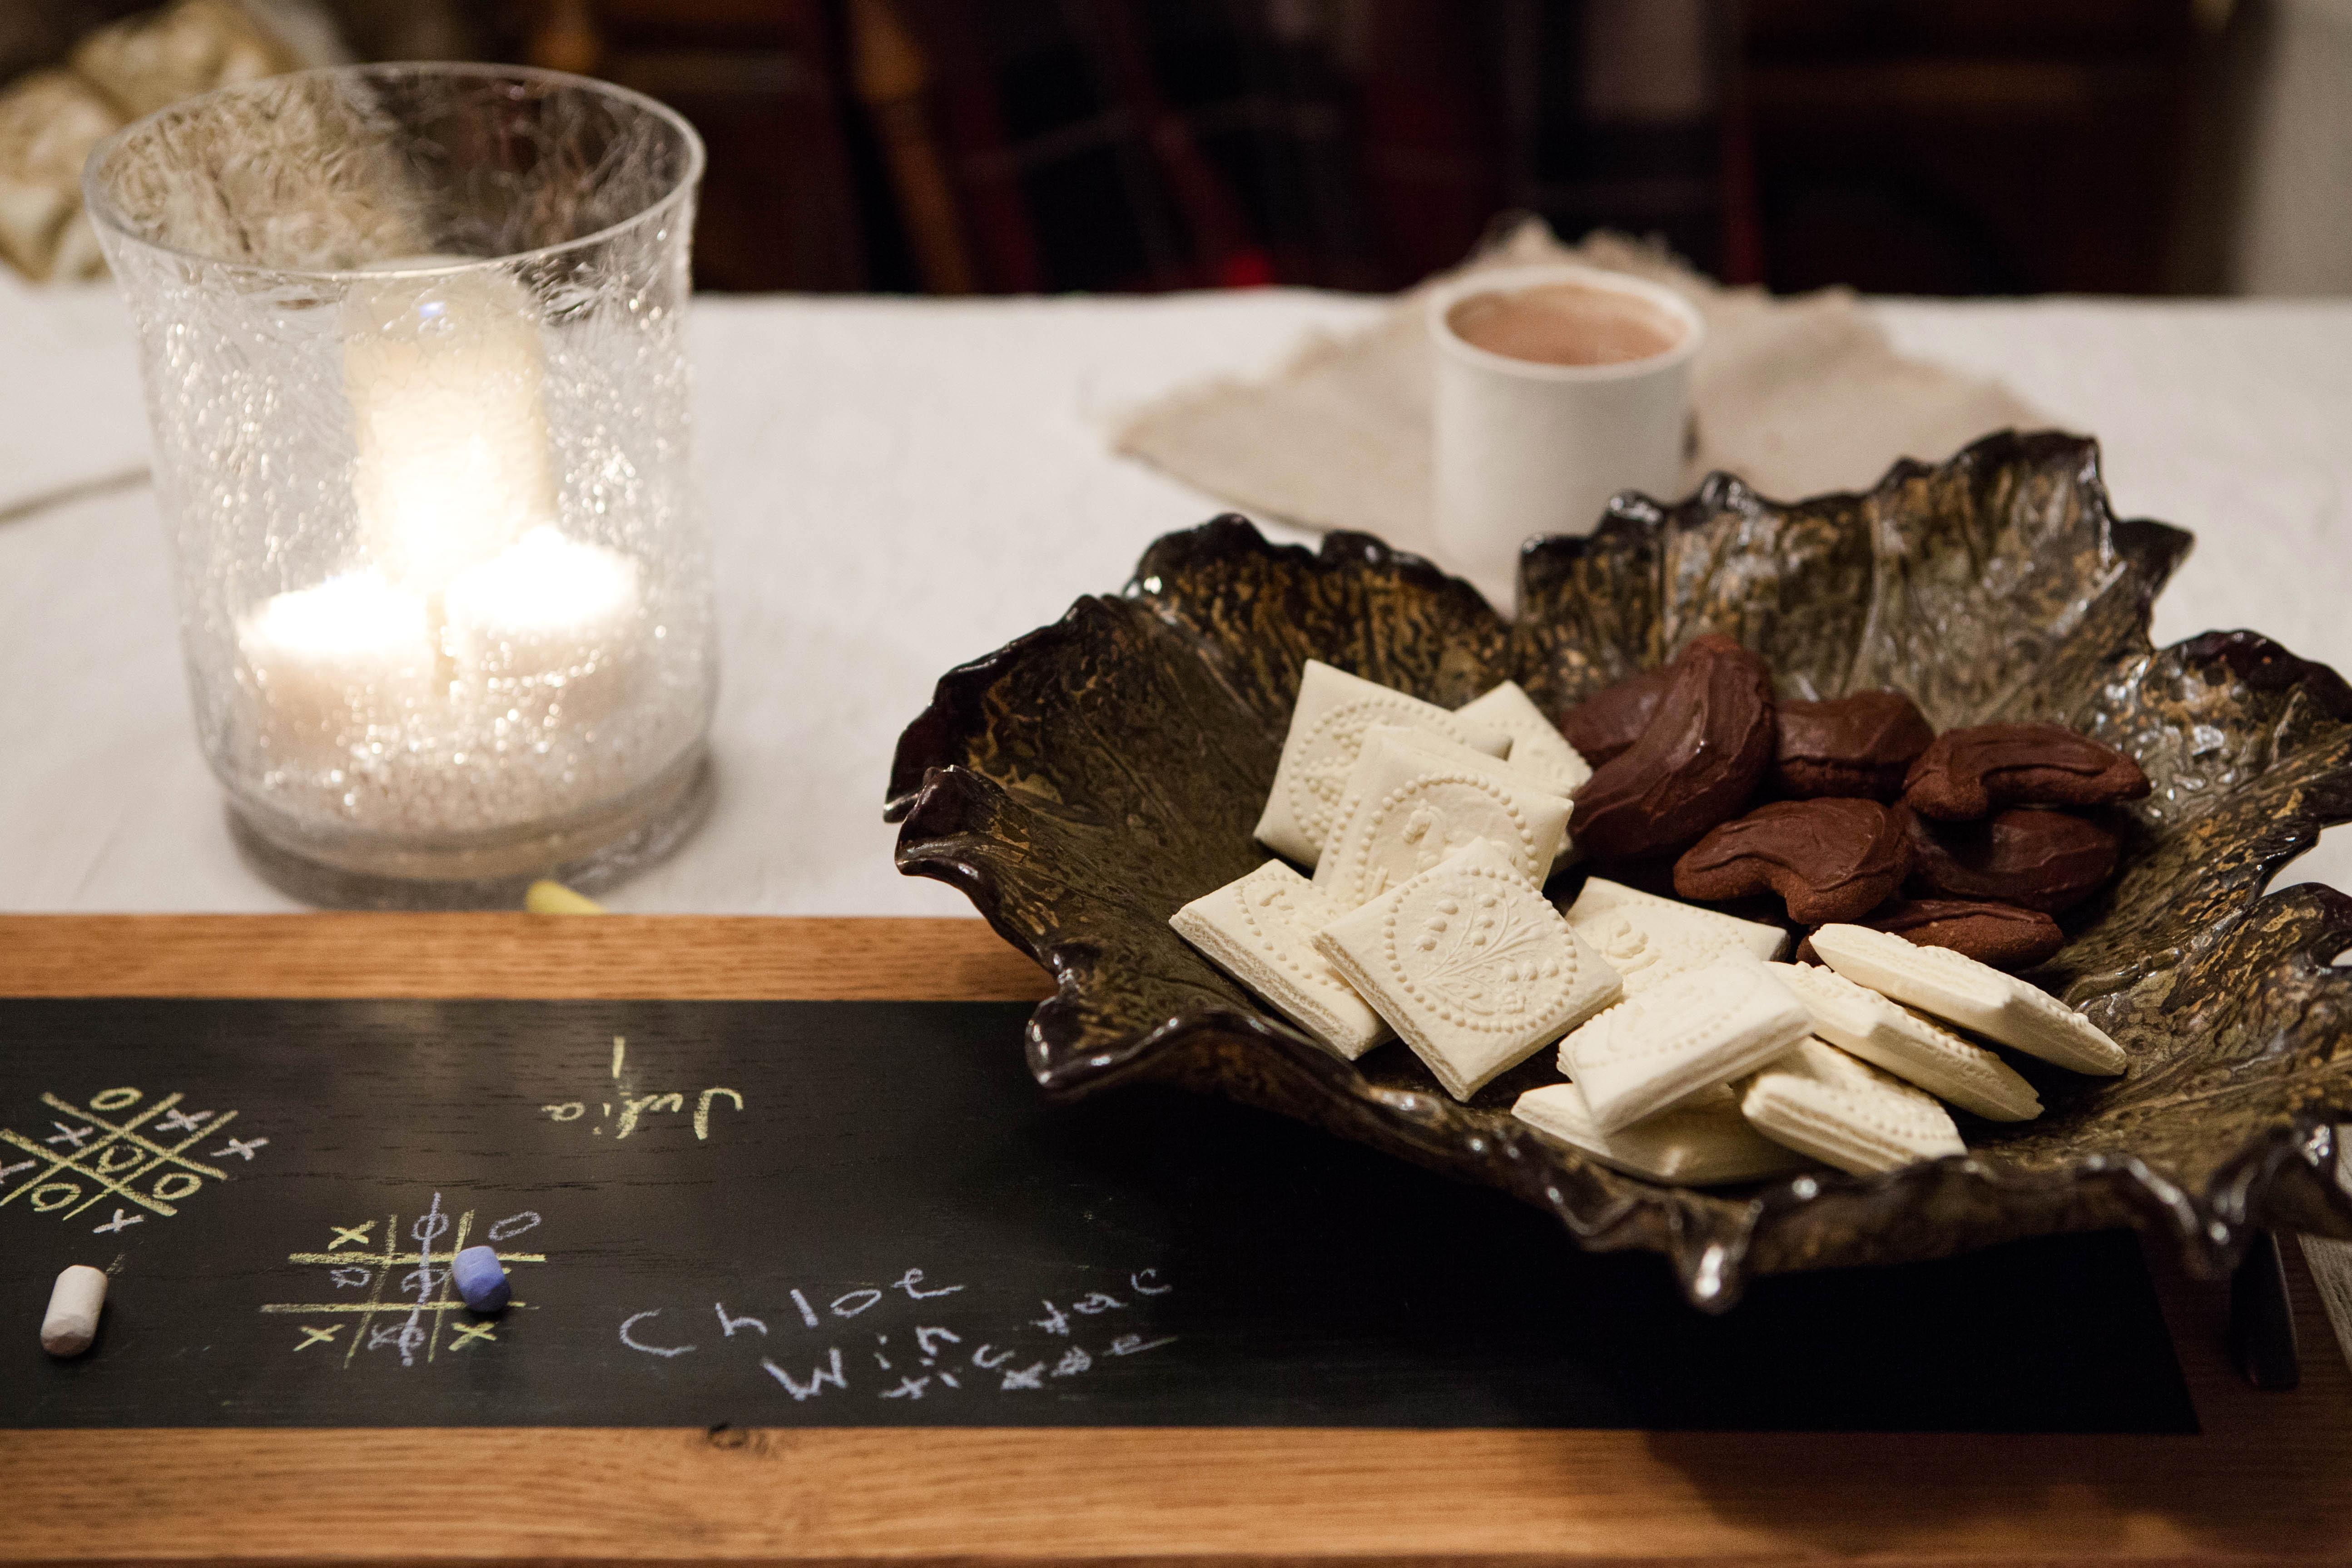
We warmed our hands on cups of rich cocoa, Swiss chocolate of course. 12 Winter Game Weekend Chalkboard Tray.jpg

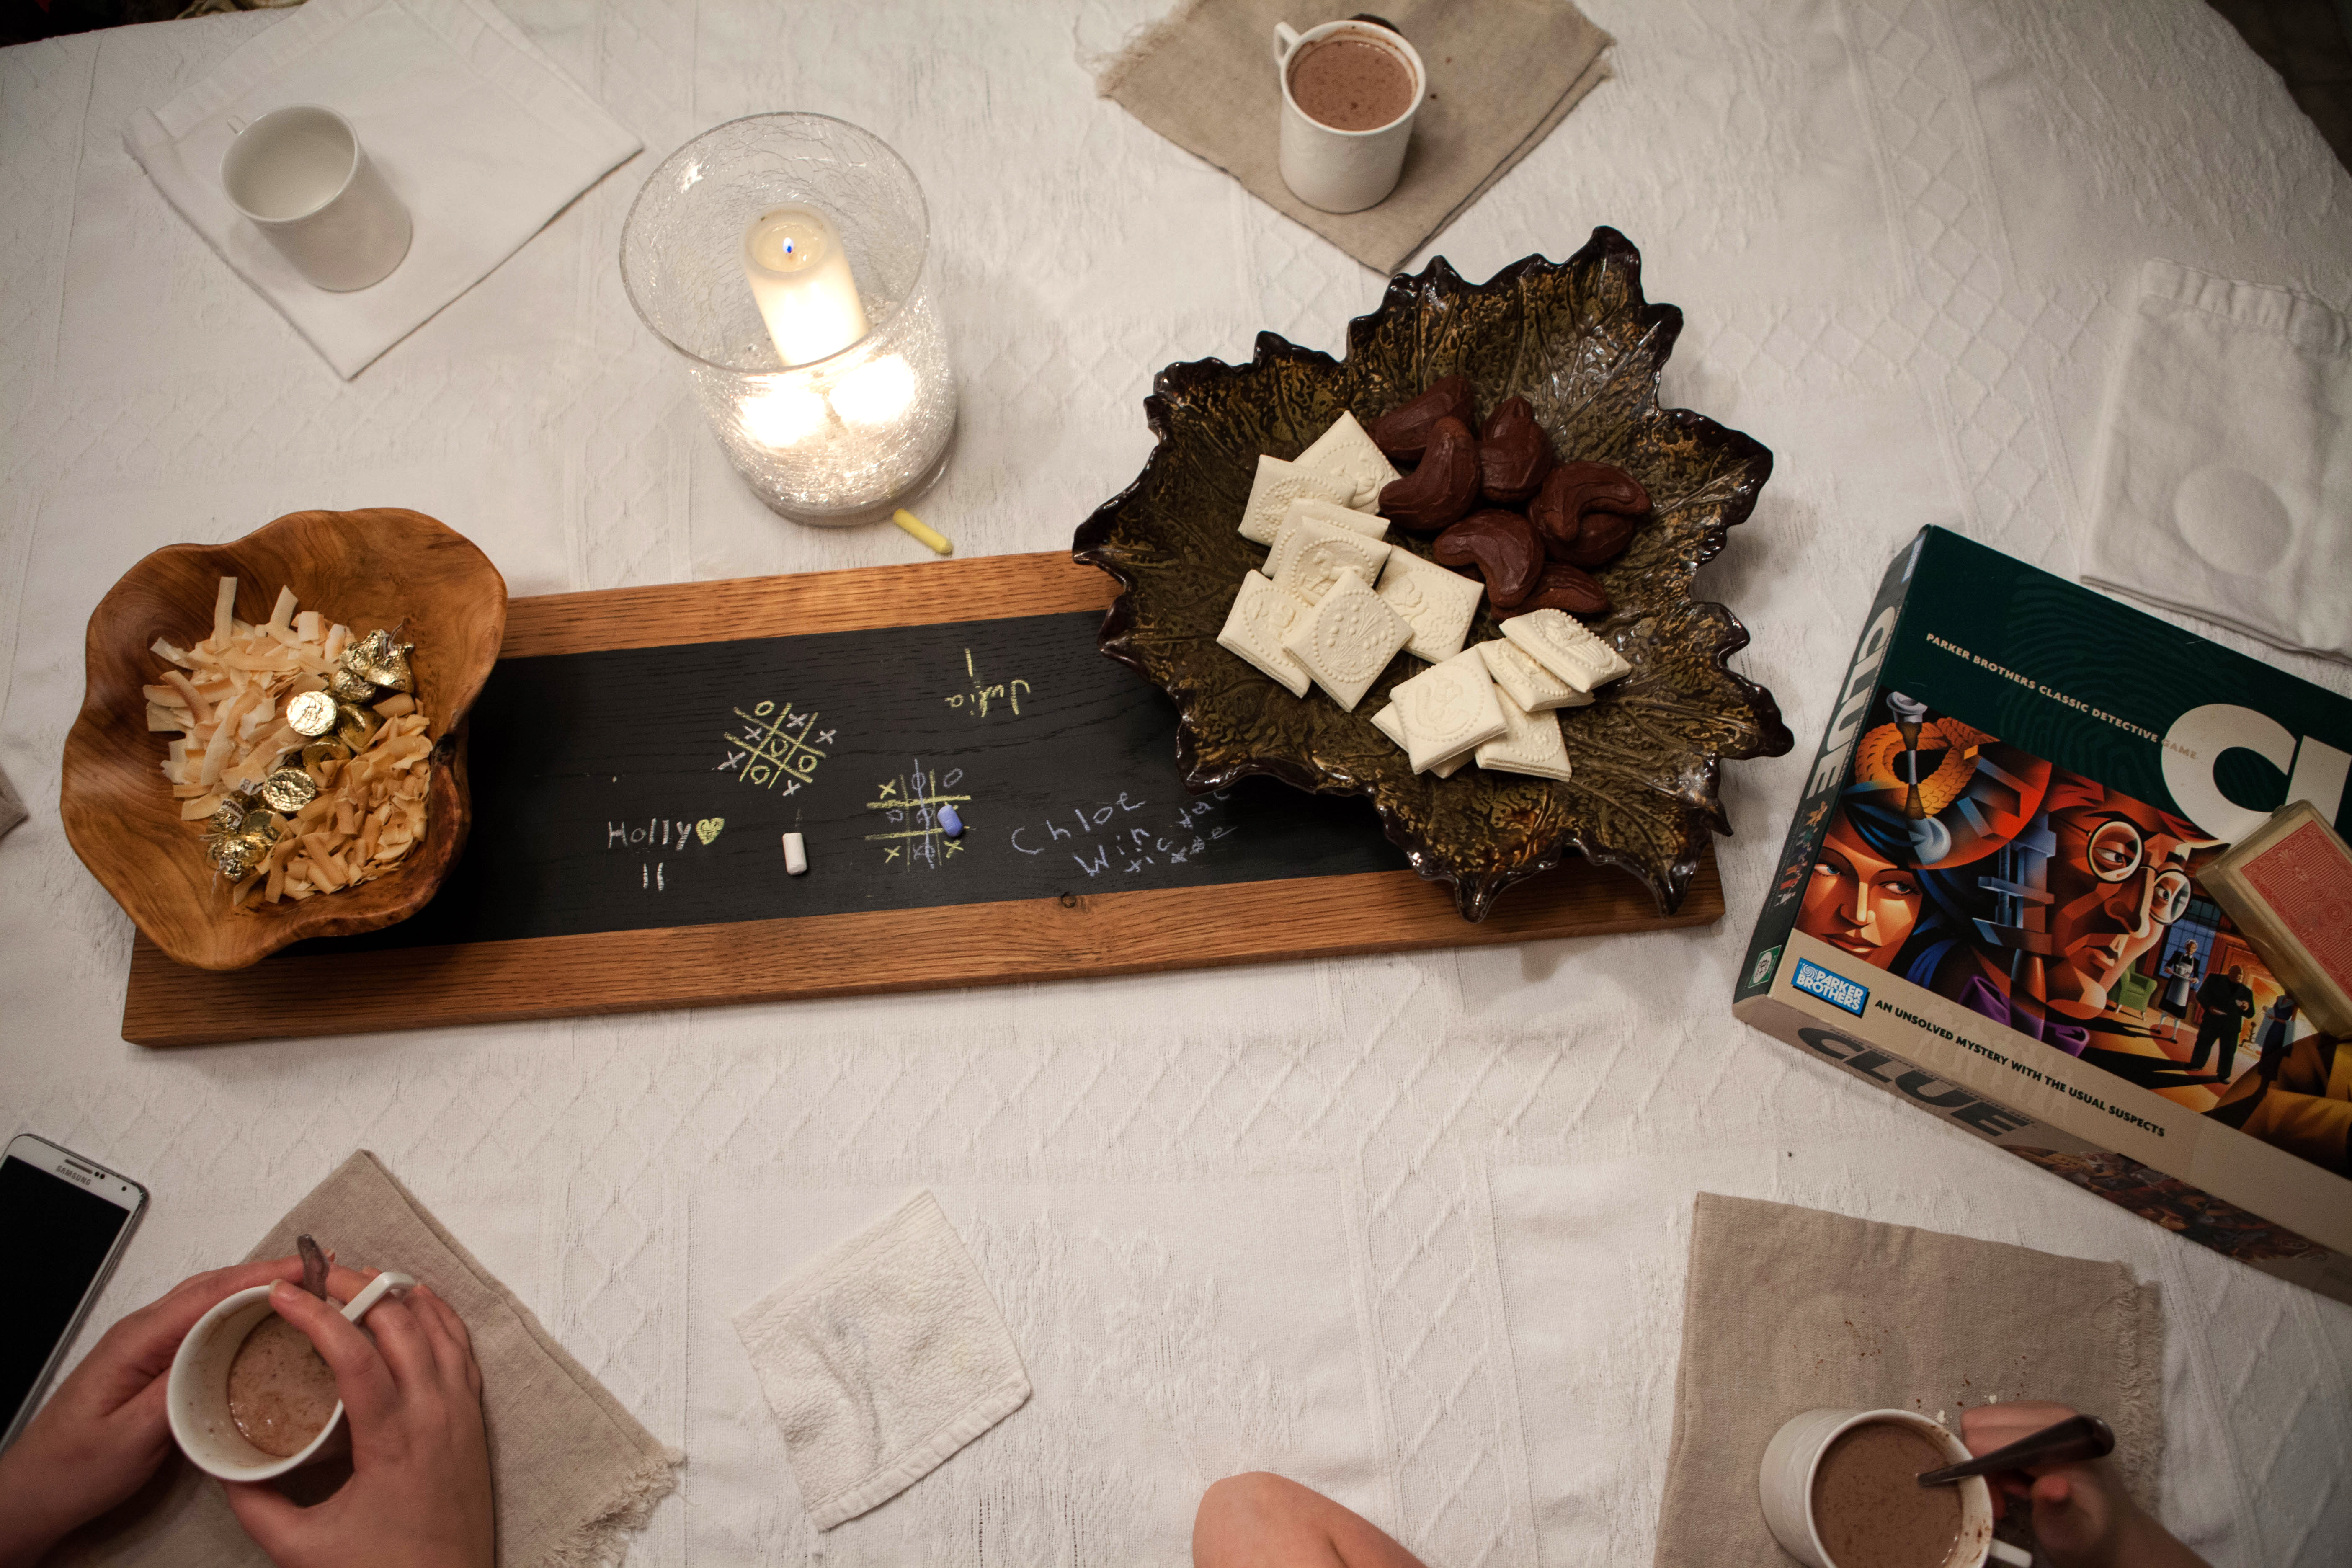
Friday night was just the girls. We played Old Maid, the very cards that I used in my childhood in the 60’s. So much fun!! 13 Winter Game Weekend playing Old Maid.jpg 
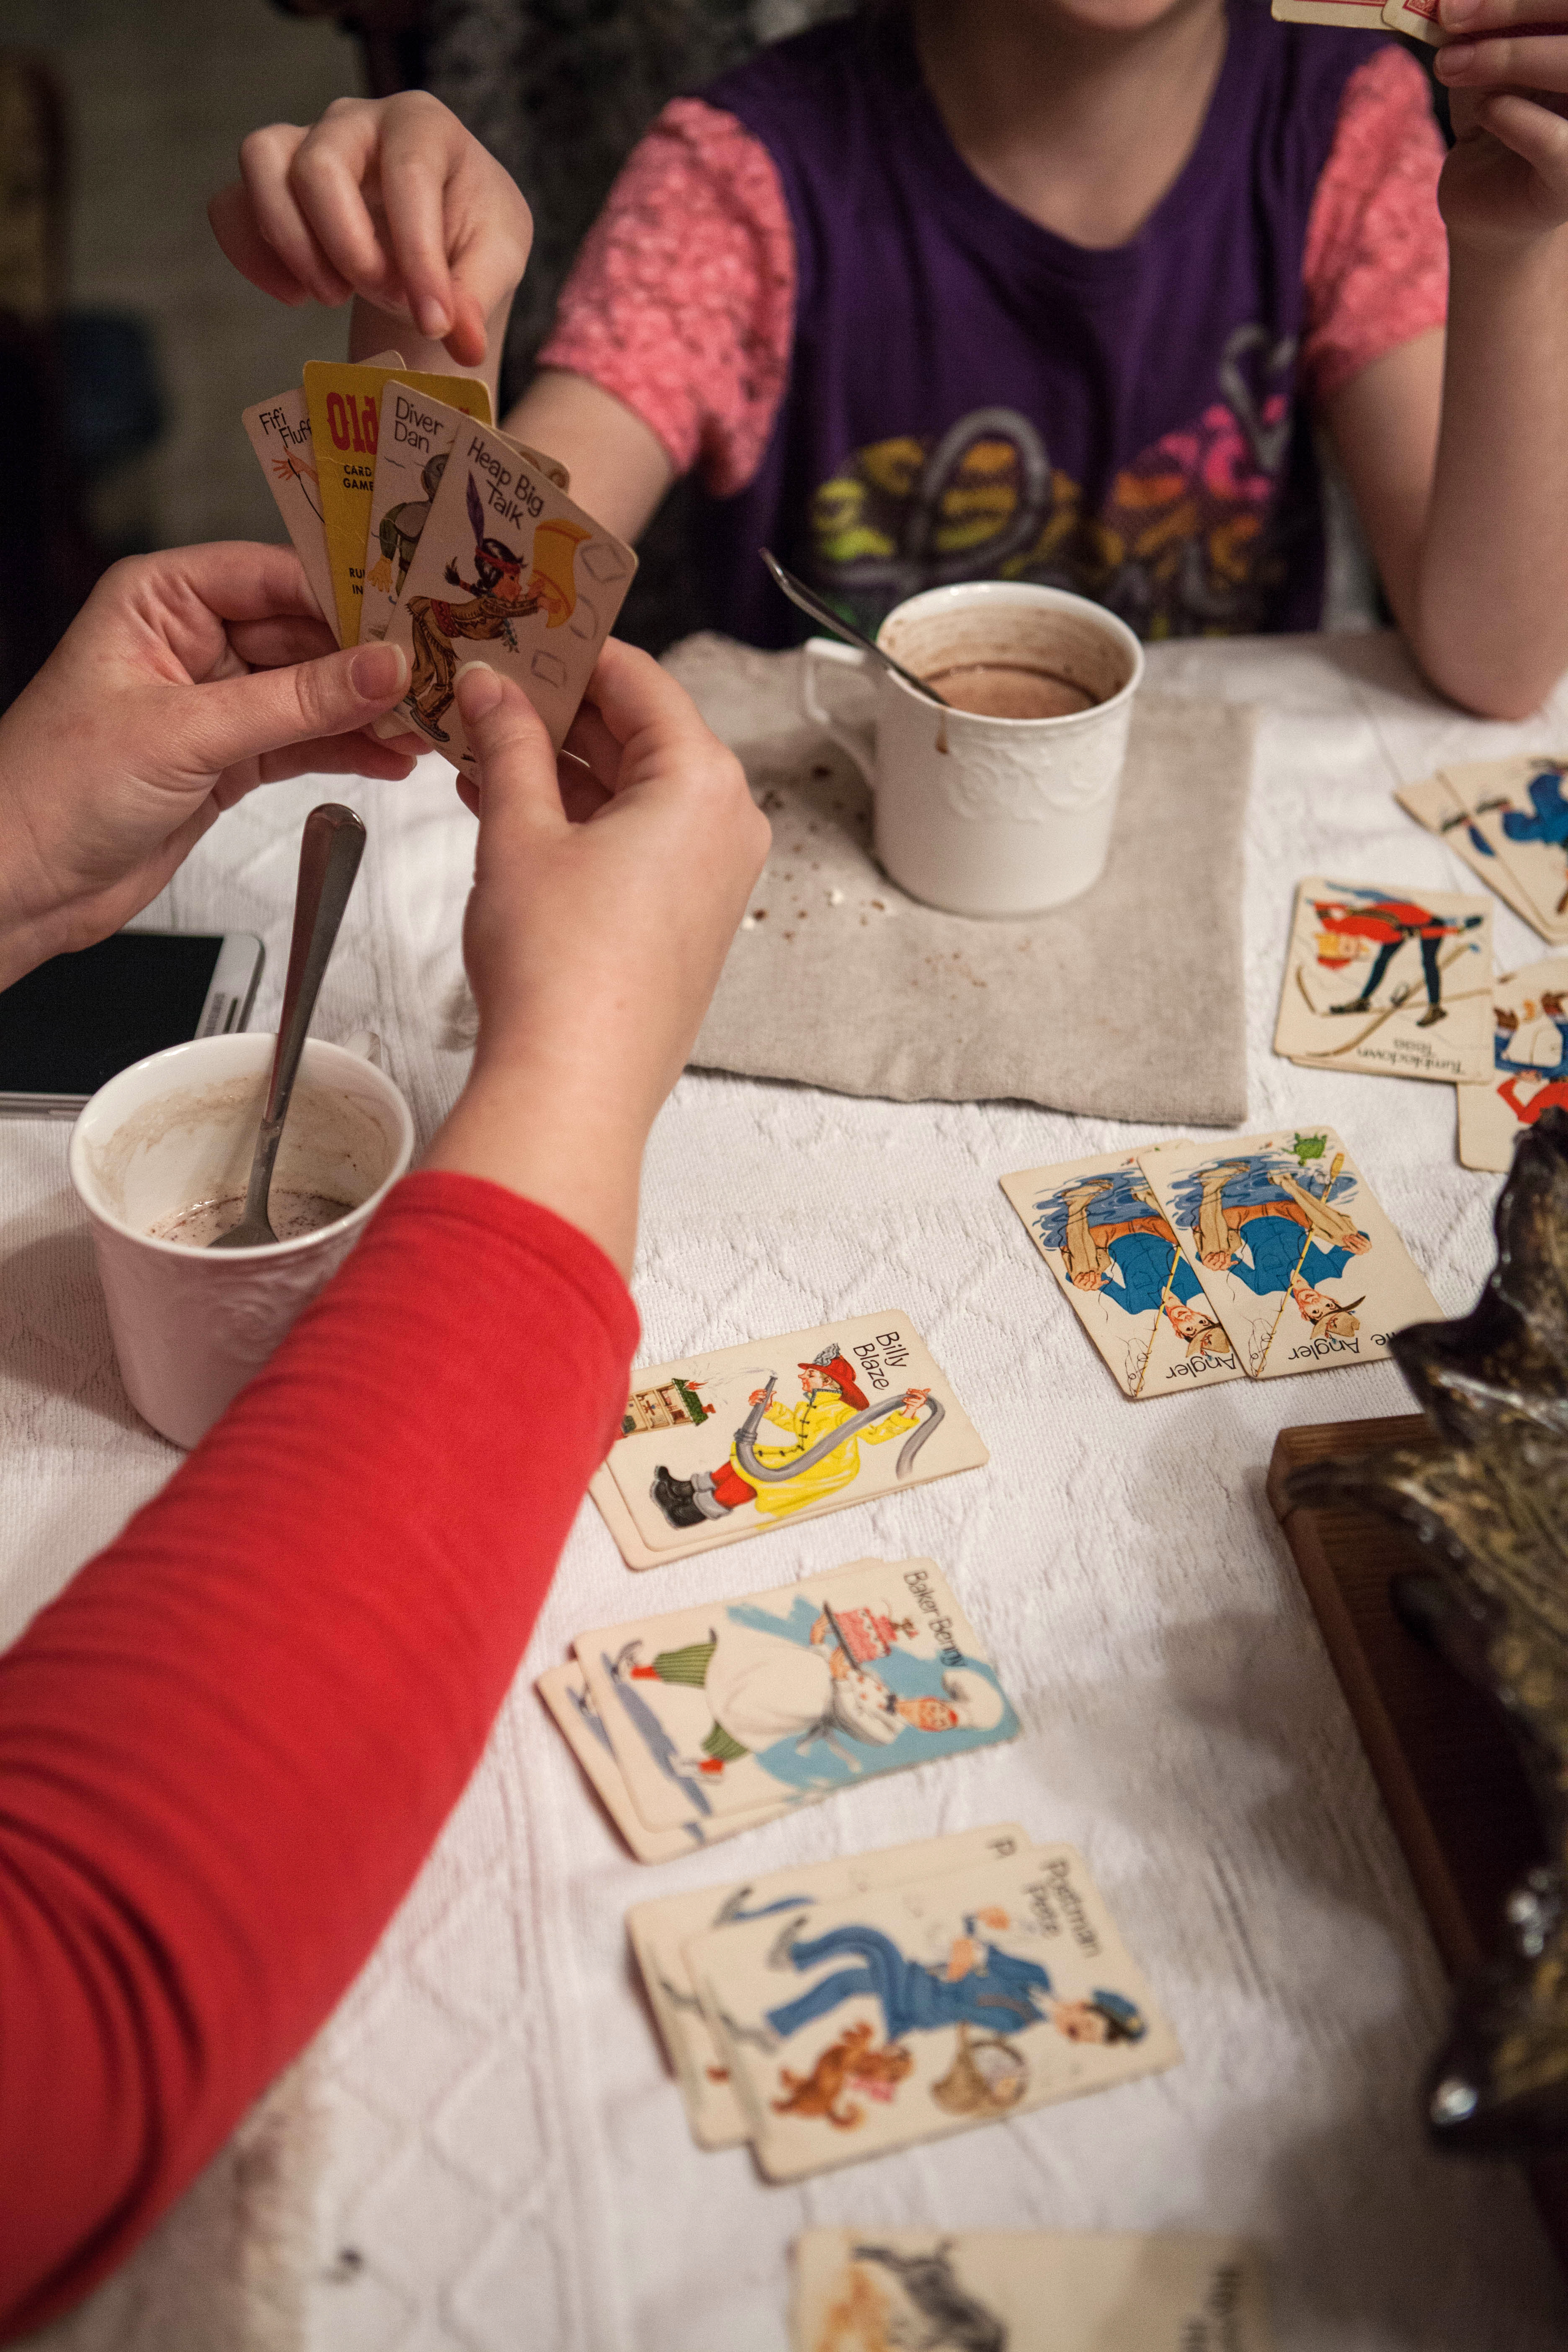
It had been so many years since I played with those cards. There was Fifi and her poodle, Greenthumb Gert, whose plantings were being nibbled up by rabbits as fast as she planted them, and Milkman Mo with his begging cats. Love the humor in these old cards, which probably would be deemed totally “politically incorrect” now-adays. 14 Winter Game Weekend vintage Old Maid cards.jpg

Saturday night, children and adults together played Clue. We did our best using  English accents and Oh the mystery and laughter!

15-winter-game-weekend-clue
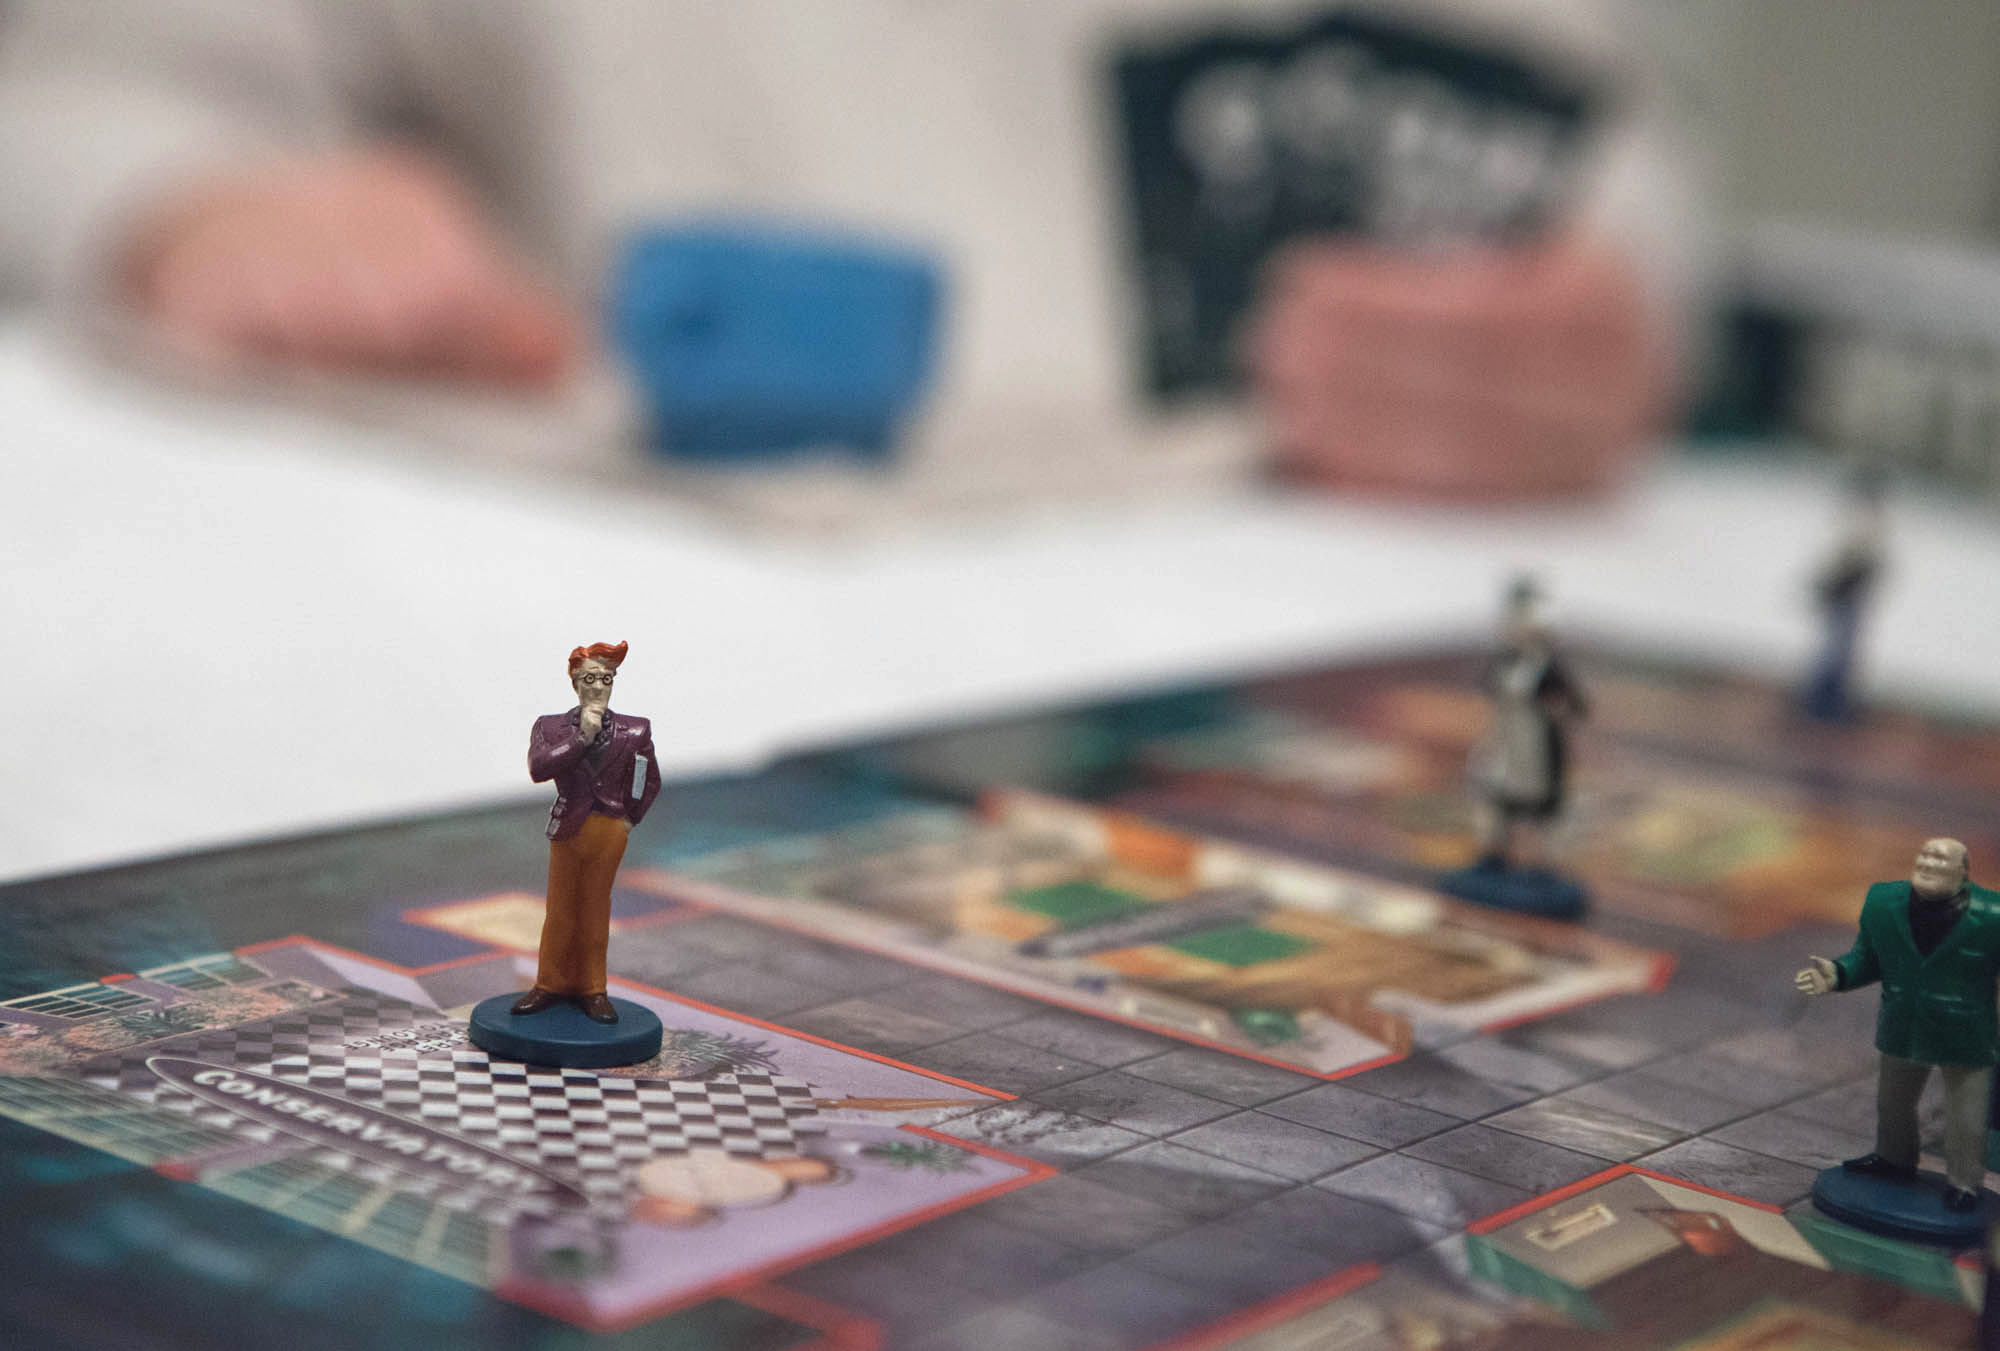
Miss Peacock, how can you be capable of such a deed! Mr Plum’s strategy was quite scientific. And Colonel Mustard actually held the pistol and knife. This view of the chandelier is only possible if you’re a game piece lying in the billiard room. haha 16-winter-game-weekend-professor-plum-looks-up

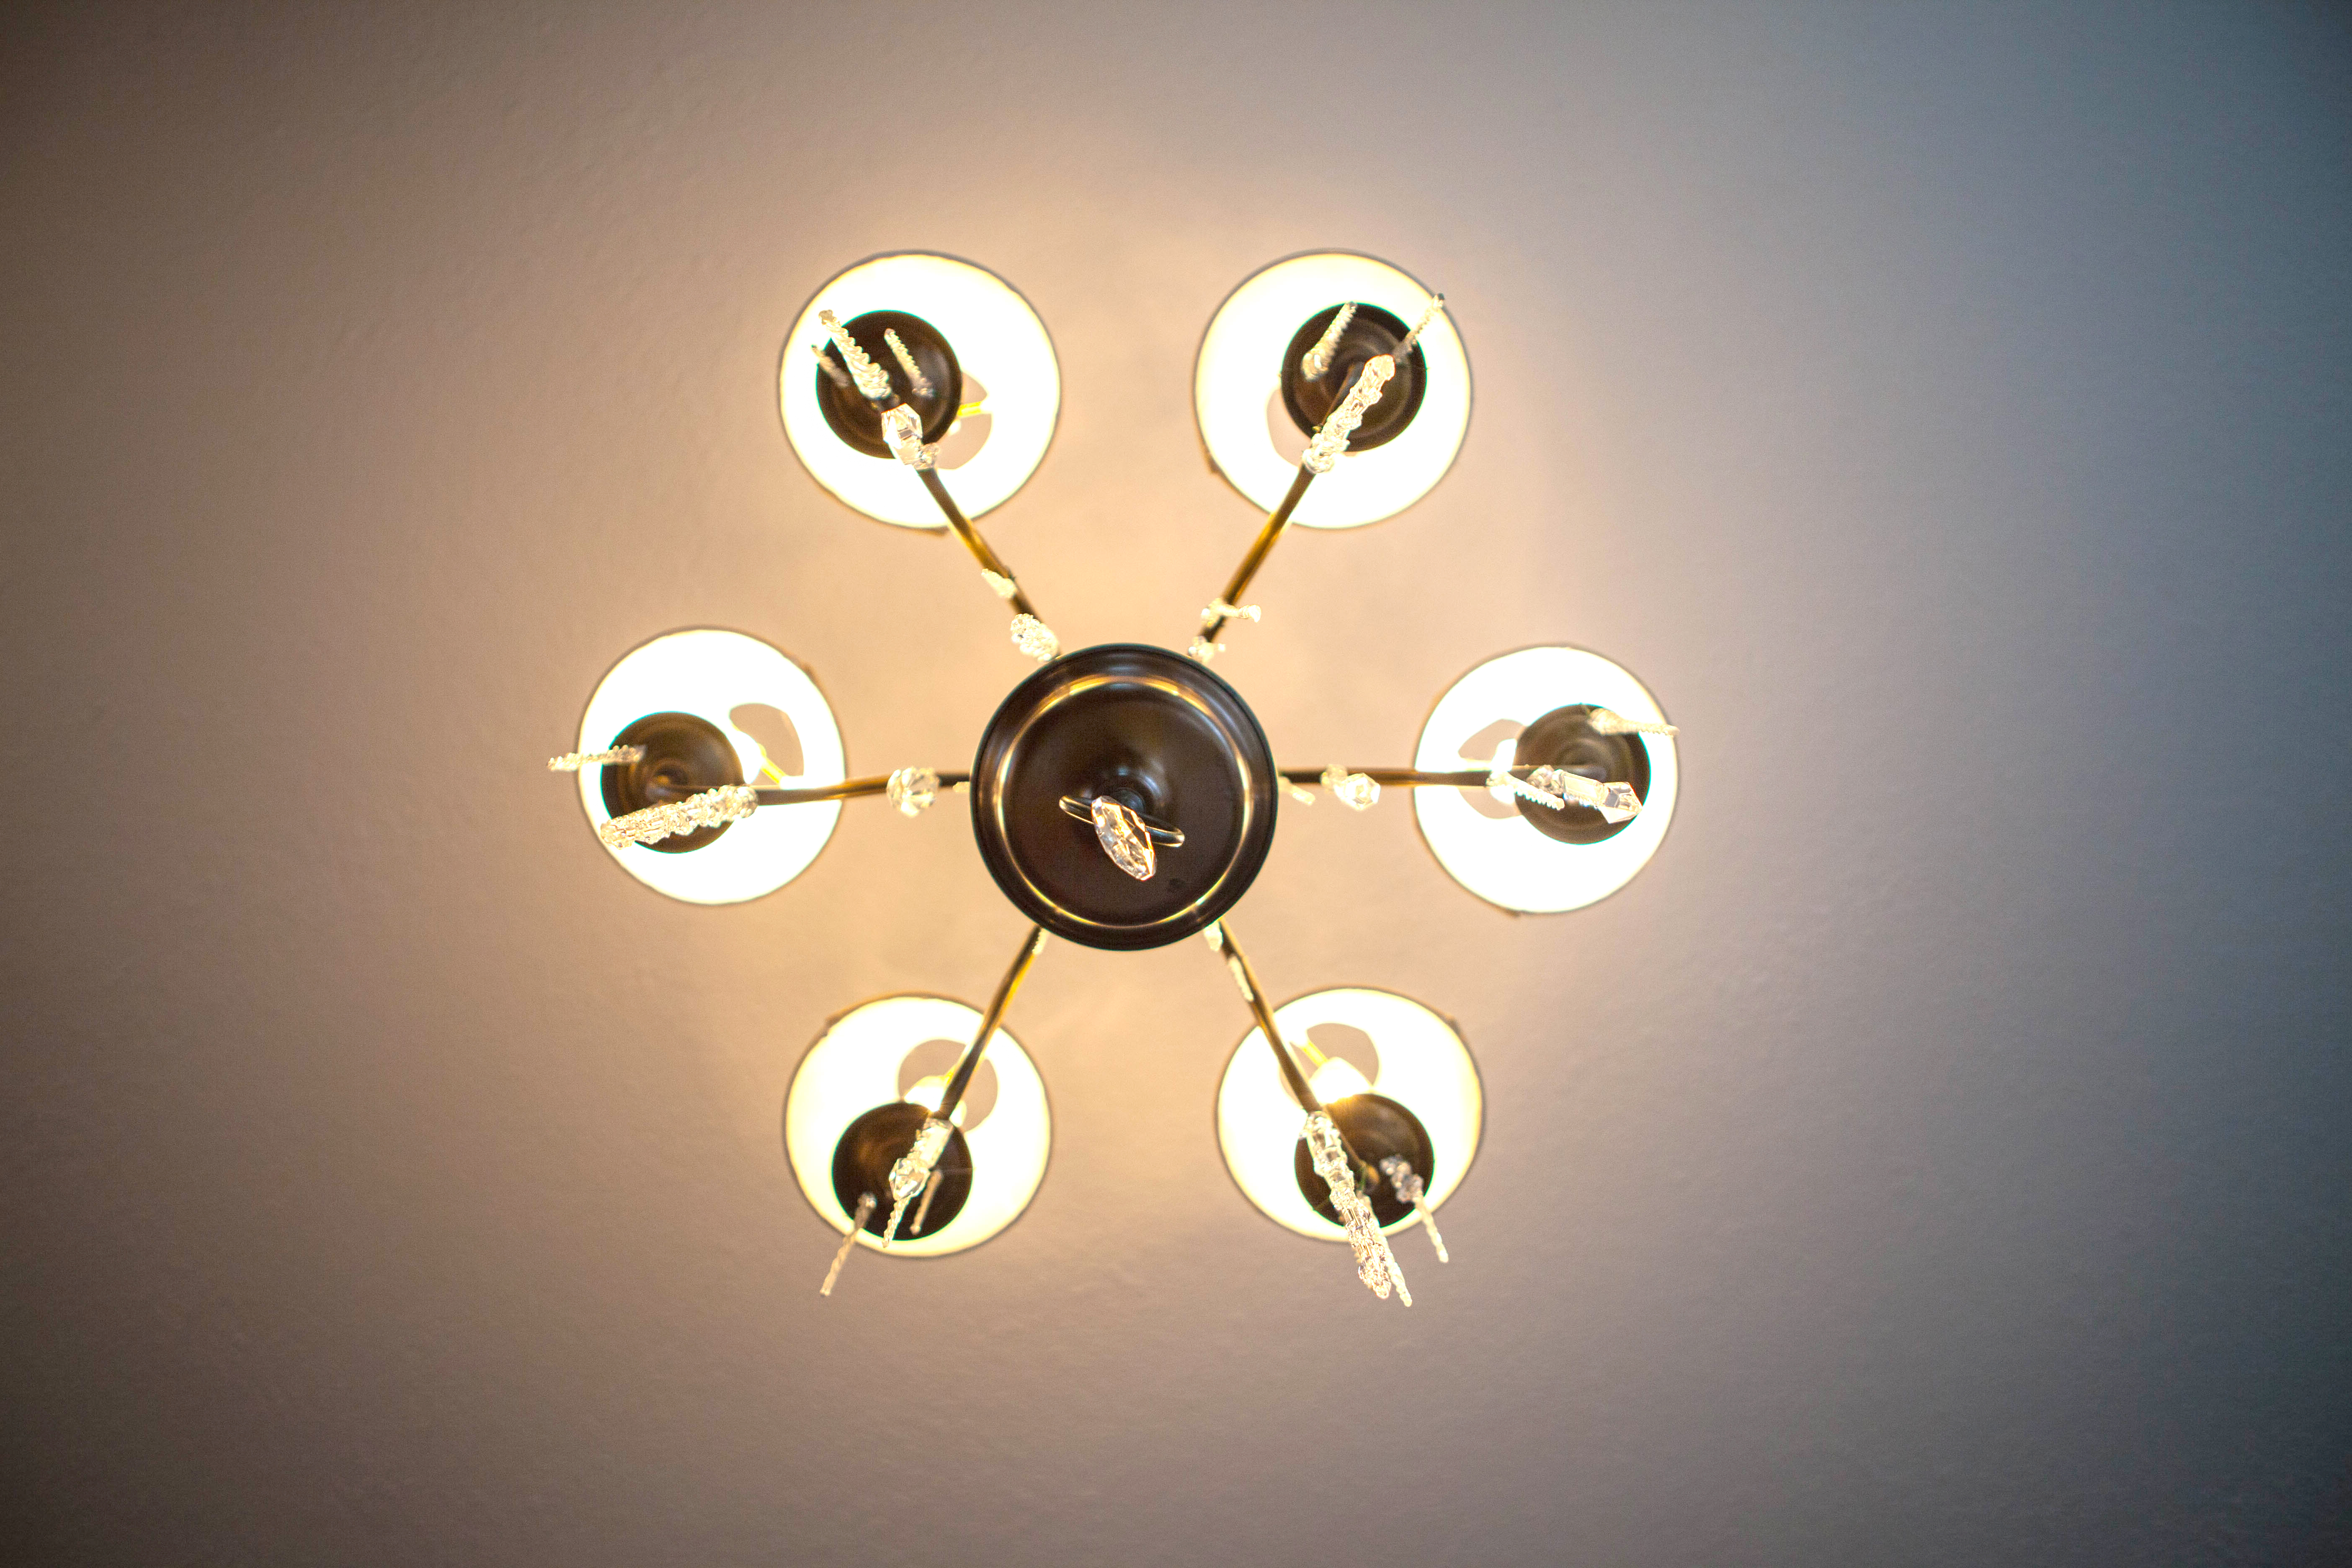
One of my favorite warming strategies was loading fireplace videos on tablets and displaying them in the bottom of the china cabinet. Fire where there is never any fire!  17-winter-game-weekend-china-cabinet-fireplace I sure wish some company would create a mini fake fire device that could play a simple, looping fire video like this and fit in a small space like a china cabinet. I would buy several in a heartbeat. Fire amongst the plants in the living room? Yes! Fire on my nightstand as I go to sleep? Yes! The last time we had a fake fire was when we made a fireplace in the oven. There’s something comforting about flame, even if it’s fake.

Sunday night’s beer and poker game ended up being postponed because the flu visited. Alas. But even as I write this, I’m feeling quite toasty. The throws are still on the chairs and I feel the warmth radiating against my back. My laptop is set up on this table and my arms are leaning in on the softness as I type. A Winter Game Weekend after Christmas has definitely become a tradition in our home.

18-winter-game-weekend-all-the-best-of-the-worlds-warmth

Share this:

  • Click to share on Twitter (Opens in new window)
  • Click to share on LinkedIn (Opens in new window)
  • Click to share on Facebook (Opens in new window)
  • Click to share on Pinterest (Opens in new window)
  • Click to share on Reddit (Opens in new window)
  • Click to email a link to a friend (Opens in new window)
  • Click to print (Opens in new window)
  • Click to share on Tumblr (Opens in new window)

Like this:

Like Loading...

Dessert Tea

15 Wednesday Oct 2014

Posted by Julia Monroe in All Sparkled Up, baking, birthday, family, food, party, projects, tea time

≈ 3 Comments

Tags

All Sparkled Up, baking, dessert, dessert table, food, party, Rosanna, tablescape, tea time

The timing was right… It was Rosanna’s 8th Annual Tablescape Contest, my daughter-in-law’s birthday, and I was finally healed enough to tackle an ambitious baking event. What better way to celebrate all three than with a Dessert Tea!

1 Dessert Table

Dessert Tea table setting

Here is the table before I started adding all the desserts. I made the tablecloth from an old bedspread with fringed edge. (You can see scraps from that old tattered bedspread in the photos of Tea by the Sea. Crafters don’t waste any scrap. Ha!)

I adore Rosanna’s style and was hoping to enter her 2013 tablescape contest last summer. But we didn’t get the remodel done in time and I wasn’t very mobile back then. The china cabinet was emptied so we could move it around and all the china was stacked on two tables in the living room. That’s when I got the idea for a blue and white and yellow theme for a table.

This year, I thought about the Dessert Table theme for weeks. Each time I got an idea, I added it to my notes.
2 Dessert Tea notes

4 Dessert Tea Centerpiece

Four elegant mugs on a dessert pedestal hold the floral centerpiece.

After I decided on the serving dishes, I wrote a list of tasks, desserts and a tentative baking schedule.
3 Dessert Tea schedule
There were two main focal points for the table, Rosanna’s elegant Luxe Moderne mugs for the centerpiece, and her La Mode fashion plates.
I used four of Rosanna’s mugs on a vintage dessert pedestal to make the centerpiece. I was so excited about this design. It has a lot of potential and I plan on using four mugs as a centerpiece base for other tablescapes.

Sugar cookies were painted following Rosanna’s designs on her mugs. I wrote about the cookies here. It was challenging to paint the designs! I have new respect for Rosanna’s design skill.
5 Gilded dress cookies
The fashion plates are so pretty!
6 Rosanna Inc La Mode plates

7 Napkins hung like little dresses

These are not dresses, they are napkins! Small squares of fabric folded are diagonally and draped over a miniature hanger. A bit of ribbon and trim… and you have sweet petite dresses!

9 Tiered server with various trays

This server was made to accommodate round plates. But rectangle platters made for more interest.


This tiered server used to be bright red, yellow and blue but I painted it all white with acrylic paint. Instead of using round plates on the server, I used two rectangle trays on the bottom. It looked great!

12 Layered desserts

Dessert Tea – Layered Desserts with Vanilla Bean Cake, Raspberry Mousse and Orange Gelatin with Raspberry and Mandarin Orange Slice.

To continue the fashion theme, I cut 6″ to 8″ squares of fabric for petite tea napkins and fringed the edges. Each napkin was folded and draped over hangers to look like dresses. Most were folded diagonally. Each was tied at the “waist” with ribbon, a little flower tucked in the waist and a small piece of trim was draped over the top to look like a collar.

I made the miniature hangers from pieces of coat hanger cut with wire cutters. One coat hanger made three miniature hangers. The metal cake stand was perfect from which to hang the napkin dresses.
8 Little coat hangers

The tea service was on the back of the table, behind the desserts. I wrote how I made the Sugar Bonnets here.
10 Dessert Tea tea service
On the tiered server, top to bottom: Spritz, squares of Fudge and Shortbread, Butter Cookie Dresses.
11 Dessert on three tiers
I experimented with a new baking pan to make the Layered Desserts. They were delicious and so pretty! I will post the recipe some time.

The Layered Desserts looked perfect on the long rectangular tray.
13 Layered desserts
I also made a Lemon Orange Cheesecake topped with Pineapple and a Marmalade Glaze. So delicious!
14 Pineapple Orange Cheesecake

16 Cherry Tarts

Dessert Tea – I didn’t have time to make round pastry shells. It was quick and easy to cut squares with a pizza cutter and place the pie pastry in the tart pan.

19 Dessert table

Dessert Tea – a table set with a delicious assortment of desserts: Layered Desserts, White Chocolate Praline Cake, Pineapple Marmalade Cheesecake, Cherry Tarts, Spritz Cookies, Fudge, Scottish Shortbread, Butter Dress Cookies, Chocolate Cupcakes with Caramel Macadamia Frosting, Honeydew Melon Balls with Blueberries and a bowl of Cherries.

20 Fabric napkin folded to look like a dress on a hanger

Dessert Tea – napkins folded diagonally and hung on a miniature hanger, tied with ribbon and draped with lace.

Two bowls held Honeydew Melon balls and Blueberries and Cherries, garnished with fresh mint.
15 Fresh cherries honeydew melon and blueberries
Cherry Tarts were on a glass dish.

I only had four covered glass dishes but that was enough to place four Chocolate Cupcakes with Caramel and Macadamia Frosting.
17 Chocolate Cupcakes with Caramel Macadamia Frosting
The birthday cake was a White Chocolate Praline Cake with homemade Strawberry Raspberry Jam topping.
18 White Chocolate Praline Cake
All together, the table looked lovely and the event was a huge success!

I submitted my photos and won an honorable mention in the tablescape contest… happy face! =)
My daughter-in-law was thrilled with her birthday, the girls loved the dress napkins and all our guests enjoyed the delicious desserts.
And it was the perfect event to celebrate the return of my health and stamina after such a long recovery. A sweet day indeed!

Share this:

  • Click to share on Twitter (Opens in new window)
  • Click to share on LinkedIn (Opens in new window)
  • Click to share on Facebook (Opens in new window)
  • Click to share on Pinterest (Opens in new window)
  • Click to share on Reddit (Opens in new window)
  • Click to email a link to a friend (Opens in new window)
  • Click to print (Opens in new window)
  • Click to share on Tumblr (Opens in new window)

Like this:

Like Loading...

Table centerpiece using four mugs and a vintage cake pedestal

03 Wednesday Sep 2014

Posted by Julia Monroe in flowers, home decor, party, tea time

≈ Leave a comment

Tags

centerpiece, dessert tea, floral arrangement, flowers, Inc, mugs, pedestal, Rosanna, table, table setting, tablescape

That was a long subject. Ha! I had a dessert tea a couple months ago and this was the centerpiece. I used four beautiful mugs from Rosanna, Inc and placed them on a vintage dessert pedestal that was my mom’s. It was so easy to arrange the flowers in the mugs! I’ll be doing this again. After the event, I put away the pedestal but kept the flowers on the table a while. They were so pretty with the elegant gold china designs.

Rosanna's Luxe Moderne Mugs make the perfect "vase" for the flower arrangement.

Rosanna’s Luxe Moderne Mugs make the perfect “vase” for the flower arrangement.

Share this:

  • Click to share on Twitter (Opens in new window)
  • Click to share on LinkedIn (Opens in new window)
  • Click to share on Facebook (Opens in new window)
  • Click to share on Pinterest (Opens in new window)
  • Click to share on Reddit (Opens in new window)
  • Click to email a link to a friend (Opens in new window)
  • Click to print (Opens in new window)
  • Click to share on Tumblr (Opens in new window)

Like this:

Like Loading...

Wine & Cheese Tasting

18 Friday Oct 2013

Posted by Julia Monroe in baking, food, party, Uncategorized

≈ 2 Comments

Tags

Abbaye de Belloc, cheese, cheese tasting, culinary, food, food photography, foodie, menu, party, photo, photography, Wine & Cheese Tasting, wine and cheese

The very day after we placed the last dish in the china cabinet, we threw a Wine & Cheese Tasting party for eight. It was splendid!
We let the cheese monger at Southern Season recommend five cheeses and I picked out a sixth. I put the cheeses on fig leaves picked from our trees. The cheese  selection was perfect!
The cheeses:
Appalachian, a firm cheese made from raw cow’s milk
Abbaye de Belloc, a semi-hard cheese made from unpasteurized sheep’s milk, still made by Benedictine Monks in France following a recipe centuries old
Rogue River Blue, a gorgeous semi soft blue cheese, wrapped in grape leaves (oh my goodness, this was amazing!)
Capricho de Cabra with Pepper, one of the best goat cheeses I’ve ever had, tangy and melt-in-your mouth creamy
Morbier AOC, a semi-soft cow’s milk cheese from France with a distinct vein of ash running through the middle
Fromager d’Affinois, a soft, double-cream cheese. This one was a favorite and we finished it off the next day.
Cheese Tasting Oct 2013 1a
Cheese Tasting Oct 2013 1b
With a tight budget, we picked wine from our own rack. Unfortunately, we were out of all our favorite dry whites and these were on the sweet side. They still went beautifully with the cheeses.
The whites: Lillet, Riesling
The red: Cabernet Sauvignon
The non-alcoholic: Sparkling Cider
Cheese Tasting Oct 2013 1c

Even though there was no cooking, it still took well over an hour to plate everything because we chose the serving ware as we went. I’ll remember that the next time and plan ahead. And of course the cheese was set out at least an hour before to come to room temperature for best flavor. We used fig leaves from our trees in the back yard for the cheese trays.
I had printed up tasting note sheets for everyone to fill out but we didn’t use them. We just ate and talked and had a jolly good time commenting about favorite combinations of cheese with wine and accompaniments.
Cheese Tasting Oct 2013 2a

Cheese Tasting Oct 2013 2b

Cheese Tasting Oct 2013 3a

Cheese Tasting Oct 2013 4a

Cheese Tasting Oct 2013 4b

Cheese Tasting Oct 2013 5a

Cheese Tasting Oct 2013 6a

Cheese Tasting Oct 2013 7a

Cheese Tasting Oct 2013 8a

Cheese Tasting Oct 2013 9a

Cheese Tasting Oct 2013 10a

Cheese Tasting Oct 2013 11a

Cheese Tasting Oct 2013 12a

Cheese Tasting Oct 2013 13a

Cheese Tasting Oct 2013 14a

Cheese Tasting Oct 2013 15a
It was early afternoon and the party was a success. After having plenty of cheese and wine, we looked over the table and calculated that all we needed was another bottle or two of wine and there would have been plenty for a party of 12. Well, we’d need at least another pound of bacon too.
I’m glad I documented the party so it will be easy to duplicate again.
Cheese Tasting Oct 2013 16a

Cheese Tasting Oct 2013 17a

Cheese Tasting Oct 2013 20a
We made the baguette and bread sticks from scratch. I’ll post the recipes with photos next time we make them. The bread sticks made a great centerpiece!
We finished with a selection of chocolates. I could only afford a couple artisan chocolates so we carefully sliced them for sharing. The Vanilla Lavender and Cinnamon Mocha were delicious! The next time I go back to Southern Seasons, I’ll get more of those and post proper credit.
Cheese Tasting Oct 2013 22a
It was an excellent meal with excellent company. Cheers to all!

Share this:

  • Click to share on Twitter (Opens in new window)
  • Click to share on LinkedIn (Opens in new window)
  • Click to share on Facebook (Opens in new window)
  • Click to share on Pinterest (Opens in new window)
  • Click to share on Reddit (Opens in new window)
  • Click to email a link to a friend (Opens in new window)
  • Click to print (Opens in new window)
  • Click to share on Tumblr (Opens in new window)

Like this:

Like Loading...

4th of July 2013

04 Thursday Jul 2013

Posted by Julia Monroe in All Sparkled Up, party, sparkling, words

≈ Leave a comment

Tags

4th of July, fireworks, sparkler, yolo

YOLO

YOLO

Share this:

  • Click to share on Twitter (Opens in new window)
  • Click to share on LinkedIn (Opens in new window)
  • Click to share on Facebook (Opens in new window)
  • Click to share on Pinterest (Opens in new window)
  • Click to share on Reddit (Opens in new window)
  • Click to email a link to a friend (Opens in new window)
  • Click to print (Opens in new window)
  • Click to share on Tumblr (Opens in new window)

Like this:

Like Loading...

Dessert Buffet

30 Saturday Jun 2012

Posted by Julia Monroe in baking, food, party

≈ 16 Comments

Tags

baking, banana pudding, catering, coconut cupcakes, dessert buffet, desserts, food, key lime pie bars, party, peach melba, peach melba shortcake, pecan pie, pecan tarts, petit fours, strawberry trifle

Several weeks ago I catered a wedding rehearsal event – Individual size Southern-style desserts for 85. I was quite busy with the preparation so these are all the photos I took. It was my first non-wedding cake event. I will say, making individual size servings of seven different desserts for 85 people is much more complicated than making a wedding cake for 250! Whew! I was thrilled that it turned out so well. Three of my sons did a fantastic job helping the day of the event. So very thankful for their help.

I prepared 24 separate recipes for all the components. I didn’t have time to make the Silk Buttercream for the Pecan Tarts so I had to use a simple buttercream instead but everything else went according to plan. Not seen well in the photos: bowls of Peanut Brittle, Spiced Pecans, Fresh Strawberries. Also: Pink Lemonade, Strawberry and Orange stick candy.

Dessert Buffet

Dessert Buffet

One of the beautiful bouquets from the buffet table, given to me by my dear friend after the event. I was not able to get a photo of the table with the bouquets but it looked lovely!

Banana Puddings, garnished with a mini Banana Spice Cookie with Lemon Frosting.

Banana Pudding

Half-size Toasted Coconut Cupcakes, garnished with unsweetened Toasted Coconut and large Coconut Flakes.

Coconut Cupcake

Key Lime Pie Bars, garnished with a thin slice of Key lime.

Key Lime Pie Bars

Peach Melba Shortcake, served with Fresh Raspberry Mousse, a Cinnamon Biscuit and Vanilla Bean Cream.

Pecan Tarts – one sweet bite of Pecan Pie.

Petit Fours – Lemon Sponge Cake with raspberry jam and Almond Poured Fondant.

Petit Fours

Strawberry Trifle – layers of sherry-soaked Vanilla Bean cake with Italian Custard and strawberries.

Share this:

  • Click to share on Twitter (Opens in new window)
  • Click to share on LinkedIn (Opens in new window)
  • Click to share on Facebook (Opens in new window)
  • Click to share on Pinterest (Opens in new window)
  • Click to share on Reddit (Opens in new window)
  • Click to email a link to a friend (Opens in new window)
  • Click to print (Opens in new window)
  • Click to share on Tumblr (Opens in new window)

Like this:

Like Loading...

Ballerina Cake Pops!

09 Saturday Jun 2012

Posted by Julia Monroe in baking, birthday, crafts, family, food, party, projects, tutorial

≈ 21 Comments

Tags

ballerina, ballerina banner, ballerina cake pops, birthday, birthday party ideas, cake pops, decorated cake, food, girl's party, honeycomb, honeycomb banner

Here are more photos from my granddaughter’s 4th birthday party. This is a long post with many photos. Please click on a photo to see a larger version if you wish. I made Ballerina Cake Pops for her in her favorite colors, purple and pink.

Ballerina Cake Pops

I drew little ballerinas on white plastic cut from clean buttermilk jugs. Then I carefully cut them out using embroidery scissors. The cake balls were made and chilled and then I inserted the ballerina into the cake ball. You can see the feet of the ballerinas sticking out of the bottom of several of the cake balls. It would have been easier to just make picks but I wanted my Granddaughter to have a little plastic ballerina to play with when she was done eating the cake pop, so of course they had to have legs.

Since there was a ballerina in the cake pop, I could not dip it as usual. I spread the melted white chocolate around the ball with an offset spatula. These were placed in styrofoam and then placed in the refrigerator to chill.

The prepared cake pops were allowed to come to room temperature before piping rows of sugar ruffles using a small rose tip.

All the cake pops were placed on a stage made of styrofoam around which I pinned crepe paper streamers and gilded trim.

She loved the Ballerina Cake Pops. I was so happy!


I made a banner of ballerinas but forgot to take a photo of them hanging at the party. Here are photos of the construction.

Honeycomb Ballerina Banner

The ballerinas were drawn in Photoshop, based on a similar project in Marie Claire Idees magazine. I had to modify the Marie Claire version since it was flat, not with a full honeycomb skirt. Here you can see the honeycomb bridal shower garland from which I cut the skirts.

The ballerinas are drying after I applied glue and glitter to the shoes, bodices and tiaras.

The ballerinas are prepared for hanging. A single thin wire will be attached through a pinhole at the top of each ballerina and strung with crystal beads.

The ballerinas are hung temporarily in my dining room as I work on the hanging wires on each one They looked lovely at the party and I’m sorry I forgot to get a photo.

I just adore my granddaughter and there is no project too tedious or complicated that I wouldn’t do for her.


Share this:

  • Click to share on Twitter (Opens in new window)
  • Click to share on LinkedIn (Opens in new window)
  • Click to share on Facebook (Opens in new window)
  • Click to share on Pinterest (Opens in new window)
  • Click to share on Reddit (Opens in new window)
  • Click to email a link to a friend (Opens in new window)
  • Click to print (Opens in new window)
  • Click to share on Tumblr (Opens in new window)

Like this:

Like Loading...

She’s almost Four!

19 Saturday May 2012

Posted by Julia Monroe in birthday, family, party

≈ 1 Comment

Tags

birthday

We celebrated the fourth birthday of my precious granddaughter today. There are more photos but I just had to post a few to commemorate the wonderful day.

We were busy watching her blow out the candles so none of us noticed her hand daintily holding her dress until we saw this photo.


She nibbled bites from the side of her sweet little cake.


Of course we must blow bubbles.


I adore her little cake with all the bites taken out of it!


Happiness wears curly pig tails.


Days like this have warmth that lingers long after the day is over. Love.

Share this:

  • Click to share on Twitter (Opens in new window)
  • Click to share on LinkedIn (Opens in new window)
  • Click to share on Facebook (Opens in new window)
  • Click to share on Pinterest (Opens in new window)
  • Click to share on Reddit (Opens in new window)
  • Click to email a link to a friend (Opens in new window)
  • Click to print (Opens in new window)
  • Click to share on Tumblr (Opens in new window)

Like this:

Like Loading...

Valentine Candy Bouquet

21 Tuesday Feb 2012

Posted by Julia Monroe in candy, crafts, food, party, projects, tutorial, Valentine's Day

≈ 8 Comments

Tags

bouquet, candy, candy bouquet, centerpiece, crafts, project, styrofoam ball, sweet, table decor, tutorial, valentine candy bouquet, Valentine's Day

We are still nibbling at the Valentine Candy Bouquet. It is delicious but very, very sweet. At this rate, it may hang on till Easter! Oh my! I do love the sparkling look of it though.

Valentine Candy Bouquet – 2012

Granddaughter Chloe nibbles a cake pop from the Valentine Candy Bouquet.

Here are directions on making the bouquet.

Prepare basket.

1. Cut Styrofoam to fit tightly in the bottom of a basket. Secure it firmly in the  basket so it won’t shift or move at all.

Secure Styrofoam in the bottom of a basket.

2. Spread out a set of battery operated bouquet or centerpiece lights over the Styrofoam in the basket. I purchased this light set at either Michael’s or A.C.Moore several years ago. Alas, I do not know if these lights are still made or sold elsewhere. Insert toothpicks around the light set in the area where the ball will be placed.

Spread light set around the edge of the basket.

3. Cut off a slice of a 5” Styrofoam ball so it can sit flat. Press the Styrofoam ball down firmly onto the toothpicks. Insert several other toothpicks around the base of the ball to secure it tightly. Trim toothpick ends with wire cutters.

Press the Styrofoam ball firmly down on the toothpicks

4. Scrunch a length of 12” wide tulle around the base of the ball, covering the lights and wires. I used a piece 12″ by about 6 feet long.

Prepare the candy.

5. To make Conversation Heart Batons, use royal icing to secure conversation hearts to a lollipop stick. When dry, pipe royal icing between the hearts and sprinkle with mini sprinkles. Tie a bow at the base with an 8” piece of ribbon; trim the ends.

Conversation Heart Batons

6a. For candies with square wrappers, twist one end of wrappers and wire three candies together.

Wire together three small candies

6b. Twist the candy bundle together around the end of a lollipop stick and secure with the wire. Tie with an 8” length of ribbon.

Wire the candy bundle around a lollipop stick & tie with ribbon

7. Cut a heart from gold paper, punch a small hole at the top and write a message. Tie a piece of lace and the gold heart to a lollipop with string.

Tie lace and a message with string to a lollipop.

8. Prepare cake pops as desired. I made chocolate cake pops by following the directions in Bakerella’s Cake Pops cookbook and using homemade frosting instead of store-bought frosting. These were the first cake pops I’ve ever made so mine were a little lumpy. But I was really happy they turned out and they are delicious!

Round cake pops.

9. Cake Pop secret – use lots of sprinkles to cover up mistakes.

Cone-shaped cake pops.

10. To help disguise the printed text at the base of lollipop wrappers, cut a fringe in the wrapper. Tie with a bow or twist tie.

Fringe bottom of lollipop wrapper and then tie with ribbon or twist tie.

11. I ended up not adding these to the bouquet. They looked very pretty in a glass dish next to the bouquet.

A dish of gold-wrapped Ferrero Rocher chocolates.

Assemble the centerpiece.

12. Using wire cutters, cut the end of one candy stick to make a slight point and insert it into the Styrofoam ball to see if you like the length. Remove the stick from the Styrofoam and adjust the length as desired. Cut sticks and insert candies, starting with the candy of which you have the fewest. I only had 8 sticks of rock candy so I inserted them first to evenly distribute them.

Cut sticks shorter with wire cutters and insert into Styrofoam ball.

13. Start in the center and work your way out as you fill the bouquet. Cut some sticks shorter so the candies help cover the Styrofoam ball. Next time I will make more of the little candy bundles to fill in the base better. I made 11 but 14 would have been better.

Valentine Candy Centerpiece

14. If desired, fill in any remaining spots on the Styrofoam ball with ribbon or tulle bows on wires. You can also use green gumdrop leaves, tissue paper or artificial flowers and leaves. I decided to leave the center open so the light set would light up the candy more.

To make ahead, the cake balls can be prepared a day or two ahead, as recommended in Bakerella’s cookbook. This bouquet was made on Valentine’s Day and then refrigerated that night, covered with plastic wrap for storage. It is one week later and the bouquet still looks wonderful and the cake pops are every bit as delicious, especially cold. Next year, I’ll prepare the cake pops several days before, refrigerating them until needed. The candies can be prepared well in advance and set aside. Allow an hour or so to insert all the prepared candies and cake pops.

In addition to holidays, a Candy Bouquet would look lovely for a Baby or Bridal shower, or as a Birthday centerpiece.

Valentine Candy Bouquet – click for a larger image.

Share this:

  • Click to share on Twitter (Opens in new window)
  • Click to share on LinkedIn (Opens in new window)
  • Click to share on Facebook (Opens in new window)
  • Click to share on Pinterest (Opens in new window)
  • Click to share on Reddit (Opens in new window)
  • Click to email a link to a friend (Opens in new window)
  • Click to print (Opens in new window)
  • Click to share on Tumblr (Opens in new window)

Like this:

Like Loading...

Miniature Birthday Fiesta

07 Saturday Jan 2012

Posted by Julia Monroe in crafts, miniature, party, tutorial

≈ 2 Comments

Tags

American Girl dolls, crafts, doll-size, fiesta, miniature, miniature pinata, tutorial

Host a doll-size Birthday Fiesta! This is one of the chapters that didn’t make the cut in Tiny Treats, a book I wrote in 2004. The centerpiece is a sweet little palm-sized pinata filled with real candy and plenty of delicious treats. Try the Three Teeny Quesadillas if you please or the Spicy Sombreros for a tiny treat. Use mini pinatas as place card holders or decorations on the table.

Miniature Birthday Fiesta!

For simple directions, see below.

For the Quesadillas, simply cut flour tortillas with a small round cookie cutter. Top with Beanie – refried beans and grated cheese, Cheesy – cream cheese with little slices of string cheese, sprinkled with paprika, or Sweetsie topping – apple pie filling with mini chocolate chips.

For the Spicy Sombreros, mix a little chili powder into cream cheese. Spread the cream cheese mixture in a little mound in the center of a round tortilla chip to make a hat. Sprinkle crushed corn chip crumbs over the cream cheese. Decorate with Pimientos.

Here are steps to make a Miniature Pinata.
You will need:
Toilet paper tube
Scissors
Masking tape
Paper punch
4 pieces plastic drinking straw, cut 1 1/2” long
Mini candies
Crayola Model Magic modeling compound
White acrylic paint
Tacky glue
1/2” wide strips of colored tissue paper
2 small black beads

Supplies to make a miniature pinata

Step 1: Cut a toilet paper tube in half lengthwise. Cut a 2” section from one of those pieces. Roll it into a tube to make the body and tape it.

Prepare candy-filled tube. Add straw “legs”.

Punch 4 holes on one side of the tube for the legs. Insert the pieces of straw for legs. Before inserting the back legs, add small candies to the tube. Cover the ends of the tube with masking tape.
Step 2: Use Crayola Model Magic to form the neck and head of a donkey or horse. Add more Model Magic to make the legs thicker. Let dry overnight.

Add Crayola Model Magic clay to make a head and legs


Step 3: Paint the piñata white. Let dry.
Step 4: Cut fringe from the tissue paper strips. Spread the legs with glue and wrap them with the tissue fringe, starting from the bottom and working your way up. Glue on more pieces of tissue paper fringe and crumpled tissue paper as desired to cover the whole pinata. Glue on a tissue paper tale. Add two black beads for eyes.

Glue tissue fringe around pinata

To remove candy from pinata, pull tissue and tape off one end of the tube.
Ole!

Tiny Pinata

Share this:

  • Click to share on Twitter (Opens in new window)
  • Click to share on LinkedIn (Opens in new window)
  • Click to share on Facebook (Opens in new window)
  • Click to share on Pinterest (Opens in new window)
  • Click to share on Reddit (Opens in new window)
  • Click to email a link to a friend (Opens in new window)
  • Click to print (Opens in new window)
  • Click to share on Tumblr (Opens in new window)

Like this:

Like Loading...
← Older posts

If you are a non-WordPress follower, enter your email address to follow this blog and receive notifications of new posts by email.

Tags

allsparkledup All Sparkled Up altered book art baking beach beads bird bread breakfast cake candy carving cat cats chocolate Christmas Christmas tree cookies craft crafts dessert DIY Easter Easter eggs eggs egg tree encouragement fabric family figs flowers food funny gardening Gilded Girls God granddaughter grandkids heart home decor hope inspiration inspirational jewelry jewelry making joconde light Little Plastic Bears miniature miniatures mixed media mousse nature painting PB & J pets photo photography projects recipe roses salad Scoliosis scripture sewing snow sparkling Spoonflower sunlight sunset Sunset Beach surgery tablescape tea tree tutorial Valentine's Day vintage book words

Archived Posts

Top Posts & Pages

Sourdough Breadstick Cobras
A Welded Valentine!
Marble window sills
Sugar Bonnets
Ballerina Cake Pops!
BFN Day - To the Third Neighbor I gave Sourdough Grain Bread

Recent Posts

  • Sfogliatelle
  • Blue Willow Toile
  • The Kitchen tea towel
  • The little cake she decorated
  • Icing flowers
  • Matthew 11:28
  • Christmas at Sea Tablescape
  • Gratitude
  • The Hot Air Balloon mobile has lights
  • Journaling in Coloring Books
  • The Light is still here.
  • A Hot Air Balloon decoration for my granddaughter’s room
  • Coco’s new favorite hangout
  • My kitten is growing
  • English roses fabric

Post Categories

All Sparkled Up allsparkledup altered books American Girl Dolls art baking Baking for Neighbors ballet beach beading BFN birthday books cake decorating calligraphy candy cats Christmas color community cooking Craft Fail crafts DIY dolls drawing Easter encouragement Etsy fabric family fashion design Favorite Childhood Books flowers food Free Idea funny gardening Gilded Girls Gilded Life God granddaughter grandkids handmade books holiday home home decor Inspirational jewelry making journals lighting Little Plastic Bears Mexican miniature mixed media music nature New Years On my Worktable painting party pets photography Princess doll projects recipe Scoliosis Scripture sewing sketchbook sparkling Spoonflower sunlight sunset tea time Thanksgiving The cats time tools travel tutorial Uncategorized Valentine's Day water wedding woodwork words wreath
Follow All Sparkled Up on WordPress.com

Blog at WordPress.com.

Privacy & Cookies: This site uses cookies. By continuing to use this website, you agree to their use.
To find out more, including how to control cookies, see here: Cookie Policy
  • Follow Following
    • All Sparkled Up
    • Join 289 other followers
    • Already have a WordPress.com account? Log in now.
    • All Sparkled Up
    • Customize
    • Follow Following
    • Sign up
    • Log in
    • Report this content
    • View site in Reader
    • Manage subscriptions
    • Collapse this bar
 

Loading Comments...
 

    %d bloggers like this: