Snowflake in the window
03 Friday Jan 2014
Posted in All Sparkled Up, art, crafts, nature, photography, sparkling, sunlight, water
03 Friday Jan 2014
Posted in All Sparkled Up, art, crafts, nature, photography, sparkling, sunlight, water
26 Tuesday Nov 2013
And of course we did crafts!
First we played with paper dolls. She picked which outfits I should cut out.
Little Miss Christmas and Holly Belle, a reprint of a favorite paper doll I had as a child.
When it was bedtime, my granddaughter insisted that Little Miss Christmas and Holly Belle have soft bedding. So we quickly made card stock beds with tissue-stuffed tissue pillows and tissue sheets and blankets.

18 Thursday Jul 2013
Posted in art, crafts, handmade books, journals, mixed media, tutorial
Tags
coffee dyed, crafting, crafts, DIY, handmade paper, make your own, paper arts, paper crafts, tutorial
A couple months ago I made some beautiful coffee-dyed, wrought iron patterned paper completely by accident. I wanted coffee-dyed paper for a project so I boiled coffee grounds (about twice as strong as a usual pot of coffee) in water and let it steep about half an hour. I strained out most of the coffee grounds by pouring the mixture through a coffee filter and then added another couple tablespoons of instant coffee.
Even though it was spring, the sun was high in the sky and it was hot out so our cast aluminum, wrought iron-style table was hot. I figured all the heat would help the paper dry.

The day was bright and and the sun was high when I dyed the paper. The large pan of coffee dye was wide enough for the paper to fit comfortably.
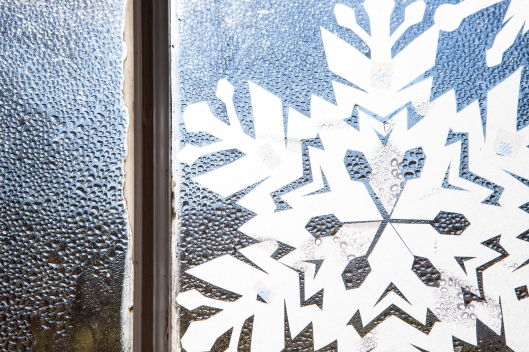
I dipped each sheet of drawing tablet paper into the coffee dye and let it drain a little against the edge of the pan. Within seconds of being laid on the table, the table design showed up on the paper! Here you can see the still-wet sheen of coffee on the paper.

The coffee pooled on the top of the paper and the pattern of the table magically appeared on the surface of the paper.
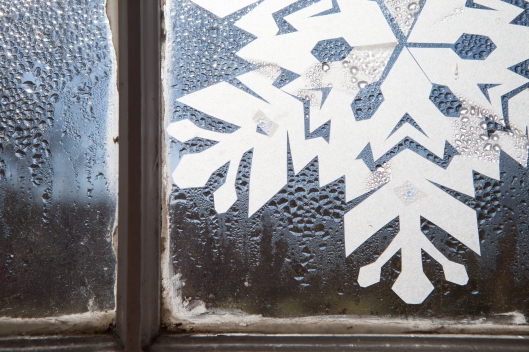
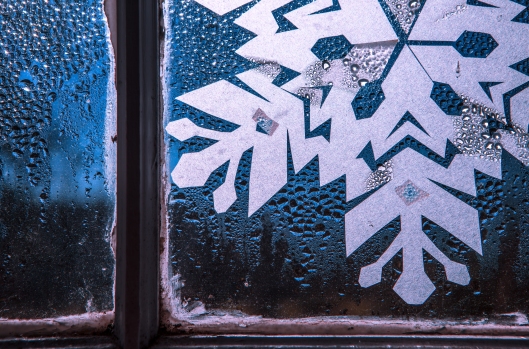
I covered as much of the table as I could with the dipped paper and loved the variety of design on each sheet of paper.
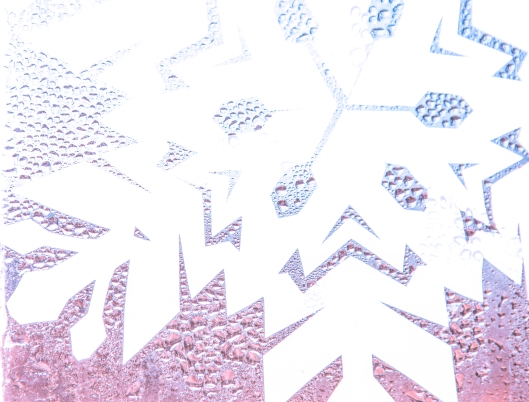
I wish I had written down how long it took the paper to dry, perhaps half an hour. Once there were no more puddles on top, I flipped all the papers over to dry more. When I turned each sheet over, the design on the bottom looked amazing! It is beautiful on both sides but especially smooth and beautifully shaded on the bottom.

The wrought iron design on the bottom side of each sheet has a beautiful creamy color and delightful shading.
I will be using this paper to make handmade books and journals.
If you dye paper like this using a wrought iron table, please let me know how it turns out. Cast aluminum doesn’t rust so there was no rust residue on my paper. A wrought iron table might have a different effect on the paper.
The table surface was very hot. I haven’t experimented to see if this works on a cold table.
There may be coffee dripping from the paper so don’t do this over a deck surface that you don’t want brown drips on. There was very little coffee dripping from the paper because the day was hot and dry and the paper absorbed it very quickly and it didn’t matter to me if there were brown specks on my deck.
17 Wednesday Apr 2013
Posted in altered books, art, crafts
Tags
altered book, altered books, art, art books, artist books, crafts, paper arts, scrapbooking, scrapbooks
Years ago I made these art books from hollow 3-D cardboard letters which were readily available back then. I used an X-acto knife and butcher knife to cut the letters in half. Some had strong corrugated cardboard baffles inside to keep the box from collapsing, thus the need for the butcher knife.
The “AT Dot Com” book. Since taking this photo, I have since filled the book with favorite website and email addresses.

The “At Dot Com Book” is made from a cardboard 3-D @ symbol, cut in half, with an accordion page glued inside.

Inside the At Dot Com Book. The accordion page is made of separate sheets of cardstock, cut and glued together to represent elements of the earth – green leafy vegetation, pink floral and blue water. For the water page, I masked off continents (which I cut from paper and taped down) and sponged blue and aqua inks over the paper.
The “C Book” scrapbook was gifted to my daughter-in-law when my granddaughter was born.

The C Book. The colored bits around the edge of the book are actually Light-Brite pegs. I was hoping to add a battery operated light inside the cover but never found one the right size so the book was finished without lighting capability. The word inside says “smitten”, which I still am. -heart-
The “D Book” was for my husband. He works in construction so I made this book with wood tones and brass nails and hinge. It only has two pages inside and will be used as a scrapbook.

The D Book is closed with a clasp and secured at the spine with two hinges. Although there is an accordion page inside, the book opens as a normal book and the accordion page does not fold out because of the hinges at the book’s spine.
To decorate the “J Book”, I covered the cardboard letter halves with green decorative tissue paper and then stitched the plastic flowers on with embroidery floss.
The J Book was the most complicated book to create. The photos taken of flowers growing in our yard are all separate, attached together with string and suspended from the book with string. They fold into the book accordion-style. Because of the weight of the photos, I glued rocks into the base of the J book for stability. Some rocks were kept loose inside the J and are used for display when the book is opened. When the book is stored on my library shelf, I keep it wrapped with a green cord to keep it closed and to keep the loose rocks inside.

08 Monday Apr 2013
Posted in art, crafts, mixed media, Uncategorized
Tags
crafts, graphics fairy, old graphics, The Graphics Fairy, vintage clip art, vintage illustrations, vintage pictures
I’m finally getting around to posting Thank You’s to some wonderful people. This one is overdue by six months.
I love vintage graphics and have a collection of old books from the 1800’s and early 1900’s that I use for inspiration. So I was thrilled to stumble upon this awesome website: The Graphics Fairy, run by Karen, a lady of terrific style and creativity.
I’ve collected some of her free graphics over the past couple months with plans to use them in artwork. Karen’s collection is remarkable and vast, with hundreds of graphics of excellent quality to use in your crafts. There are convenient search tools on site so you can search by category or word for specific graphics. I’ve searched for vintage birds, bird cages and Paris drawings.
One graphic that means a lot to me is a gorgeous Eiffel Tower print. It is from an 1890’s advertising card. I included the image in a post last year. Alas, I just discovered that I forgot to credit Graphics Fairy with the image last year. Back when I did the post, I was totally strung out on pain meds and barely made it through typing that post. I edited the post today to include the image credit.
In addition to providing images, Karen also includes creative ways to use them. There are great tutorials and tips for printing and transfering images to make dozens of lovely, vintage-inspired items.
Thank you, Karen of Graphics Fairy fame, for providing such a fantastic resource so generously. You are appreciated so much!

Thank you, Karen. This image was created using Graphic Fairy’s pink heart – http://www.graphicsfairy.blogspot.com/2012/02/vintage-valentines-day-clip-art.html
15 Friday Mar 2013
We’ve been a busy lot. I planned on making individual posts to share our crafting fun but I can’t keep up with such a flurry of crafting events! So here are some fun times with my granddchildren.
Building with the big blocks. The kids love the cake blocks I painted last year. So we made them some big blocks to play with. Eventually we’ll paint these.
Sorting the Colored Pencils. It was almost as much fun sorting the pencils as it was drawing with them!
And then there was the Beading-on-a-Wire. It was actually a frantic effort to defuse a melt down. It worked for at least thirty minutes.
We cut dolls out of plywood. She didn’t want to wait until the doll was dressed. It sprang to life immediately!
And last night we painted some plastic Easter Eggs. This took much concentration because the eggs were slippery.
It was very messy, of course. Paint is supposed to be messy!
So we gave him a heavy wood block to paint.

Grandson repeatedly and vigorously plunges the brush into the almost empty acrylic paint. “This is sticky! This is sticky!” It was important to him to get enough paint on the brush.

But then he finally noticed the paint on his hand. And on the brush. And on the table. And when he tried to wipe everything it rapidly got worse. So that was the end of painting for the day.
But we have lots of eggs so we’ll be painting again.
08 Tuesday Jan 2013
Tags
angles, Kickstarter, measuring, polygons, ruler, Versa Ruler
The Versa Rulers arrived today! Yay! We were looking forward to these so much.
I’m a big fan of Kickstarter, a terrific funding platform online that helps entrepreneurs get their creative ideas off the ground. Projects range from film and fashion to design and food. I’m especially keen on the technology projects. As soon as I saw this particular project, the Versa Ruler, by Frank Pinal & Carlos Rodriguez, I immediately contributed to their funding. We enjoy making things here and figured that this nifty measuring tool would be very useful. Funding has passed so it’s not possible to contribute pledges for the ruler through Kickstarter, but you can still purchase a Versa Ruler through the Koala Tools website.
The Versa Ruler is a “shape-making 2-D ruling system. Sides connect to form an unlimited amount of measured polygons.” Check out the video from the Kickstarter page to see the Versa Ruler in action. We’ve only just begun to realize its potential. Some possible applications:
The rulers come 4 to a pack with basic instructions.

One set of rulers can be connected together to create three-sided or four-sided polygons.

We purchased two sets for more options. Using all eight rulers, we made a perfect octagon.

Six rulers can form a perfect hexagon, with a maximum diameter of about 14″.
Using five rulers, we formed a pentagon.

Although these photos show equilateral polygons, the rulers can be adjusted to skew the polygon in multiple ways, lengthening and decreasing sides and angles.
Kudos to Pinal and Rodriguez and their company, Koala Tools, for creating such a great new measuring tool!
31 Tuesday Jul 2012
Posted in art, calligraphy, Inspirational
Tags
acrylic artist ink, art, art journal, calligraphy, India ink, ink, migraine, old age, pen and ink
I’ve got a migraine with no med, and a back more curvy than this calligraphy. Life is lived in slow motion some days but never too slow to do something creative. Yes!
Today I pulled out an art journal. I first printed text as a guide using the charming The King and Queen font, by Bran, available at dafont.com. I dipped the pen in ink and did three lines of script before noticing I grabbed the wrong ink. I watched through pain-squinted eyes as the watery ink slowly seeped into the page, creating rough and warted lines, puddles of gray.
In slow motion, I thought Oh, it’s not me, it’s the ink. So I pulled out the bottle of better ink and did another line of script. Though the ink didn’t seep into the paper, the letters were still nonuniform, wavery and warted. And then I laughed. It’s not the ink, it’s old age! And pain. And just because it’s a very slow day.
It’s ok to be wavery and warted and gray when you’re old.
Slow, gray days are much easier to get through with Courage and Strength.
And when Courage and Strength seem a bit shaky, try Generosity and Joy.
And when Generosity and Joy are too muddled, Thanksgiving never fails.
21 Saturday Jul 2012
Posted in art, funny, Uncategorized, words
My computer desktop is usually littered with an unmanageable mess of icons. I painted a bunch of 4″ x 6″ cards for an e-course I’m taking and decided to photograph the cards to make a Desktop Background icon sorter before finishing the cards. Click on the photo to see larger image. Feel free to save it and use as wallpaper.
The terrific typewriter fonts used in this project are from Dafont:
AA Typewriter by Attila_Acs
Rough Typewriter by by JibbaJabba Fonts
Mom’s Typewriter by Christoph Mueller
06 Friday Jul 2012
Posted in art, crafts, Inspirational, projects, woodwork
We’re excited about life. The pieces are all there. We have plans and everything seems straight and simple.


We look down and see what is lost. We mourn what has fallen. We don’t want to part with things we think are important.

The Carver keeps the instruments sharp. Carefully honing the blade, we hear the swish of metal on stone and we’re afraid.

But the Carver sees. The Carver sees a beauty on the inside that we can’t see from the outside. The Carver whittles away, bit by bit, to reveal the treasure within.

We don’t understand the Carver’s dream. But we reach a point where we must trust. Even though we don’t understand, we let the Carver work. And we begin to let go.

We begin to trust that the Carver has a greater plan. It is too big for us to understand right now. But now we think I can get through this. It’s going to be ok.
And for the first time, we’re ok with it.
♥
To be continued…