The little bears go a-sailing in the toy boat.

My granddaughter plays with the little bears and the toy boat.

29 Sunday Sep 2013
Posted in grandkids, Little Plastic Bears, sparkling
The little bears go a-sailing in the toy boat.
My granddaughter plays with the little bears and the toy boat.
16 Monday Sep 2013
Posted in All Sparkled Up, grandkids, nature, sparkling, sunlight, Uncategorized
04 Thursday Jul 2013
Posted in All Sparkled Up, party, sparkling, words
Tags

YOLO
07 Friday Jun 2013
Posted in All Sparkled Up, beading, crafts, jewelry making, projects, sparkling, tea time, tutorial
Tags
beading, beads, crafts, flower beads, jewelry, jewelry making, Moss Rose, moss rose bracelet, tutorial, vintage beads
The Moss Rose Bracelet, inspired by an antique tea set from my Grandma, is finished and I love it! It turned out even better than I expected. ..happy smile…

Moss Rose Bracelet, inspired by an antique tea set from my Grandma.
There are three things special about this bracelet. First, the colors truly say Moss Rose.
I was working from my stash of beads from French General, A Gilded Life and vintage beads and wasn’t sure I had all the right colors. Without intention, my love of Moss Rose must have influenced my purchase of beads over the years because I just happened to have the right colors. How cool is that! I had dark mossy greens, deep pinks and the perfect little dusty lavender cone flower beads. I was most particular about the white beads, which had to look like old white china. I didn’t have any rose beads but that was ok since all I really needed was the impression of a rose. I used Lucite trumpet flower beads with a bead calyx and that worked well.

Moss Rose Bracelet components
Second was the movement of the bracelet. Necklaces lay fairly still around the neck but bracelets have to move. They need shimmy and jingle, drape and sway, elegant like ballet. Bracelets need movement just distracting enough to be noticed. The Moss Rose Bracelet does exactly what I hoped it would do; the roses and leaves drip down and sway gently against my arm.

I love how loose and draping the leaves are on this bracelet.
Third and best is how much the bracelet makes me think of my Grandma and my mom. Some of the beautiful china-white beads are from a broken necklace that belonged to my mom. So special. ♥
Even though I’m making a few of these bracelets to sell in my Etsy shop, I want to share how I made some of the components. I have not included directions for making the small clusters of purple flowers because some Moss Rose patterns do not have these flowers. But you can see how they were constructed by looking closely at the photos.
Make the “roses”
To make a rose, prepare the wires for the flower centers.
1. Bend 1/4″ at the end of a 2 1/2″ piece of jewelry wire.
2. Hold the bent part of the wire in round nose pliers.
3. Coil the wire using the round nose pliers. As the coil is formed, you will have to move the bent tail out of the way until a full coil is formed. It’s hard to explain but you’ll see what I mean as you bend the wire.
4. The finished coil, ready for seed beads.

Prepare the wires for the rose centers.
Add about 8 seed beads to the wire.
1. Slide the beads onto the wire and into the coil.
2. Make sure all the beads are in the coil and then bend the tail of the wire over.
3. Use needle nose pliers to fold the tail tightly around the wire as shown. Cut off the short tail close to the center wire using flush cutters.

Secure seed beads to the flower center wire loop.
Shown here are all the steps to make a flower center.

Prepare the beaded Calyx wires.
Start with a 1 1/4″ piece of wire.You can use head pins for this but I didn’t have enough so I made my own by tightly folding in 1/16″ of wire at the end. Two calyx wires are used for each rose and one for each rose bud. I varied the length of these to make the mossy roses and buds more realistic and natural looking. The color of green seed beads are placed in a light to dark to light pattern on each wire.
[NOTE: The photos show the way I made the wires first. But I had a few broken seed beads when I twisted the center of each calyx wire after the seed beads had been added. The better way would be to form the center loop first, then slide beads onto each side, and then fold the tip of the wire in to secure the beads. I don’t have photos of bending the wires that way but these photos will give you an idea of the finished product.]

Secure green seed beads on wires to use for the calyx.
The components to make a rose are two calyx wires, a trumpet bead flower and a round beaded wire center.

Components used in making a “rose”.

Insert the flower center into a flower bead. Using round nose pliers, bend the calyx wires in half and then bend until you have a tiny loop.

Two beaded wires ready to place on the flower wire.

Slide the calyx wires one at a time down over the flower. Twist a little tighter to make the calyx secure. That’s ok if they move a little. Remember, if you twist too tight, you might break some of the seed beads. It might be easier to make these directly on the flower wire so as to avoid any seed beads breaking. I will probably try that next time although this worked well enough.


I finished some of the flowers with just a wire wrapped loop. But others I added seed beads to make a slightly longer stem before finishing with a wire wrapped loop.
Make the rose buds
1. Make Calyxes as above, one per rose bud.
2. Slide a pink seed bead and then a 4 mm round pink bead on a 2″ wire with folded end or use a head pin. Then add a dark green seed bead. Slide the prepared beaded calyx wire over the round bead as you did for the flowers.
3. Add more seed beads to the wire and finish with a wire wrapped loop. I slightly spiraled the calyx wires around the 4mm bead.

Make the rose leaf clusters
Oh my goodness, I got so excited the night I figured out how to wire these! I was shutting down for the night and was staring at my work table, not seeing the beads. I was actually praying for some family members in distress and not even thinking of beading. Then all of a sudden I figured out how to wire the leaves together so they would dangle the way I hoped. God is so cool to give us ideas when we least expect it.
1. Prepare the center bead by sliding a seed bead, then a pressed glass leaf bead, then another seed bead on a 2″ wire with folded end or head pin. Finish with a wire-wrapped loop and set aside.
2. Cut a 3″ piece of wire and bend at a 90 degree angle as shown.
Slide the center bead you made down to the angle in the 3″ wire.
Slide a leaf bead on each side of the center bead.
Fold the wires toward the center of the two beads. The wires will cross over. Where the wires cross over, twist the wires together at the top, as in photo 3. Be careful you don’t twist too tight or you may shatter the leaf beads. I didn’t break any but I know that’s a possibility if you make the twist too tight.
3. Cut one of the wires with a flush cutter as shown so you have a single wire remaining. The twist should be tight so that it will fit inside a bead in the next step. Click on the photo and then click the number link at the upper left of the photo to view the original size image to see a close up of the construction.
4. Slide a larger bead with a hole big enough to cover the twisted wires. Add a couple more seed beads on the remaining wire. Finish with a wire wrapped loop.

Gilding
The Moss Rose tea set I have has a delicate border of gold, much of it worn off by age. I duplicated that touch of gold by using Rub n Buff and a stiff brush to add a touch of gold to the some of the white beads and wire findings on the bracelet components.

Here are the beads all ready for assembly. I moved them around on the table a bit until I came up with a design I liked. I ended up not using the little white doughnut beads but it was fun to have options.

The bracelet is finally assembled using jump rings to attach all the pieces together.


Thank you for visiting my blog. I truly appreciate it! Blog readers get just little glimpses into our lives; they see splashes of color, tangles of wire, components lined up but not always connected. I really appreciate your faithfulness as I figure out how to make this blog better for you.
In the beginning of this blog, I didn’t have any readers at all but merrily posted away like a little bird chirping in a forest. Then I went through a rough time after breaking my back and getting major surgery, with its months of medicated pain management. Over the past year my posts weren’t always happy. But I have come to value life and the beautiful people in it more than ever.
This blog is for you. Like tending a garden of roses, I’ve done some weeding and deleting here. What is left are posts I hope have value, and the ones written when I did my best to be brave. I’m learning how important it is to stay true to the sparkling things in life and share the best. I guess we all grow in grace like that. I want to give you something good because your presence here reading my blog is a gift of pure grace. Thank you.
May grace adorn your life, with all the splendor you hoped for.
Love to you, my dear readers!
29 Wednesday May 2013
Tags
cloth dolls, crafts, Princess dolls, removing stains from cloth dolls, sewing, stuffed dolls, tiny dolls
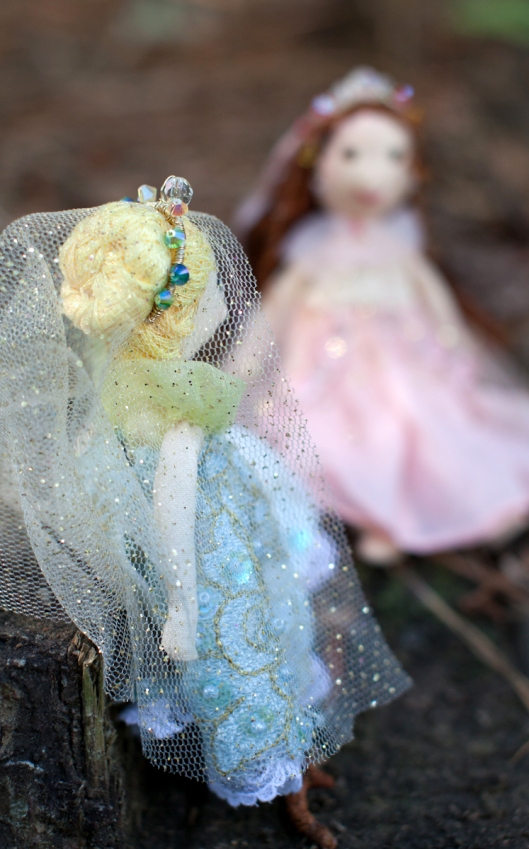
I made these for my granddaughter for her birthday last week – Two Little Princess Dolls, barely 5 1/2″ tall. It was a challenge to make them heavy. I believe doll legs and arms should flop down when you hold them so I filled the bottom part of the legs with sand to give them weight. I also half-filled the arms with sand too. The rest of the body is filled with fiberfill.
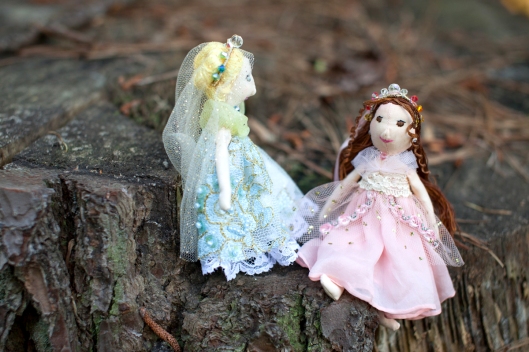
I made these dolls with legs that bend at the knee so they can sit.
Actually, I only made the dresses and tiaras last week and put new hair on them. I created the pattern for these dolls back in 1985, inspired by the work of Joan Russell from the early 60’s. I made about 20 of these little dolls. Most were given away and I don’t even remember who I gave them to. I embroidered my name and date, J A Monroe 1985, on the back of each doll and every one was different, with a different combination of eye and hair color.
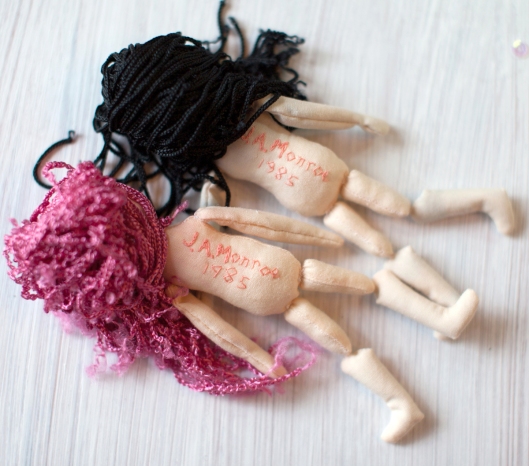
Embroidered name and date on the back of the dolls.
Alas, when we moved to North Carolina from Miami in the 90’s, we went through a flood and the five remaining dolls were submerged under flood water for several days. They got badly stained. The original hair was a silky “dry clean only” cord that couldn’t handle water. Here you can see some of the bad staining.
The dolls were badly stained when they went through a flood.
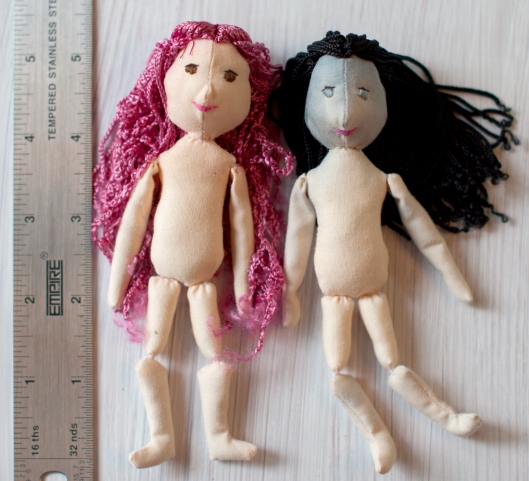
Fortunately, I was able to bleach out the stains using full strength bleach on a cotton swab. You can see how perfectly the bleach is removing the black stain. I removed the ruined hair from two dolls and sewed on hair of embroidery floss. The blond hair doll used to have black hair. What a change!
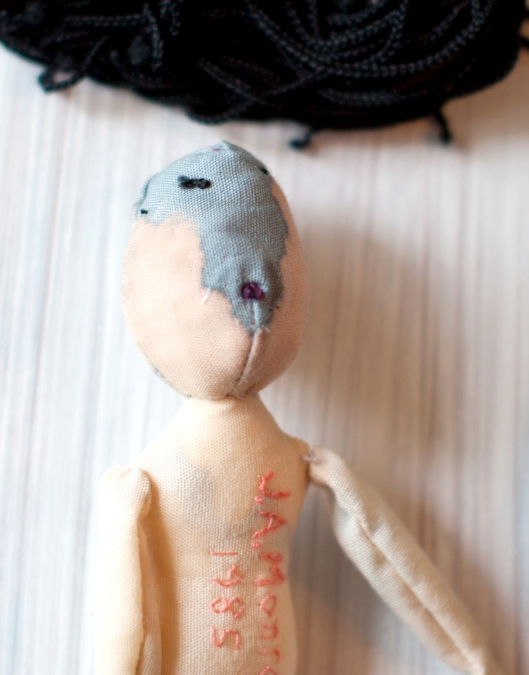
I used a cotton swab with bleach to remove the black stains. It worked very effectively.
The tiaras were made by first wrapping and gluing wooly nylon thread around a wire frame. Then beads were wired to the frame.
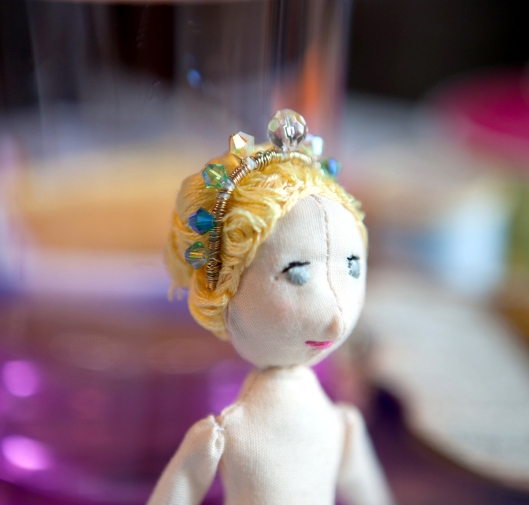
The black hair was removed and replaced with yellow embroidery floss.
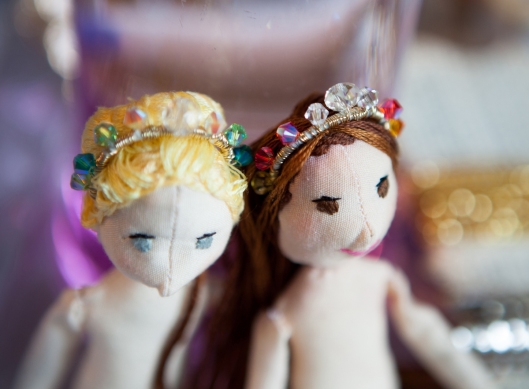
The dolls looked much better with new hair and tiaras.
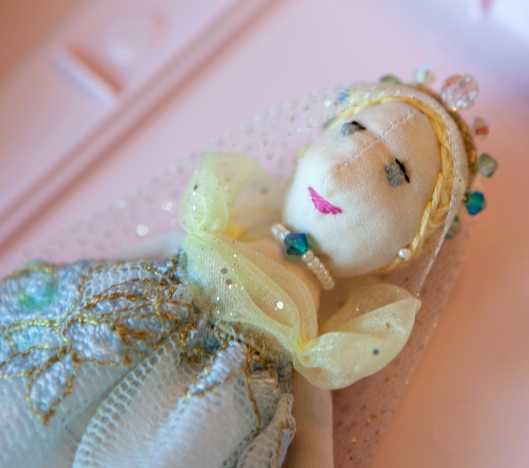
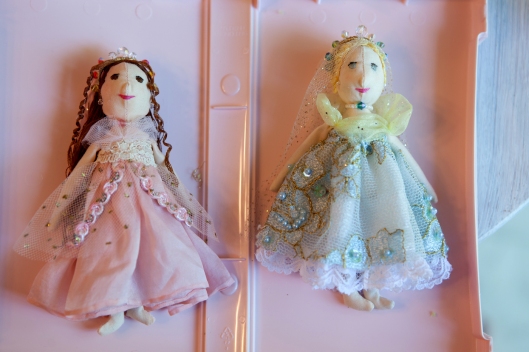
The clothing was so fun to design! It was a challenge to find fabric with the right amount of drape. For such a tiny doll, the fabric had to be thin and soft. The pink dress was made from a vintage silk scarf. The blue, sequined lace was from A Gilded Life. The blue dress has one snap and the pink dress has a hook in back so the dresses can be removed.
Click the photos so see a larger image for detail. Both dolls have heads fully covered with embroidered floss; I figure if little brother ever gets hold of them and pulls off the long hair, they’ll still have embroidered hair, albeit short. The brown haired doll’s hair is left long and can be slightly styled. To make the curls, I wrapped a tendril of floss with glue around a waxed toothpick and let it dry. It slid right off the waxy toothpick. The blond doll’s hair is stitched into a bun.

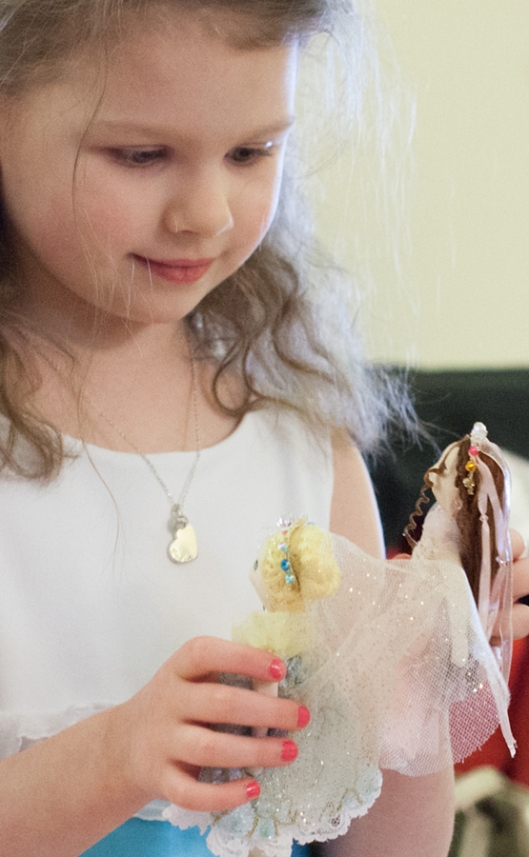
She loved the dolls! …smile… =) ..heart.. ♥ …happy…
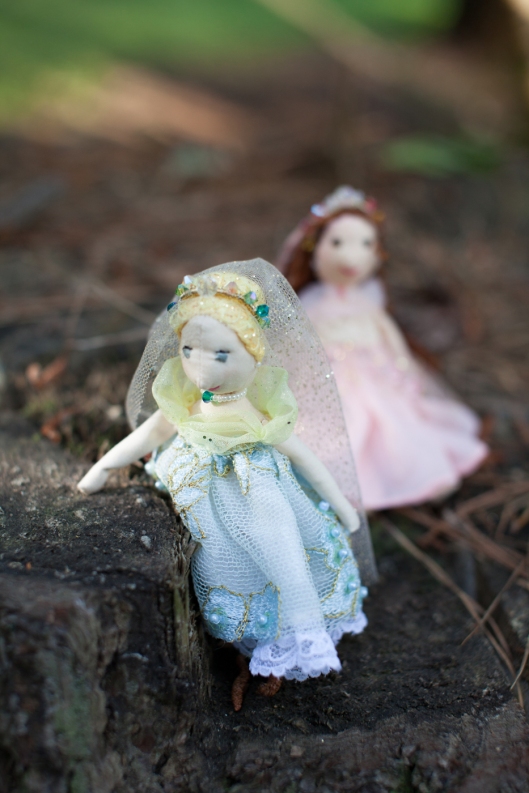
Two tiny princess dolls, ready to begin their adventures.
22 Wednesday May 2013
Posted in All Sparkled Up, crafts, Inspirational, Scripture, sparkling, words
Tags
All Sparkled Up, hope, inspiration, light, Plan B, scripture, sequins, sparkling
I Figured out Plan B. Isn’t that the best feeling ever… When you come up with a plan B that will actually work? :)
Sometimes things are really mixed up and messed up. There’s no order. There is nothing to grasp. You watch Plan A fall away in little bits.

Plan A, scattered like sequins.


Plan B is Hope. It’s not perfect. It still has cracks around the edges. Sometimes it’s fragile and not very clear. But Plan B will work.
And Plan B is always crazy BRAVE!
Sometime Bravery is all you need to come up with Plan B.
Don’t give up! God knows exactly where you are. Ask Him to help you make it through.
Go for Brave.
Sara Bareilles sings Brave.
[A huge public Thank You to my son Ethan. Ever since I broke my back last year and had 17 vertebrae fused, I can’t get down to ground level easily. As I shared my idea for this post, Ethan became my Hope. Sometimes Hope from God arrives in the form of a person. They bring light when everything seems fractured and dark. Ethan, you’re the best!]
‘For I know the plans that I have for you,’ declares the LORD, ‘plans for welfare and not for calamity to give you a future and a hope.
Jeremiah 29:11
22 Wednesday May 2013
Tags
bead crafts, crafts, mini, mini purse, miniature, miniature purse, miniature tote, purses, ribbon
Rainy day fun with ribbon and beads making tiny totes and miniature purses.
I started with the Klutz book Ribbon Purses (no longer in print) and made this tiny purse following their directions and using the kit materials.

A tiny ribbon purse made with Klutz book kit materials.
I really wanted to stick with just the kit items but then I thought of this one, using some of the kit supplies and adding my own seed beads and charms.

Tiny ribbon purse with charm dangle.
I didn’t follow the directions on this one but did use the kit supplies plus seed beads.

I used the purple beads from the kit to form the purse bottom.
Then I got a shiny new idea.

Tiny ribbon tote bag supplies: I used the ribbon from the kit but the chain, metallic trim, square beads, brass beads and eye pins are my own.

Tiny ribbon tote bag. This was fun to design!
For the last one, I used the Klutz kit ribbon but added my own embellishment. I would love to make a full size clutch purse like this. The hardest component would be finding large, clear, flat-sided acrylic gems to form the sides of the clutch. I love how the light passes through this purse. I used a tiny turtle from a pierced earring for the decoration on the side.

The light passes through the gems in the sides of this tiny clutch purse.

I used a tiny turtle from a pierced earring to embellish this miniature clutch purse.
09 Thursday May 2013
Tags
bead bottles, bead crafts, beads, crafts, miniature, miniatures
I was cleaning out old photo files and found these photos from way back in 2003.
All the perfume bottles are made of beads, earring backs and jewelry findings. They are tiny, some less than half an inch. To help the bead “bottles” stand up, I glued the bead on a pierced earring back. If you want to see the most detail in these photos, click on the photo to open a larger image. Then at the upper left of each photo will be a link that says “ORIGINAL SIZE AT (number) “. Click that link to see the largest image.

Miniature perfume bottles made from beads and jewelry findings. Please click on the photo to see a larger image.

A small plastic organizer with the lid removed served as an elegant “glass” shelf unit for the miniature bead bottles.

Miniature perfume bottles made from beads.

Miniature perfume bottles made from beads. This dresser tray is a mirror with trim glued around the edge.

To make the tray, I glued seed beads around the edge of a small mirror.
The first two photos were taken in my kitchen window… so many years ago, even before we planted the rose bush which has climbed all the way up to the kitchen window. I don’t remember where I put all the tiny bead bottles. When I find them, I think I’ll put the display case in the bedroom or bathroom window. I love tucking miniatures around the house. Most people never see them but I like knowing that my home has an even smaller story for those who have eyes to catch it.
06 Monday May 2013
It’s been mostly overcast and rainy for at least two weeks now.

A Rainy day in May.
I’m discovering that the weather greatly affects my pain level, ever since having my spine fused. Despite the pain, I shall redeem this time.

Rain in May, drip drip drip, fall the crystal drops …
Today when the sun peeked out briefly, I stood outside even while the rain was still falling, so desperate to feel sun on my face.

Even the trees are becoming mossy from all the dampness this spring.
Then the clouds moved in again and I tucked back in the darkness of my work space. But places don’t have to stay colorless and uncheered. I got out the beads.

Seed beads, mostly size 11, including Aiko and Delicas, fill a bin with color.

Pearl, crystal and glass beads.
They glistened and captured every speck of light. I didn’t want any light to get away.

Beads in a small condiment dish.
I made petals and leaves and flower centers.

Gold and bronze bead flower centers await petals and assembly.
I use children’s teacups and dishes to hold flower components while I work. Here a child’s teacup holds stamens.

A small child’s teacup holds white stamens.

I made a cardboard insert in a bin to hold my bead bottles upside down so I can see the color of the contents better.
These vintage flower centers belonged to my grandmother. I’m looking forward to using them. Thank you so much, dear sister Donna for sending them!

I will use these vintage flower beads in French Beaded flowers and jewelry.
Even though it is dark and rainy outside and there are no flowers blooming in the window, I have flowers blossoming on the table.

French Beaded flowers
French Beaded flowers in a shoebox await stems and leaves.

French Beaded flowers
03 Wednesday Apr 2013
All the activity of last week finally caught up with me so yesterday was a down day. Some days are just like that; I just have to hold very still all day and let my old bones repair. Fortunately, I had a new craft to work on – French Beaded Flowers.
I used this book, French-Beaded Flowers, and this terrific video by Lana to get started. The book is very good for beginners but it was the wonderful video by Lana that finally made sense. Thank you, Lana!
I don’t have a studio so I do all my crafting on the dining room table. I try to only take over half the dining room table so the family can use the other half for actual dining. ha ha. My end is called “the work table” and here is what it looked like last night.

My work table (half the dining room table) covered with beading supplies for making French Beaded flowers.
The bead spinner was essential! In the photo above, it’s the little round wood bowl with green beads in it on the left. I was going to skip purchasing one until I tried to hand string about… (getting calculator)… about 2730 tiny beads. I put about 10 seed beads on the wire by hand and looked at the clock and figured I didn’t have the luxury of eight more months to finish. To string the beads quickly, I used the mini bead spinner from Bead Wrangler. It works fantastic! It was fascinating watching the beads fill the wire as I spun the spinner like a spinning top.
The beading tools are from French General. They are very durable and are stored in a lovely roll. I’ve purchased many unique and gorgeous beads from French General over the years and hope to incorporate some of them in my flowers.
I didn’t take photos of the beading process because the day was all about holding as still as possible. These flowers were all made while watching two movies, so basically less than 4 hours.

French Beaded Flowers, made with size 11 seed beads and delicas.

The construction wires were wrapped with green floral tape to form the stems. Delicas are cylindrical beads, such as in the pink flower shown here, while seed beads are round, which is what I used to make the leaves. I made up the green loopy leaves because I didn’t want all the leaves to look alike.

I aspire to making stunning flowers like these, from the Bead Society of Greater New York. Until then, I’m really pleased with my first little arrangement.

My first French Beaded flowers.

