• About

All Sparkled Up

~ Like dew hanging from the tip of a leaf, a single bead or word adds sparkle where there was none. BE the bright!

All Sparkled Up

Author Archives: Julia Monroe

The tiniest book I ever made – Blue Flowers

14 Friday Oct 2016

Posted by Julia Monroe in All Sparkled Up, allsparkledup, art, books, crafts, flowers, handmade books, miniature, painting

≈ Leave a comment

Tags

art, art books, book arts, bookmaking, crafts, miniatures, painting, water color

This tiny book, less than a quarter inch square, is titled Blue Flowers.

The tiniest book I ever made was titled Blue Flowers.

The tiniest book I ever made was titled “Blue Flowers” and included tiny paintings and descriptions of blue flowers. In order to qualify for “micro mini” status, it had to be under 1/4″ square.

I shaved the blue suede as thin as possible so the edges could be folded with less bulk.

I shaved the blue suede as thin as possible so the edges could be folded with less bulk.

I think I made 7 copies and traded them with book making friends. I have one copy but don’t remember where the other copies went. Each book with blue suede cover and gilded page edges was tucked inside a tiny blue flower.
blue-flowers-3
The text was printed using a laser printer. When the pages were cut apart from the sheet of printer paper, I had to be careful not a single breeze blew over my worktable since I couldn’t see the text and would have to use a magnifying glass to put them all back in order again. I was glad when I had all the pages stitched together!

Each book had a headband made of silk ribbon.

Each book had a headband made of silk ribbon. The gold ink used to gild the edges was sticky so I used an exacto knife to carefully cut the pages apart so they wouldn’t stick as the ink dried.

blue-flowers-6

Tiny book, with blue suede cover, text and water color paintings of blue flowers.

I made the paintings on each page using a magnifying glass and a brush that had only 3 hairs in it.
blue-flowers-5

blue-flowers-7

blue-flowers-8
blue-flowers-9

blue-flowers-10

blue-flowers-11

Blue Flowers - a micro mini book with descriptions and water colors of blue flowers

Blue Flowers – a micro mini book with descriptions and water colors of blue flowers

The paintings were so fun to make! Some day I hope to make a tiny book about Pink Flowers. But that will have to happen soon before my eyesight ages even more.

Share this:

  • Click to share on X (Opens in new window) X
  • Click to share on LinkedIn (Opens in new window) LinkedIn
  • Click to share on Facebook (Opens in new window) Facebook
  • Click to share on Pinterest (Opens in new window) Pinterest
  • Click to share on Reddit (Opens in new window) Reddit
  • Click to email a link to a friend (Opens in new window) Email
  • Click to print (Opens in new window) Print
  • Click to share on Tumblr (Opens in new window) Tumblr
Like Loading...

Croque Monsieur

12 Wednesday Oct 2016

Posted by Julia Monroe in baking, food, recipe

≈ Leave a comment

Tags

food, recipe, sandwich

It’s the most luscious Ham & Cheese sandwich ever! Definitely our favorite. The guys loved them for lunch.
Don’t these ingredients look yummy?

Ingredients for Croque Monsieur. Sliced homemade bread, sliced ham, gruyere cheese, Herbs de Provence, mustard bechemel.

Ingredients for Croque Monsieur. Sliced homemade bread, sliced ham, gruyere cheese, Herbs de Provence, mustard béchemel.

I followed Bon Appetit’s recipe for Croque Monsieur. So delicious!
I baked a loaf of bread the day before but the guys cut into it so I had to make the Croque Monsieur slices a little thinner. The mustard béchemel turned out perfect. The only mustard I had on hand had horseradish in it but that was great with the ham and gruyere. The herbs were from Penzey’s, Herb de Provence.
Four slices of bread were spread with the prepared béchemel.

Tear two round ham slices in half to fit a square piece of bread.

Note: Tear two round ham slices in half to fit a square piece of bread.

Half of the cheese sprinkled over the ham.

Half of the cheese sprinkled over the ham.

The remaining four slices of bread had more mustard béchemel spread on and placed on the sandwiches.

The remaining four slices of bread were spread with more mustard béchemel and placed on the sandwiches.

The remaining cheese was scattered on top of the sandwiches.

The remaining cheese was scattered on top of the sandwiches.

Herbes de Provence sprinkled over tops of the sandwiches.

Herbes de Provence sprinkled over tops of the sandwiches.


Baked for about 18 minutes at 425.

Baked for about 18 minutes at 425 F.

Croque Monsieur

Croque Monsieur

The smell coming from the oven was sooo good… The cheese! The toasty bread! The herbes!

Oh I wish you could taste this Croque Monsieur hot from the oven!

Oh I wish you could taste this Croque Monsieur hot from the oven!

The middle was all melty and soft and the bottom crusts with dripping cheese had a great crunch. Oh so delicous!
Please comment if you’ve ever had a Croque Monsieur sandwich. Did you like it? This will be our go-to sandwich when we have tomato or bean soup this winter.

Save

Save

Share this:

  • Click to share on X (Opens in new window) X
  • Click to share on LinkedIn (Opens in new window) LinkedIn
  • Click to share on Facebook (Opens in new window) Facebook
  • Click to share on Pinterest (Opens in new window) Pinterest
  • Click to share on Reddit (Opens in new window) Reddit
  • Click to email a link to a friend (Opens in new window) Email
  • Click to print (Opens in new window) Print
  • Click to share on Tumblr (Opens in new window) Tumblr
Like Loading...

Never Never Never give up

09 Sunday Oct 2016

Posted by Julia Monroe in allsparkledup, calligraphy, God, Inspirational, words

≈ 5 Comments

Tags

All Sparkled Up, hope, inspirational, paper crafts

Some days are just plain hard. But God is powerful enough, loving enough and HERE enough to repair even the greatest brokenness.

Never give up.

Never give up.

Share this:

  • Click to share on X (Opens in new window) X
  • Click to share on LinkedIn (Opens in new window) LinkedIn
  • Click to share on Facebook (Opens in new window) Facebook
  • Click to share on Pinterest (Opens in new window) Pinterest
  • Click to share on Reddit (Opens in new window) Reddit
  • Click to email a link to a friend (Opens in new window) Email
  • Click to print (Opens in new window) Print
  • Click to share on Tumblr (Opens in new window) Tumblr
Like Loading...

In Lieu of Luke’s Diner – Sugar Crusted Orange Ginger Muffins

05 Wednesday Oct 2016

Posted by Julia Monroe in All Sparkled Up, allsparkledup, baking, family, food, recipe, tea time

≈ 1 Comment

Tags

baking, food, Gilmore Girls, Luke's Diner, muffins, recipe

The plan was to get a free cup of hot coffee from “Luke’s Diner” in town. Commemorating the 16th anniversary of Gilmore Girls, and to celebrate the upcoming debut of a Gilmore Girls mini series, Netflix sponsored pop-up “Luke’s Diner” in coffee shops all over the country. Oh my goodness, I love that show!

I had every intention of going and really looked forward to it. In fact, I even walked toward the line and snapped a picture. What a special event in town!

"Luke's Diner" pop-up at one of the local coffee shops

“Luke’s Diner” pop-up at one of the local coffee shops

But then I started to miss my own “Rory” so much that I had to leave. If I had stayed, I feared I would have started to cry and end up blubbering something like “Will you please be my daughter? I miss my daughter! Anyone in this line, can I please be your Lorelai because my daughter lives halfway to China and I’m missing her so much and we watched Gilmore Girls together when she was going to college and HOW can I possibly get a cup of coffee that we would have shared but can’t because she’s halfway to China??” If I had stayed, I totally would have done that. 0_0

So I left without coffee, immediately went home and did a Sookie thing – I whipped up some Sugar Crusted Orange Ginger Muffins and cried the entire time. I sure did.

Sugar Crusted Orange Ginger Muffin

Sugar Crusted Orange Ginger Muffin

I made up this recipe years ago, just because I needed a batter that fit in the big, new muffin tins. I still use my favorite batter-scooping spoon, even though the handle is broken.

Scooping the muffin batter with the broken spoon, just because it's the perfect size and shape for scooping.

Scooping the muffin batter with the broken spoon, just because it’s the perfect size and shape for scooping.

Sugar Crusted Orange Ginger Muffins

Sift together in a large bowl:
3 1/2 cups all purpose flour
1/4 cup sugar
5 tsp baking powder
1/4 tsp salt
1 tsp ginger
1/2 tsp cardamom

Mix together in another bowl:
2 eggs
1 1/2 cups milk
1/2 cup oil
3 Tbsp unsalted butter, melted
1 tsp grated orange rind

Mix together in another bowl:
3/4 cup raisins (I like golden best but any raisin will do)
3/4 cup candied ginger cut up into little pieces (I never buy the precut ginger because it has too much sugar sprinkled on it. All that extra sugar changes the texture of the recipe. It’s better to buy candied, sliced ginger and cut it up yourself with scissors.)

Dump the egg mixture into the flour mixture and quickly stir with a whisk or wooden spoon about 5 or 6 strokes. Mixture will be lumpy and NOT mixed together.

Dump in the raisins and ginger.

Stir quickly and thoroughly but briefly using a wood spoon or whisk. Mixture will be lumpy. Make sure you scrape the dry ingredients off the bottom of the bowl while mixing. If the batter gets rubbery and stretchy, you mixed it too long and the muffins might be tough. Anyway, drop spoonfuls of batter into greased, large muffin tins.

Sprinkle tops with coarse sugar crystals.

BAKE at 400F for 20-25 minutes.

Makes 12 large muffins.

Spicy bits of crystalized ginger and raisins stud this ginger & cardamom muffin.

Spicy bits of crystalized ginger and raisins stud this ginger & cardamom muffin.


After I had two cups of good strong coffee and a muffin, I felt better. But since I miss my daughter so much, I’m declaring it Official Wallowing Day. Truly. At least once a year I just need a good wallow.

I miss you and love you, Heather. <3
And Texas just seems like half-way to China. ;)

Share this:

  • Click to share on X (Opens in new window) X
  • Click to share on LinkedIn (Opens in new window) LinkedIn
  • Click to share on Facebook (Opens in new window) Facebook
  • Click to share on Pinterest (Opens in new window) Pinterest
  • Click to share on Reddit (Opens in new window) Reddit
  • Click to email a link to a friend (Opens in new window) Email
  • Click to print (Opens in new window) Print
  • Click to share on Tumblr (Opens in new window) Tumblr
Like Loading...

I made fabric from photos of my carvings

01 Saturday Oct 2016

Posted by Julia Monroe in fabric, home decor, projects, sewing, Spoonflower, woodwork

≈ 3 Comments

Tags

carving, fabric, fabric design, floral, sewing, Spoonflower, woodwork

If you’ve been following my Instagram feed here, https://www.instagram.com/juliaamonroe/, you can see the progress I’m making carving wood panels for a terrarium.

Before assembling the carved wood panels into a terrarium base, I thought they would make a nice striped fabric so I took photographs of the panels and created a seamless, railroaded Floral Wood Carving Stripe fabric design. The design repeat is a little over a yard. You can find the fabric here on Spoonflower.

Fabric design from photographs of the carvings I'm making for a terrarium base.

Fabric design from photographs of the carvings I’m making for a terrarium base.

Close up of carving detail printed on fabric.

Close up of carving detail printed on fabric.

Another close up of the carved fern section.

Another close up of the carved fern section.

The Floral Wood Carving Stripe also makes a great gift wrap.
It’s available as wallpaper too.

The design is railroaded, with a repeat a little over a yard.

The design is railroaded, with a repeat a little over a yard.

I’m looking forward to making pillow covers from this fabric. They will look so nice outside on the deck. Or I might make cushions for the deck rocking chairs. Hmm, that will be a hard decision!

Floral Wood Panel Fabric

Floral Wood Panel Fabric

Share this:

  • Click to share on X (Opens in new window) X
  • Click to share on LinkedIn (Opens in new window) LinkedIn
  • Click to share on Facebook (Opens in new window) Facebook
  • Click to share on Pinterest (Opens in new window) Pinterest
  • Click to share on Reddit (Opens in new window) Reddit
  • Click to email a link to a friend (Opens in new window) Email
  • Click to print (Opens in new window) Print
  • Click to share on Tumblr (Opens in new window) Tumblr
Like Loading...

The Day the Baby Hawks Learned to Fly

23 Friday Sep 2016

Posted by Julia Monroe in All Sparkled Up, encouragement, Inspirational, nature

≈ 5 Comments

Tags

birds, hawks, inspirational, nature, photography

The Hawk family lived in the trees in our backyard for over a decade. I never paid attention to them until 2014. During 2014, my recovery from spinal surgery meant most days were spent dealing with pain. So getting outside was still a big deal for me. And all that un-busyness gave me more time to notice details. Like the incessant squawking from little birds.

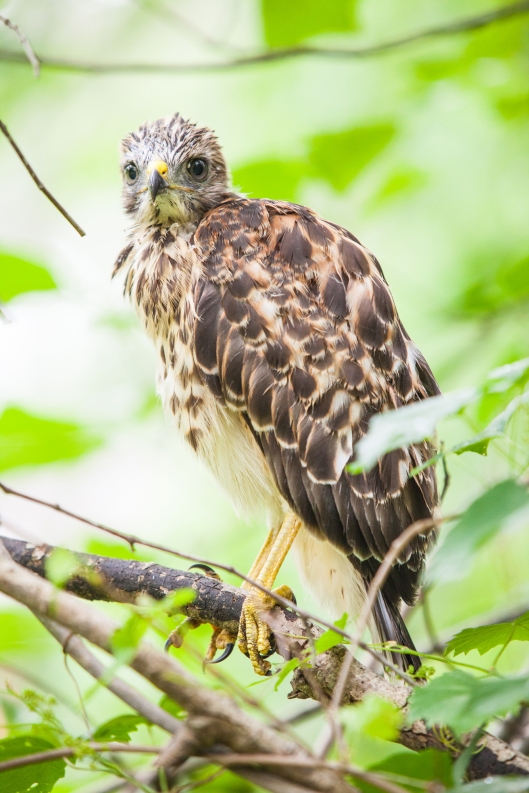
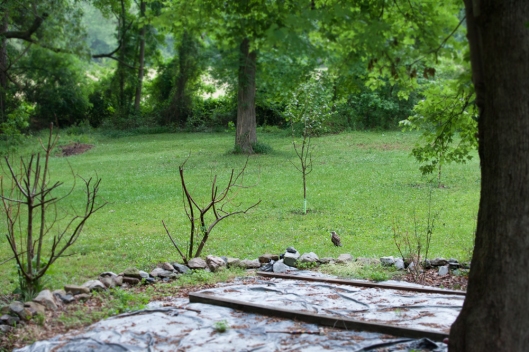
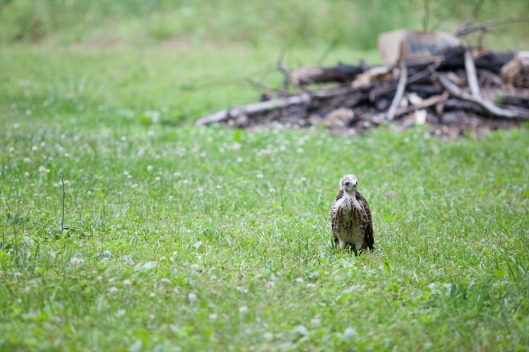
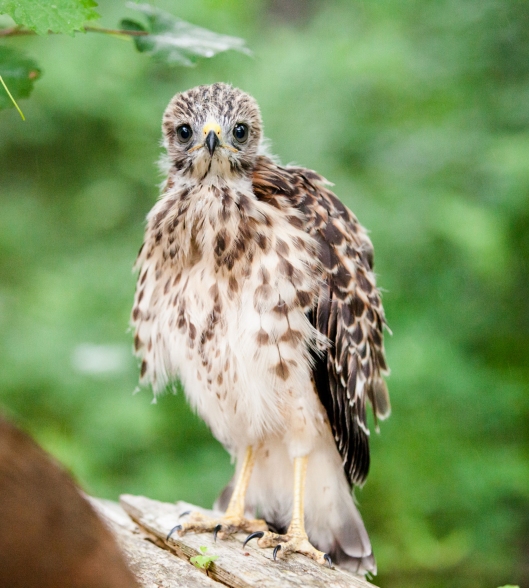
Every spring, the hawks make a terrible racket. But I never looked out my window. That fine day in 2014, I decided to look out the window. And I saw a very large bird on the ground in the backyard. I grabbed the camera and ever so slowly, crept up to the bird. I had no idea that the bird couldn’t fly. Which explains why it didn’t move and let me get very close.

1a-baby-hawks-2014

1b-baby-hawks-2014

1c-baby-hawks-2014
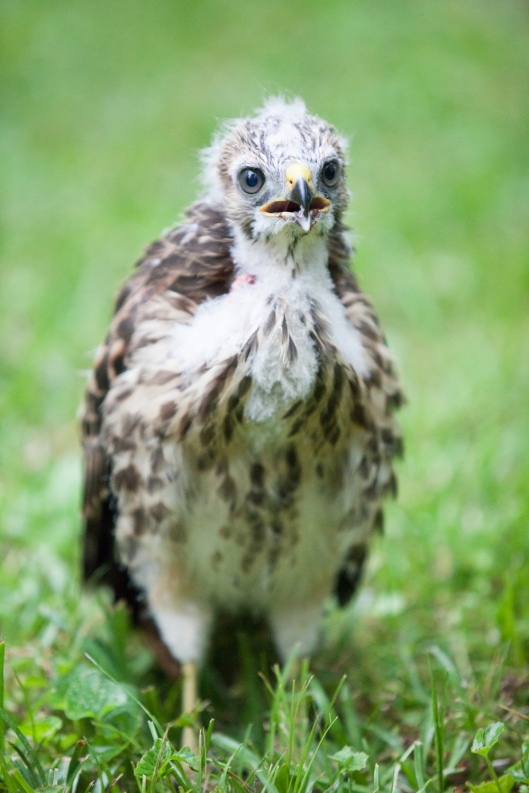
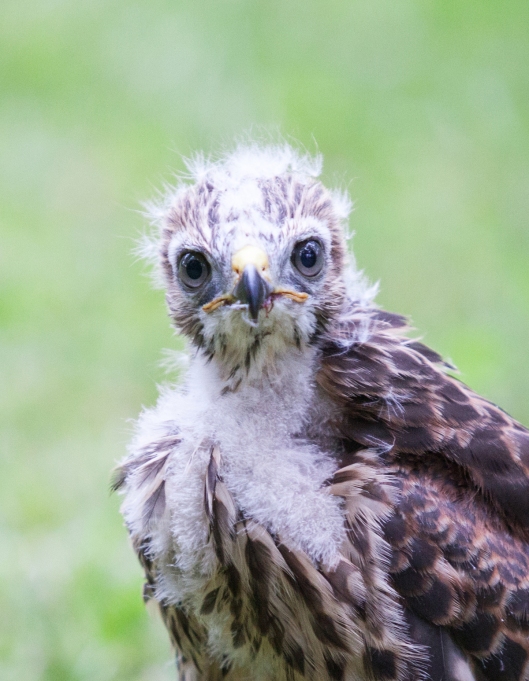
There was some kind of tissue in the bird’s beak so it must have been eating recently.
1d-baby-hawks-2014

1e-baby-hawks-2014
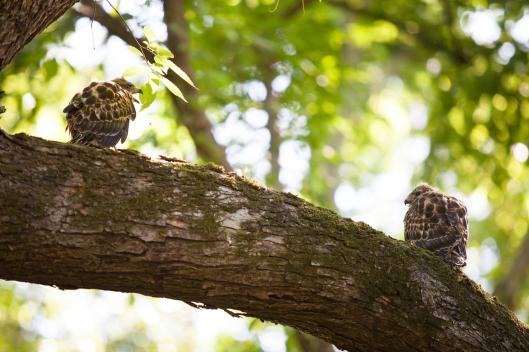
There was a second baby hawk over on the logs of the wood pile. Like the first one, it didn’t move.
2-baby-hawks-2014
I talked to the hawks, encouraging them to fly, so I could catch photos of those early flights. But the birds didn’t move. The one on the wood pile was silent, but the one in the yard made a lot of noise. I went back in the house in case I made the birds nervous. The one in the yard finally ran across the yard into the trees. But it didn’t get off the ground.

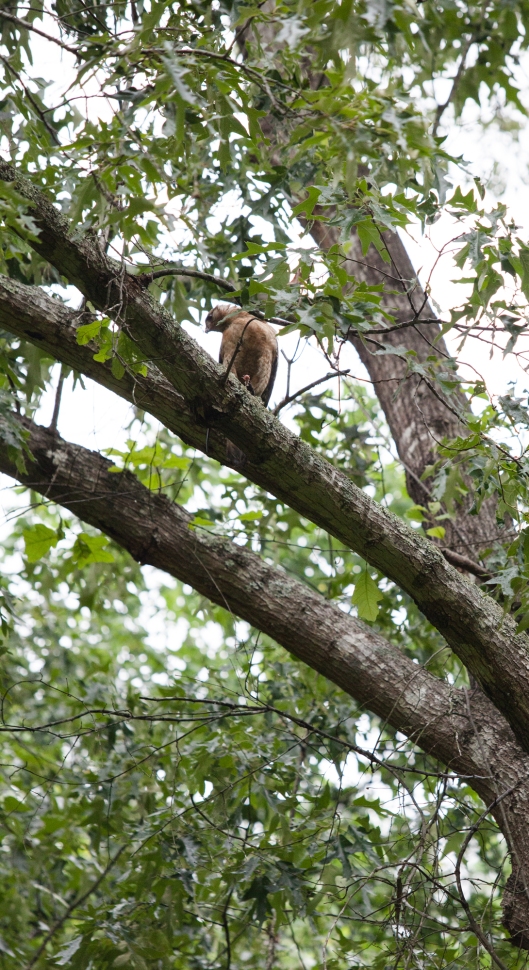
Hours later, I went back out to see where the birds were. One was still on the wood pile. The other one was climbing a tree, making a lot of racket and flapping wings, but not flying.
3a-baby-hawks-2014
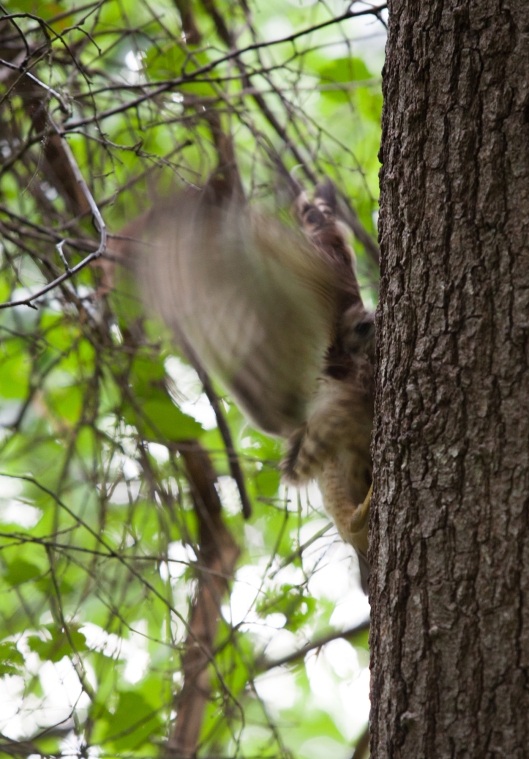
The hawk then got stuck on some branches. I watched helplessly.
3b-baby-hawks-2014

3c-baby-hawks-2014

3d-baby-hawks-2014

3e-baby-hawks-2014

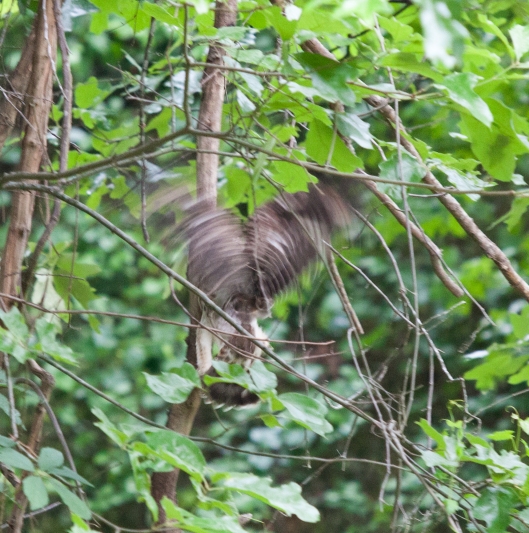
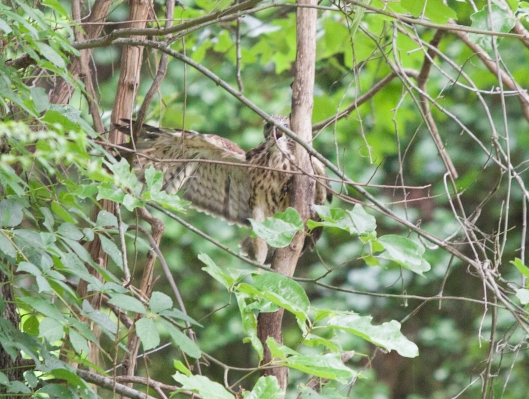
The bird would occasionally stop flapping its wings and just hang from the branches, wing extended. It looks so awkward, painful and frustrating!

I really related to that bird. So much pain and it seemed that I would never recover from surgery. It was over a year and a half since surgery. Why was I still in so much pain and so immobile? I spent weeks and weeks sitting still against a heating pad, pacing around the house, impatient to mend. But there was absolutely nothing I could do to hasten the healing. It just had to take time.

Looking through the camera lens was sometimes difficult, since I couldn’t look up very well. My eyes blurred with pain a lot.

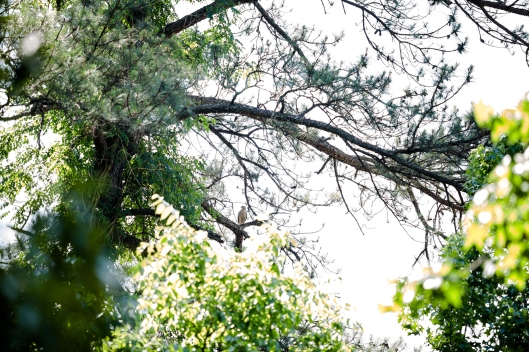
I heard a very small squawk high in the trees, pointed my lens and took a picture. It had to be the mother. She stayed close and watched her babies like… well, like a hawk. She never took her eyes off them.
4a-baby-hawks-2014
When I looked at the photos later, I discovered that the mother hawk was holding a snake! That explained the shreds of tissue in the baby’s beak.
4b-baby-hawks-2014
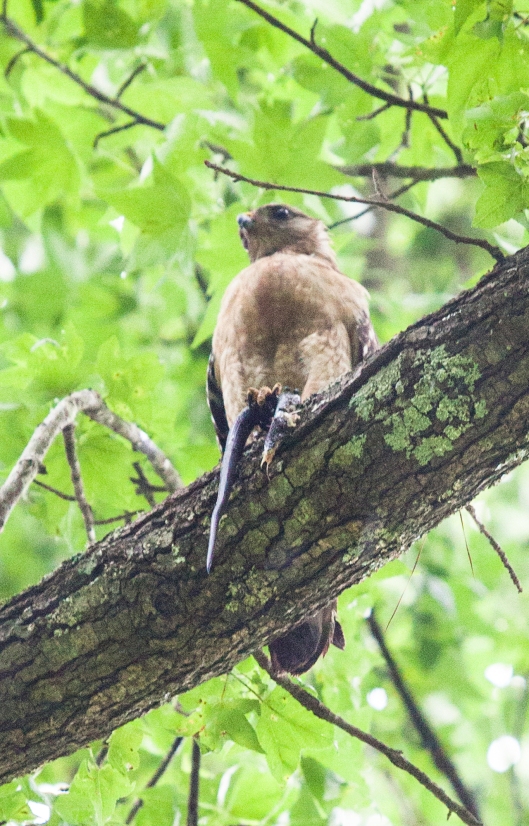
I imagined the birds were making such a racket that the mother pushed them out of the nest mid-meal. “If you two don’t shut up, I’m kicking you out!” I imagined her saying. But she cared enough about them that she didn’t take her eyes off them, especially when they were on the ground, unable to fly.

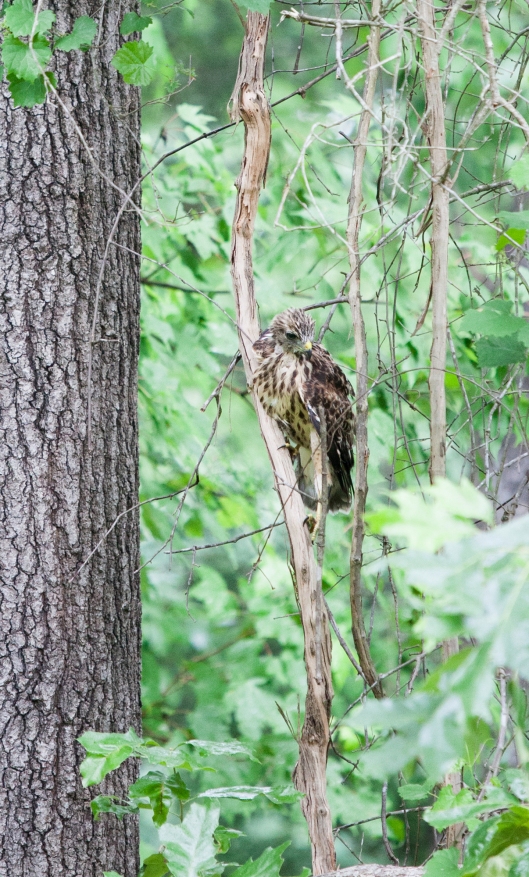
All day long I frequently looked out the kitchen window, hoping to capture the first flight. But the birds took their time. One chattered incessantly, the other was mostly silent. At one point, the silent one was up in a tree and I was glad to see it had successfully gotten off the ground. It sat on the limb with one leg up. For a long time, one leg in the air, perfectly still.
5-baby-hawks-2014
The mother hawk ate more snake. But she didn’t come down from her high perch, where she kept an eye on the two.
6-baby-hawks-2014
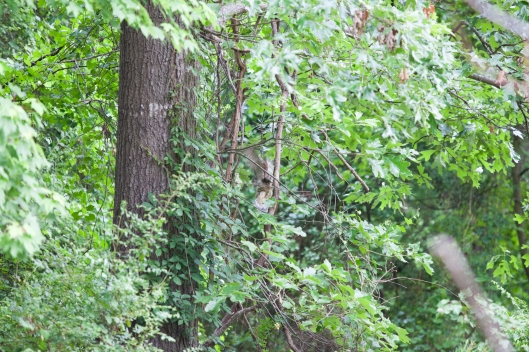
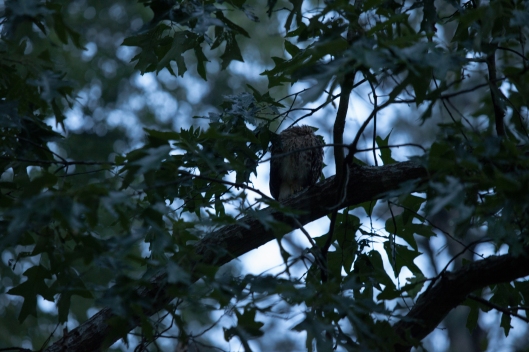
Evening came and I checked the hawks again. The one that spent so much time stuck on a branch was no longer there. There was one on a favorite old tree, its head tucked tight under its wing for the night.
7-baby-hawks-2014
I prayed for the hawks, that the missing hawk didn’t get eaten by some wild critter in the woods.
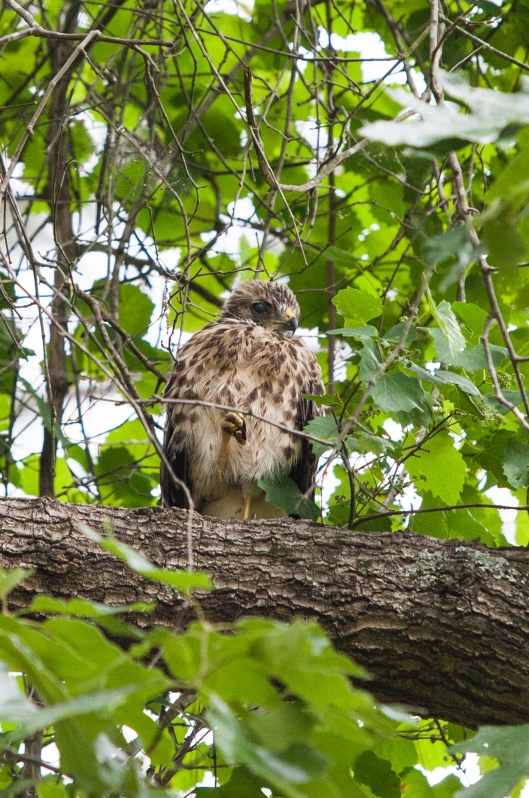
The next morning, the mother hawk was in her high perch, watching closely over her babies.
8-baby-hawks-2014
Both the baby hawks were in their favorite tree. How glad I was to see them safe!
9a-baby-hawks-2014
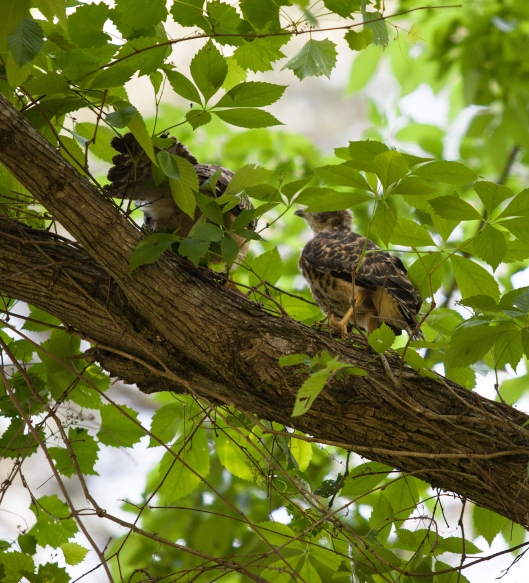
They still must not have been good at flying or hunting. One hawk kept crying loudly all day long. I could just picture the conversation..
“I’m STARVING! I’m gonna die!!!” said the noisy hawk.
“Well, you shouldn’t have gotten us kicked out of the nest. We were right in the middle of breakfast!” said the other.
“We’re GONNA die. I know it! I’m Starved! STARVED, I tell you! I’m GOING TO DIE!!” said the noisy one.
“Oh shut up,” said the quiet one.
9b-baby-hawks-2014
Birds are so dramatic.

I marvelled over the hawks, and felt a keen gratitude that they let me into their special time of life. What an honor!

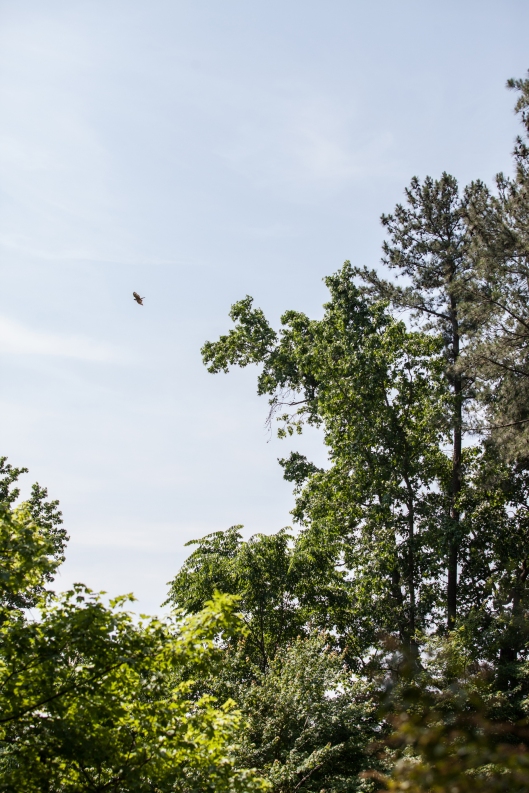
I wasn’t able to check on the birds again till the third day. High in the sky I saw one fly. Birds always learn to fly. It just takes time. And there are branches to get stuck in and a bit of hunger while learning to hunt. But birds always learn to fly.
10-baby-hawks-2014

The hawks built their nest in a new location the next year, high in the trees right near my bedroom window. They had never lived so close to the house. Even though the crazy squawking of the new peeps in spring was so annoying, I felt a warm kinship to these strong creatures.

It’s 2016, over three years since my surgery. I can now lightly jog short distances and can look up better. Things take time but time always changes things. Birds always learn to fly.

11-baby-hawks-2014

Share this:

  • Click to share on X (Opens in new window) X
  • Click to share on LinkedIn (Opens in new window) LinkedIn
  • Click to share on Facebook (Opens in new window) Facebook
  • Click to share on Pinterest (Opens in new window) Pinterest
  • Click to share on Reddit (Opens in new window) Reddit
  • Click to email a link to a friend (Opens in new window) Email
  • Click to print (Opens in new window) Print
  • Click to share on Tumblr (Opens in new window) Tumblr
Like Loading...

I’m keeping busy

18 Saturday Jun 2016

Posted by Julia Monroe in crafts, On my Worktable, woodwork

≈ Leave a comment

Tags

carving, crafts, woodwork

Carving the wood base for the terrarium with my dad’s knives. 5 panels done, 1 to go.
Carving Terrarium Base

Share this:

  • Click to share on X (Opens in new window) X
  • Click to share on LinkedIn (Opens in new window) LinkedIn
  • Click to share on Facebook (Opens in new window) Facebook
  • Click to share on Pinterest (Opens in new window) Pinterest
  • Click to share on Reddit (Opens in new window) Reddit
  • Click to email a link to a friend (Opens in new window) Email
  • Click to print (Opens in new window) Print
  • Click to share on Tumblr (Opens in new window) Tumblr
Like Loading...

A little snow and ice last week

01 Monday Feb 2016

Posted by Julia Monroe in All Sparkled Up, allsparkledup, nature, photography, sunlight

≈ 5 Comments

Tags

beautiful, ice, nature, photography, sunlight, winter

Photos just can’t capture what the eye sees. I walked under the ice-coated branches and looked up through them. I wish everyone could experience the beauty of an ice storm. We lost power for a couple days so that wasn’t easy getting through but what I remember most is the crystalline beauty. Diamonds!
1 Winter Jan 2016
2 Winter Jan 2016
3 Winter Jan 2016
4 Winter Jan 2016
5 Winter Jan 2016
6 Winter Jan 2016
7 Winter Jan 2016
8 Winter Jan 2016
9 Winter Jan 2016
10 Winter Jan 2016
11 Winter Jan 2016
12 Winter Jan 2016
13 Winter Jan 2016
14 Winter Jan 2016
15 Winter Jan 2016
16 Winter Jan 2016
17 Winter Jan 2016
18 Winter Jan 2016
19 Winter Jan 2016
20 Winter Jan 2016

Share this:

  • Click to share on X (Opens in new window) X
  • Click to share on LinkedIn (Opens in new window) LinkedIn
  • Click to share on Facebook (Opens in new window) Facebook
  • Click to share on Pinterest (Opens in new window) Pinterest
  • Click to share on Reddit (Opens in new window) Reddit
  • Click to email a link to a friend (Opens in new window) Email
  • Click to print (Opens in new window) Print
  • Click to share on Tumblr (Opens in new window) Tumblr
Like Loading...

The Snow and Crystal Tree and Tendril Snowflakes

20 Wednesday Jan 2016

Posted by Julia Monroe in allsparkledup, Christmas, crafts, DIY, home decor, projects, sparkling

≈ 2 Comments

Tags

Christmas, Christmas decorating, DIY, home decor, nature crafts, snowflakes, tree, tutorial

I put away all the Christmas decorations except for one – the Snow and Crystal Tree. The corner will be too empty if I put it away and I love the wintery look of it. The snowflakes remind me of scribbles. Scribble Snowflakes!

Snow and Crystal Tree, with vintage chandelier crystals and snowflakes made from dried vine tendrils.

Snow and Crystal Tree, with vintage chandelier crystals and snowflakes made from dried vine tendrils.

The tree is a dried branch cut from a tree in the woods behind our house. I stuck it firmly into Styrofoam in an urn and laid moss around the base.
The crystals are from the old chandelier that used to hang in my parents’ dining room when I was a child. I loved that chandelier so I’m thrilled to have some of the crystals from it.
The snowflakes are made of natural tendrils and curls that I collected from the vines in the backyard in the fall.  My granddaughter helped me look for the curly tendrils and we really enjoyed our time together outdoors.

Dried vine snowflakes, little 1" glass ball ornaments and vintage chandelier crystals.

Dried vine snowflakes, little 1″ glass ball ornaments and vintage chandelier crystals.

To make the snowflakes, I broke off the dry twigs and slid the curly tendrils off. Here is a photo I posted on instagram of the twig bits with the tendrils removed.

The tendrils were gently twisted and pulled off the broken twigs.

The tendrils were gently twisted and pulled off the broken twigs.

Each snowflake needed six similar pieces so I grouped the tendrils by size.
3 Snow Crystal Tree
Once I had six similar tendrils, I trimmed the ends so they were the same length.
4 Snow Crystal Tree
For each snowflake, I made a contoured mat out of foil for gluing. A small bead was glued temporarily on the back of the foil so it would create a small mound on the right side.
5 Snow Crystal Tree

The foil is gently pressed down around the bead to create a little mound.

The foil is gently pressed down around the bead to create a little mound.

On the right side of the foil, on top of the tiny mound, I glued a small bead for the center of the snowflake. All the tendrils will then be glued to this bead using hot glue.
7 Snow Crystal Tree
The tendrils were arranged around the center bead in a pleasing manner.
8 Snow Crystal Tree
The two straightest tendrils were glued on first, opposite each other, to create the line of symmetry.
9 Snow Crystal Tree
The other tendrils were glued on the sides and the hot glue was allowed to harden.
10 Snow Crystal Tree
To remove the delicate snowflake, the foil was folded and pinched together under the snowflake. Then the snowflake was gently popped off the foil. One of the snowflakes stuck too much so I used tweezers to pull the foil off and reglue the tendrils that had loosened.
11 Snow Crystal Tree
12 Snow Crystal Tree
The snowflakes were hung with thin hooks I made from jewelry wire.
13 Snow Crystal Tree
14 Snow Crystal Tree
15 Snow Crystal Tree
The vintage crystals look lovely on the tree.

Vintage hand-cut crystals adorn the tree.

Vintage hand-cut crystals adorn the tree.

17 Snow Crystal Tree
18 Snow Crystal Tree
At the base of the urn is a gilded tea cup filled with little glass ball ornaments.

The beautiful earthy and neutral color ornaments were from Terrain. The tea cup is from Anthropologie.

The beautiful earthy and neutral color ornaments were from Terrain. The tea cup is from Anthropologie.

Snow and Crystal Tree, with vintage chandelier crystals and snowflakes made from dried vine tendrils.

Snow and Crystal Tree, with vintage chandelier crystals, glass balls in neutral shades and snowflakes made from dried vine tendrils.

The little fox ornament I got several years ago finally found a home… at the base of the Snow and Crystal tree.

A furry, little red fox ornament sits at the base of the Snow and Crystal Tree.

A furry, little red fox ornament sits at the base of the Snow and Crystal Tree.

I don’t know what to put in the corner when this tree comes down.. probably a lamp. But then again, perhaps I’ll make a Snowy Valentine tree…

Share this:

  • Click to share on X (Opens in new window) X
  • Click to share on LinkedIn (Opens in new window) LinkedIn
  • Click to share on Facebook (Opens in new window) Facebook
  • Click to share on Pinterest (Opens in new window) Pinterest
  • Click to share on Reddit (Opens in new window) Reddit
  • Click to email a link to a friend (Opens in new window) Email
  • Click to print (Opens in new window) Print
  • Click to share on Tumblr (Opens in new window) Tumblr
Like Loading...

Pearl Bottle Brush Topiary

13 Wednesday Jan 2016

Posted by Julia Monroe in allsparkledup, Christmas, crafts, DIY, home decor, New Years, On my Worktable, projects, tutorial

≈ Leave a comment

Tags

bottle brush tree, Christmas, Christmas decoration, crafts, home decor, pearls

I’ve made a decision!

Last year I was committed to posting timely topics on my blog. Well that didn’t happen! sigh. I don’t know how other bloggers do it all. They must decorate for Christmas months before December, the same way magazines work on their seasonal material many months before the issue hits the press.

Though I really tried last year, if I couldn’t finish a post during the season, I ended up never posting at all. That is going to change. This year, I am posting anything I want, any time I want. I have quite a bit of material to post! I know that breaks blogger rules, the rule that says readers won’t be interested in seeing Christmas crafts in August. But life is too short and much too busy so I hope you all forgive me for diving right in to this new year.

You will be getting more posts from me but it’s fairly certain they won’t be all calendar-tidy. Nope. Not at all. I can sorta-kinda-maybe get some posts matched with seasons but I won’t stress about missing. And I’ll do my best to not apologize when I post Christmas in May and Valentines in September. Because… it’s highly likely I will actually be working on Christmas projects in May and making Valentines in September!

So here’s a project I just finished yesterday, January 12, 2016. It’s a Christmas decoration. Happy New Year to you!

Pearl Bottle Brush Tree Topiary, made by cutting bristles out of a bottle brush tree and gluing on pearls.

Pearl Bottle Brush Tree Topiary, made by cutting bristles out of a bottle brush tree and gluing on pearls.

The photos are a bit off in tone because I started this Pearl Bottle Brush Topiary Tree before Thanksgiving 2015 and photographed the steps under various lighting conditions as I did them, weeks apart. That’s how I get so much done. Projects are broken down into phases, kept in bins and boxes like a kit, ready for me to work on here and there.

For the bottle brush topiary, I picked a nice bottle brush tree to work with. The brush had to be full and evenly distributed all the way around and the bristles had to be tight. I found these 9″ trees at Michaels.

The first step was establishing the spiral by sticking masking tape around the tree. I started at the base and wound it around the tree all the way to the top.

The masking tape is wound around the tree, starting at the bottom and spiraling around the tree to the top. The tape will mark all the places that the bristles will NOT be cut.

The masking tape is wound around the tree, starting at the bottom and spiraling around the tree to the top. The tape will mark all the places that the bristles will NOT be cut.

I first started cutting out the bristles right in the center of the taped areas as shown here. The first cutting was in the center between the tape, all the way from the base to the top of the tree.
3 Pearl Bottle Brush Topiary
Here you can see what the tree looks like after the first cutting.
4 Pearl Bottle Brush Topiary
To make the second cutting, I cut at an angle from the tape in to meet the deep first cut in the center of the tree.

Cutting at an angle from the tape to the center. The tree was turned upside down to make cuts under the spiral as you can see here.

Cutting at an angle from the tape to the center. The tree was turned upside down to make cuts under the spiral as you can see here.

After the second cutting.
6 Pearl Bottle Brush Topiary
I continued cutting away bristles until there was a nice, neat spiral shape, all between the tape-covered bristles.
7 Pearl Bottle Brush Topiary
The cutting is all finished here.
8 Pearl Bottle Brush Topiary
The masking tape is gently pulled away.

I was so happy with how easy it was to make the spiral shape!

I was so happy with how easy it was to make the spiral shape!


10 Pearl Bottle Brush Topiary
11 Pearl Bottle Brush Topiary
Here is the cut tree next to an identically-taped bottle brush tree. The tape makes it easy to cut an even spiral.
12 Pearl Bottle Brush Topiary
13 Pearl Bottle Brush Topiary
The last step was gluing on the pearly glass and plastic beads. I watched Downton Abbey while doing this and it was a pleasant task. Oh so elegant! I used Fast Grab Tacky Glue and tweezers to place each pearl. No other glue would have been as easy to use because I needed a glue that grabbed fast and didn’t drip. I used two kinds of large pearl beads and a couple different kinds of smaller pearls and pearly beads.

Pearls are glued to the tips of bristles on this Bottle Brush Topiary Tree.

Pearls are glued to the tips of bristles on this Bottle Brush Topiary Tree.

I’m looking forward to displaying this pretty tree next Christmas, tucked amongst the plants in the corner of the dining room.

Pearl Bottle Brush Topiary Tree

Pearl Bottle Brush Topiary Tree

By the way, did you see the beautiful red Poinsettia peeking over in the first photo? When I lifted the poinsettia plant out of the van in early December, three branches broke off. So I stuck them in a glass of water. They are still beautiful, over a month later. =)

Share this:

  • Click to share on X (Opens in new window) X
  • Click to share on LinkedIn (Opens in new window) LinkedIn
  • Click to share on Facebook (Opens in new window) Facebook
  • Click to share on Pinterest (Opens in new window) Pinterest
  • Click to share on Reddit (Opens in new window) Reddit
  • Click to email a link to a friend (Opens in new window) Email
  • Click to print (Opens in new window) Print
  • Click to share on Tumblr (Opens in new window) Tumblr
Like Loading...
← Older posts
Newer posts →

If you are a non-WordPress follower, enter your email address to follow this blog and receive notifications of new posts by email.

Tags

All Sparkled Up allsparkledup altered book art baking beach beads bird bread breakfast cake candy carving cat cats chocolate Christmas Christmas tree cookies craft crafts dessert DIY Easter Easter eggs eggs egg tree encouragement fabric family figs flowers food funny gardening Gilded Girls God granddaughter grandkids heart home decor hope inspiration inspirational jewelry jewelry making joconde light Little Plastic Bears miniature miniatures mixed media mousse nature painting PB & J pets photo photography projects recipe roses salad Scoliosis scripture sewing snow sparkling Spoonflower sunlight sunset Sunset Beach surgery tablescape tea tree tutorial Valentine's Day vintage book words

Archived Posts

Top Posts & Pages

Printing on tissue paper for mixed media work
Marble window sills
White Kitchen - remodel Before & After
100 Lego Perfume Bottles
Four Little Bunnies - a charming Easter tale from 1935

Recent Posts

  • Today I remembered something that used to sparkle…
  • Sfogliatelle
  • Blue Willow Toile
  • The Kitchen tea towel
  • The little cake she decorated
  • Icing flowers
  • Matthew 11:28
  • Christmas at Sea Tablescape
  • Gratitude
  • The Hot Air Balloon mobile has lights
  • Journaling in Coloring Books
  • The Light is still here.
  • A Hot Air Balloon decoration for my granddaughter’s room
  • Coco’s new favorite hangout
  • My kitten is growing

Post Categories

All Sparkled Up allsparkledup altered books American Girl Dolls art baking Baking for Neighbors ballet beach beading BFN birthday books cake decorating calligraphy candy cats Christmas color community cooking Craft Fail crafts DIY dolls drawing Easter encouragement Etsy fabric family fashion design Favorite Childhood Books flowers food Free Idea funny gardening Gilded Girls Gilded Life God granddaughter grandkids handmade books holiday home home decor Inspirational jewelry making journals lighting Little Plastic Bears Mexican miniature mixed media music nature New Years On my Worktable painting party pets photography Princess doll projects recipe Scoliosis Scripture sewing sketchbook sparkling Spoonflower sunlight sunset tea time Thanksgiving The cats time tools travel tutorial Uncategorized Valentine's Day water wedding woodwork words wreath
Follow All Sparkled Up on WordPress.com

Blog at WordPress.com.

Privacy & Cookies: This site uses cookies. By continuing to use this website, you agree to their use.
To find out more, including how to control cookies, see here: Cookie Policy
  • Subscribe Subscribed
    • All Sparkled Up
    • Join 287 other subscribers
    • Already have a WordPress.com account? Log in now.
    • All Sparkled Up
    • Subscribe Subscribed
    • Sign up
    • Log in
    • Report this content
    • View site in Reader
    • Manage subscriptions
    • Collapse this bar
 

Loading Comments...
 

    %d